How To Fix Wood Paneling Walls
Introduction
A great way to add warmth and personality to a room is to cover the walls with wood paneling. However, they will need to be fixed or kept at some point. You’ve come to the right place to learn how to fix your wood panels if they are cracked, holed, or damaged by water. “How to Fix Wood Paneling Walls,” our in-depth article, will show you several ways to get your paneling to look like it did when it was first put up.
From repairing minor blemishes to completely transforming the look of your walls, we’ll cover it all. You’ll learn about patching and filling methods, sanding and refinishing techniques, and how to update the appearance of wood paneling with paint or whitewashing. We’ll also discuss addressing structural issues and ensuring the longevity of your paneling.
Our guide will give you step-by-step steps, expert tips, and creative ideas to make your wood paneling walls a source of pride again, no matter how experienced you are with DIY projects or how new you are to the idea of making your living space look better. Here we are going to learn how to fix wood panels and make your rooms look better and more restored.
What is the best thing to stick paneling to the wall?
Heavy-duty glues like Gorilla Glue or No Nonsense Grab are the best to use. We’ve put links to their goods below. The MDF panels need to be glued to the wall in a zigzag pattern, and then the panel needs to be pressed hard against the wall. Let the glue dry.
The best glue or method for attaching paneling to a wall relies on the wall’s surface and the type of paneling. Here are a few popular choices:
Construction Adhesive:
Sometimes, a strong polyurethane glue or a solvent-based glue is used to stick panels to the walls. Put a thin layer of glue on the back of the wood, then press it against the wall. While the glue sets, use temporary supports to keep the wood in place. This method works well for a lot of different deck types.
Double-Sided Tape:
Double-sided adhesive tape, especially heavy-duty or industrial-grade tape, can be used for lightweight paneling or temporary applications. It’s quick and easy to apply and can be removed without damaging the wall.
Paneling Nails or Staples:
For wood paneling, nailing or stapling the panels directly to wall studs or furring strips is a common method. This provides a secure and long-lasting attachment. It’s important to use the appropriate length of nails or staples to ensure a strong bond.
Velcro Strips:
Velcro strips with adhesive backing can be used for lightweight or temporary paneling. This method allows for easy removal and repositioning.
Liquid Nails:
Liquid Nails or similar construction adhesives designed for paneling can provide a strong bond for wood, MDF, or other materials. Apply the adhesive in a zigzag pattern on the back of the paneling and press it onto the wall.
Wall Anchors:
When installing paneling on drywall or sheetrock, consider using wall anchors along with adhesive or nails for added support and stability.
The choice of or method depends on factors like the material, the wall surface, the of the installation, and your preferences. Always follow the manufacturer’s instructions for the adhesive you choose, and ensure that the wall surface is clean and properly prepared for a secure bond.
How do you install wood paneling on a concrete wall?
1: Orient Panels & Determine Installation Order.
2: Prepare Your Concrete Surface.
3: Trim Your First Panel (if needed)
4: Draw a Level Line.
5: Install Corner Piece (optional)
6: Apply Adhesive.
7: Adhere Panel to the Concrete.
8: Apply Adhesive and Caulk.
Installing wood paneling on a concrete wall can be a bit more challenging than on drywall or wood studs, but it’s certainly possible with the right approach. Here’s a general outline of the process:
Materials Needed:
- Wood paneling
- Pressure-treated wooden furring strips (1×3 or 1×4)
- Concrete anchors or masonry screws
- Construction adhesive
- Level
- Tape measure
- Circular saw or reciprocating saw
- Drill with masonry bit and driver bit
- Stud finder (optional)
Steps:
Prepare the Concrete Wall:
Ensure the concrete wall is clean and free of dust, dirt, and loose debris. Clean it thoroughly and allow it to dry.
Measure and Mark:
Use a level and tape measure to mark the desired height for your wood paneling. Ensure the marks are level and evenly spaced.
Install Furring Strips:
Attach pressure-treated wooden furring strips horizontally to the concrete wall. These strips create a framework to which you’ll attach the wood paneling.
Apply construction adhesive to the back of each furring strip and press it against the concrete wall at the marked locations.
Use concrete anchors or masonry screws to secure the furring strips to the wall. Space the anchors or screws according to your paneling’s width, typically around 16 inches apart.
Ensure the furring strips are level as you install them.
Cut the Wood Paneling:
Measure and cut the wood paneling to fit between the furring strips horizontally. A circular saw or reciprocating saw can be used for this task.
Attach the Wood Paneling:
- Apply construction adhesive to the back of each wood paneling piece.
- Slide the paneling between the furring strips and press it against the wall.
- Secure the paneling to the furring strips with finishing nails or screws. Ensure the fasteners penetrate both the paneling and the furring strips.
Repeat Steps 4 and 5:
Continue measuring, cutting, and attaching wood paneling pieces until the entire wall is covered.
Finish and Seal:
Fill any gaps or seams between paneling pieces with wood filler or caulk.
Sand the paneling and apply a finish or sealant, such as stain or polyurethane, to protect and enhance the wood’s appearance.
Installing wood paneling on a concrete wall may require additional effort compared to drywall, but it can create a warm and inviting atmosphere in a space. Proper preparation, secure furring strips, and diligent attachment of the paneling will result in a sturdy and attractive installation.
How do you fix fake wood paneling?
Spackle and Paint
- The Tools You’ll Need.
- Clean the Panels. Wipe down the panels to remove dust and debris before doing anything else.
- Cover the Grooves With Spackle. Use the putty knife to apply evenly spackle over the grooves.
- Sand It Down.
- Primer and Paint.
Fixing fake wood paneling, also known as laminate or veneer paneling, typically involves addressing common issues like peeling, chipping, or gaps between panels. Here’s how to repair fake wood paneling:
Materials Needed:
- Wood glue or contact cement
- Fine-grit sandpaper
- Wood filler
- Putty knife
- Clamps (if needed)
- Paint or stain (optional)
- Finishing nails (for securing loose panels)
Steps:
Reattach Loose Panels:
If any panels have come loose from the wall, use wood glue or contact cement to reattach them. Apply a thin, even layer of adhesive to both the back of the panel and the wall. Press the panel firmly against the wall and use clamps to hold it in place while the adhesive dries.
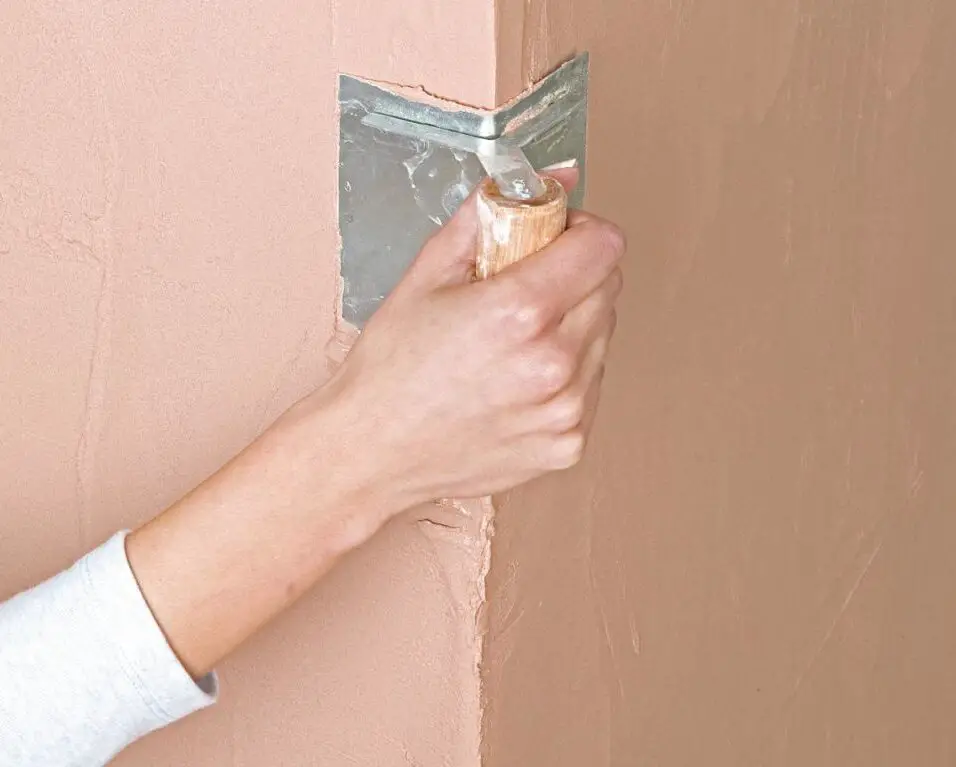
Fill Gaps and Cracks:
Use wood filler to fill any gaps or cracks between panels or along the edges of individual panels. Apply the filler with a putty knife, smoothing it to match the surrounding surface. Allow it to dry according to the manufacturer’s instructions.
Sand the Surface:
After the filler has dried, sand the repaired areas and any rough or damaged spots with fine-grit sandpaper. This will create a smooth and uniform surface.
Touch Up the Finish:
If the fake wood paneling has a finish like paint or stain, you may need to touch up the finish to blend the repaired areas with the rest of the paneling. Use paint or stain that matches the existing finish.
Secure Loose Edges (Optional):
If the edges of the paneling are loose or peeling away from the wall, you can use finishing nails to secure them. Carefully nail the edges back into place, making sure not to split the paneling.
Inspect and Maintain:
Periodically inspect the paneling for any new issues, especially if it’s located in areas prone to moisture or temperature fluctuations. Address any problems promptly to prevent further damage.
Repairing fake wood paneling is a cost-effective way to refresh the appearance of a room without the expense of replacement. Properly executed repairs can make the paneling look like new, extending its lifespan and maintaining its aesthetic appeal.
Do you nail or glue wood paneling?
It depends on your goals. If you want to save time and want a quick, temporary solution, it’s best to go with glue paneling, but if you want the wall panels to stay in their place for as long as you want, nail them!
Whether you should nail or glue wood paneling depends on your specific project and preferences. Both methods have their advantages and considerations:
Nailing Wood Paneling:
Advantages:
- Provides a strong and secure attachment to the wall.
- Allows for easier removal or replacement of individual panels in the future.
- Ideal for structural applications or situations where added security is needed.
Considerations:
- Leaves visible nail holes that need to be filled and finished for a seamless appearance.
- Requires access to wall studs or framing for proper nailing.
- May not be suitable for very thin or lightweight paneling.
Gluing Wood Paneling:
Advantages:
- Creates a smooth, nail-hole-free surface for a clean and modern look.
- Well-suited for decorative or non-structural applications.
- Minimizes the risk of visible fasteners.
Considerations:
- Panel removal can be more challenging and may result in damage to the wall or paneling.
- Glue type and application are critical; use the appropriate adhesive for wood paneling and follow manufacturer recommendations.
- Surface preparation is crucial for a successful glue bond.
In many cases, a combination of both methods may be used. For example, you can use construction adhesive to glue the paneling to the wall for initial attachment and stability, and then secure it further with finishing nails at the edges and studs for added security.
Ultimately, the choice between nailing and gluing wood paneling depends on the specific requirements of your project, the type of paneling, and your desired aesthetic. Be sure to follow manufacturer recommendations for adhesives and fasteners, and consider the ease of future maintenance or removal when making your decision.
How is wood paneling attached?
TO ATTACH THE PANELING TO THE WALL
Pull the panel away from the wall and let the adhesive become tacky. Push the panel back on the wall and roll the panel with a rolling pin. This will make sure that the panel and the adhesive make good contact. Finally, drive finishing nails into place at the top of the panel.
Wood paneling can be attached to walls using several methods, depending on the type of paneling and the desired result. Here are some common ways to attach wood paneling:
Nailing:
This traditional method involves securing the wood paneling to wall studs or framing using finishing nails. Nailing provides a strong and secure attachment, especially for heavy or structural paneling. For a clean finish, nails can be countersunk and filled with wood filler before finishing.
Gluing:
Construction adhesive or paneling adhesive can be used to glue wood paneling directly to the wall surface. This method creates a smooth, nail-hole-free appearance and is suitable for decorative or non-structural applications. Proper surface preparation and adhesive selection are critical for a successful bond.
Tongue-and-Groove:
Tongue-and-groove paneling has interlocking edges that fit together, creating a strong and seamless connection. It is often nailed through the tongue or groove into the wall framing. This method ensures that the fasteners are hidden, resulting in a clean look.
Stapling:
In some cases, a pneumatic stapler can be used to attach thin or lightweight wood paneling. Staples are driven into the paneling and wall framing. This method is quick and can provide a secure attachment for thinner materials.
Floating or Clip Systems:
Some wood paneling systems, especially those used for ceilings, use clips or brackets that allow the panels to “float” or be suspended from a grid. This method does not involve direct attachment to the wall but rather to a supporting framework.
Adhesive Strips or Peel-and-Stick:
Certain types of lightweight wood paneling, such as peel-and-stick or adhesive-backed panels, can be applied directly to the wall. These panels have adhesive strips on the back that adhere to the wall when pressed in place.
The method you choose depends on the type of wood paneling, the wall’s condition, and your aesthetic preferences. It’s important to follow manufacturer guidelines and recommendations for installation, especially regarding adhesive types, fastener spacing, and surface preparation.
What kind of glue to use on wood paneling?
LIQUID NAILS® Paneling Wood & Foam Molding Adhesive (LN-606) is specially designed for projects like paneling and molding where instant hold is needed. The fast, sure hold of this construction adhesive provides precision placement and minimizes nailing. Twenty minute open time and an impact-resistant bond. The choice of glue for wood paneling depends on various factors, including the type of paneling, the wall surface, and the desired level of adhesion.
Construction Adhesive:
High-quality construction adhesive, such as a paneling or heavy-duty adhesive, is a versatile choice for attaching wood paneling to drywall, plywood, or other smooth surfaces. It provides a strong bond and is suitable for both structural and decorative applications.
Paneling Adhesive:
Paneling adhesive is specifically designed for attaching wood paneling to walls. It offers good adhesion and is easy to work with.
Contact Cement:
Contact cement is a strong adhesive that creates an instant bond when the surfaces coated with it come into contact. It’s suitable for laminating wood veneer paneling or when a very strong bond is needed.
Construction Adhesive Caulk:
Adhesive caulk can be used for attaching lightweight paneling or for filling gaps and seams between panels. It provides a flexible bond and helps seal joints.
Peel-and-Stick Adhesive:
Some lightweight wood paneling, like peel-and-stick or adhesive-backed panels, comes with adhesive strips on the back. These strips are activated when the panel is pressed against the wall.
When selecting an adhesive, it’s essential to consider the specific requirements of your project and the type of paneling you’re using. Follow the manufacturer’s recommendations regarding surface preparation, application temperature, and drying or curing times. Properly preparing the wall surface by cleaning, sanding, and priming, if necessary, will help ensure a strong bond.
Always prioritize safety by using adhesives in a well-ventilated area, wearing appropriate personal protective equipment, and following safety guidelines provided by the adhesive manufacturer.
Is wall Panelling a good idea?
Paneling can be a great hallway idea for solving this, especially when used halfway up the wall where the majority of the scuffs occur. Wall paneling can be an excellent idea for various reasons, depending on your design goals and the specific circumstances of your space. Here are some advantages and considerations when deciding whether wall paneling is a good idea:
Advantages:
- Aesthetic Appeal: Wall paneling can enhance the visual appeal of a room. It adds texture, depth, and character to walls, making them more interesting and stylish.
- Warmth and Comfort: Wooden paneling, in particular, can create a warm and cozy atmosphere in a space, making it feel inviting and comfortable.
- Versatility: Wall paneling comes in various materials, styles, and finishes, allowing you to achieve a wide range of design aesthetics, from traditional to modern.
- Durability: High-quality wall paneling can be durable and long-lasting, providing protection to walls and reducing wear and tear.
- Sound Insulation: Some types of wall paneling, especially those with added insulation, can improve acoustic comfort by reducing sound transmission between rooms.
- Easy Maintenance: Many wall paneling options are relatively easy to clean and maintain, making them suitable for high-traffic areas.
- Concealing Imperfections: Paneling can be used to conceal imperfections on walls, such as cracks or uneven surfaces.
Considerations:
- Cost: Depending on the type of paneling chosen, costs can vary. High-quality wood paneling, for example, can be more expensive than other materials.
- Installation: The installation process can be labor-intensive, especially if you’re not experienced with carpentry or wall paneling installation.
- Design Trends: Paneling styles can go in and out of fashion, so it’s essential to choose a design that suits your taste and complements your space.
- Maintenance: Some paneling may require periodic maintenance, such as refinishing or sealing, to keep it looking its best.
- Removal: If you decide to remove paneling in the future, it can be a time-consuming process, and it may reveal underlying wall issues that need attention.
Ultimately, whether wall paneling is a good idea depends on your specific goals, budget, and design preferences. It can be an excellent way to transform the look and feel of a room, but careful consideration of the pros and cons is essential before making a decision.
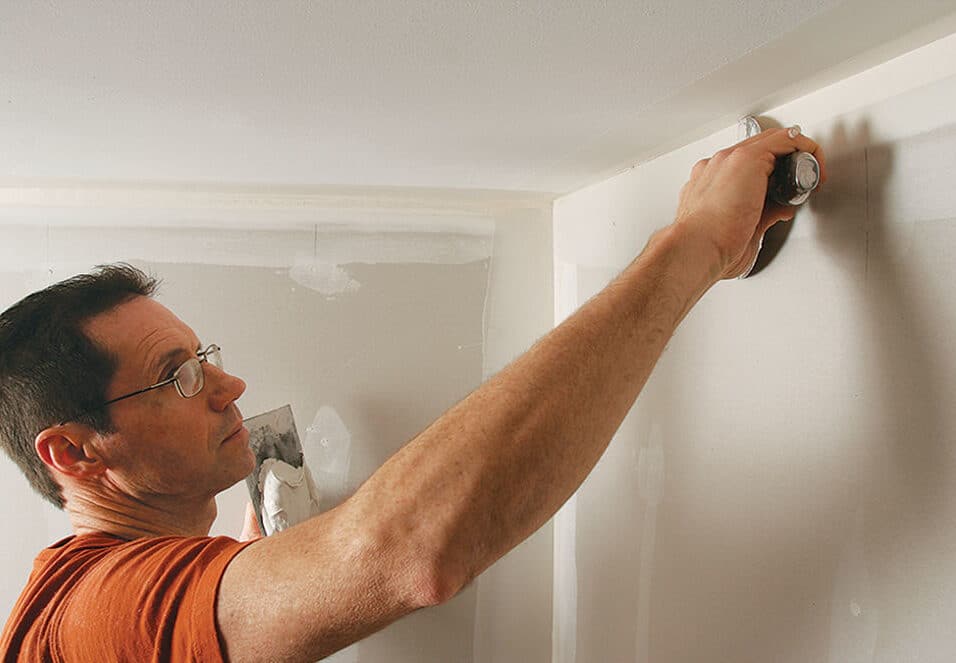
How do you smooth wood paneling?
Using a fine sandpaper (220 grit is a good level here), focus on any areas that are uneven or that have dried drips, such as corners and edges. After you sand, be sure to vacuum the paneling thoroughly and tack or wipe everything down with a damp cloth to remove any remaining dust. Then let it dry.
Smoothing wood paneling involves preparing the surface for painting, staining, or simply achieving a more refined appearance. Here’s how to smooth wood paneling:
Materials Needed:
- Sandpaper (medium and fine grit)
- Wood filler or putty
- Putty knife
- Tack cloth or damp cloth
- Primer (if painting)
- Paint or stain (if desired)
Steps:
Clean the Paneling: Begin by cleaning the wood paneling to remove dust, dirt, and any residues. Use a tack cloth or a damp cloth to wipe down the surface thoroughly. Allow it to dry completely.
Fill Gaps and Cracks: Inspect the paneling for gaps, cracks, or holes. Fill these imperfections with wood filler or putty. Use a putty knife to apply the filler, and make sure to smooth it flush with the surface. Allow the filler to dry according to the manufacturer’s instructions.
Sand the Surface:
Start with medium-grit sandpaper (around 120 to 150 grit) to sand the entire surface of the wood paneling. Sand in the direction of the wood grain to avoid creating scratches.
Sanding helps smooth out any rough spots, imperfections, or raised wood grain. It also provides adhesion for paint or stain.
Inspect and Repeat:
After sanding, inspect the paneling for any remaining imperfections. If necessary, apply more wood filler, let it dry, and sand again until you achieve a smooth surface.
Switch to Fine-Grit Sandpaper: Once the surface is relatively smooth with the medium-grit sandpaper, switch to fine-grit sandpaper (around 220 grit) for a final pass. This finer grit helps create a smoother finish.
Remove Sanding Dust: After sanding with the fine-grit sandpaper, thoroughly remove all sanding dust from the paneling. Wipe it down with a tack cloth or a damp cloth. Ensure the surface is clean and dry before proceeding.
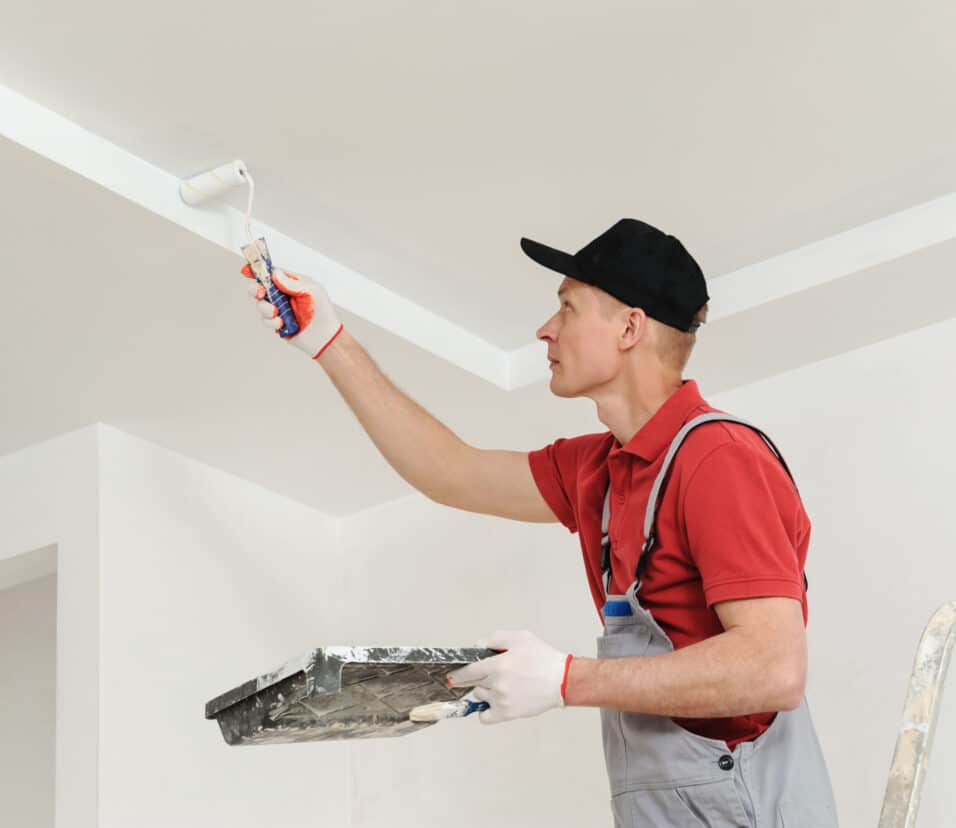
Prime (If Painting):
If you plan to paint the wood paneling, apply a high-quality primer that is suitable for wood surfaces. This will create a smooth and even base for the paint.
Allow the primer to dry according to the manufacturer’s instructions before painting.
Paint or Stain (Optional):
If you desire a different color or finish, apply paint or stain according to the manufacturer’s instructions. Follow recommended drying times between coats if multiple coats are needed.
Seal or Finish (Optional):
If you’ve stained the paneling, consider applying a clear wood finish, such as polyurethane or varnish, to protect the wood and enhance its appearance.
If you’ve painted the paneling, a clear topcoat can also provide extra durability and a smooth finish.
Smoothing wood paneling can significantly improve its appearance and create a more polished look in your space. The process may vary depending on the condition of the paneling and your desired finish, but careful preparation and attention to detail will help you achieve a smooth and attractive result.

Conclusion
With our complete guide on “How To Fix Wood Walls,” you now know how to fix a wide range of problems that might come up with your wood. To keep the beauty and integrity of your indoor spaces, you now know how to do everything from small flaws to major repairs and even completely new looks.
Remember that the best way to fix wood panels is to plan ahead, pay attention to detail, and use high-quality materials. Things that need to be sanded, refinished, painted, or filled in cracks and holes need to be done carefully and with patience.
The versatility of wood paneling allows you to explore various creative options, from preserving its natural beauty to giving it a modern or rustic makeover with the right finishes. You now have the tools to tailor your wood paneling walls repair to your unique style and vision.
If you follow our advice and take the time to understand and meet the needs of your wood paneling, you can turn your living areas into beautiful and one-of-a-kind displays. Thanks for going with us as we fix things and make things better. Your wood paneled walls should always look nice and make your home feel cozy. If you smooth out wood walls, they can look a lot better. This is going to make your room look better. If you plan ahead and pay close attention to the little things, you should be able to get a nice, smooth finish. The steps may be different based on the condition of the paneling and the finish you want.