How To Finish Inside Drywall Corners
Introduction
How To Finish Inside Drywall Corners: When it comes to finishing inside drywall corners, one of the most important aspects is ensuring a smooth and seamless transition between the two adjoining walls. This not only enhances the aesthetic appeal of your walls but also prevents any cracks or gaps from forming over time. To achieve this, you will need to use joint compound, also known as mud, which is a versatile material used for filling and smoothing out imperfections in drywall surfaces.
Before you begin the actual finishing process, it is crucial to prepare the corners properly. Start by applying a layer of joint compound along the corner using a putty knife or a taping knife. Make sure to press the corner bead firmly against the wall to ensure a secure attachment.
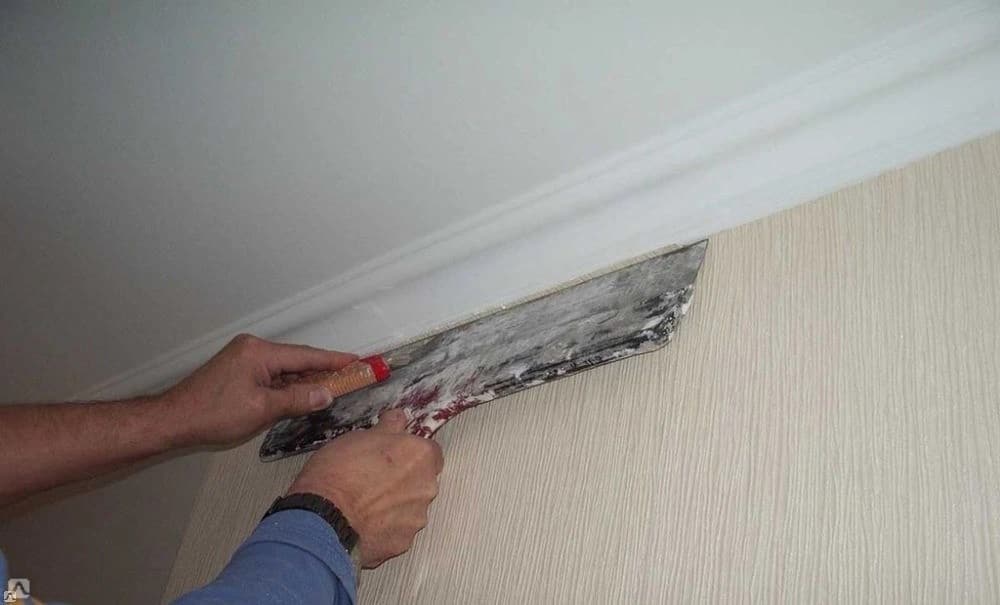
Once the corner bead is in place, it’s time to apply the joint compound. Use long, smooth strokes to spread the compound evenly along the corner, feathering the edges as you go. Repeat this process, adding additional layers of joint compound until the corner is completely filled and smooth. Remember to let each layer dry before applying the next one.
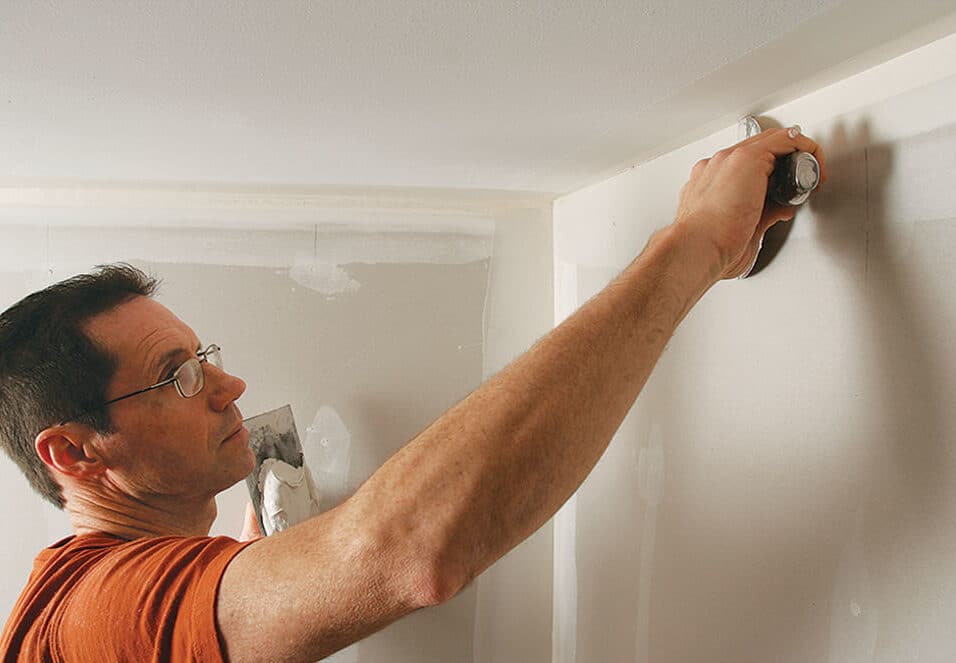
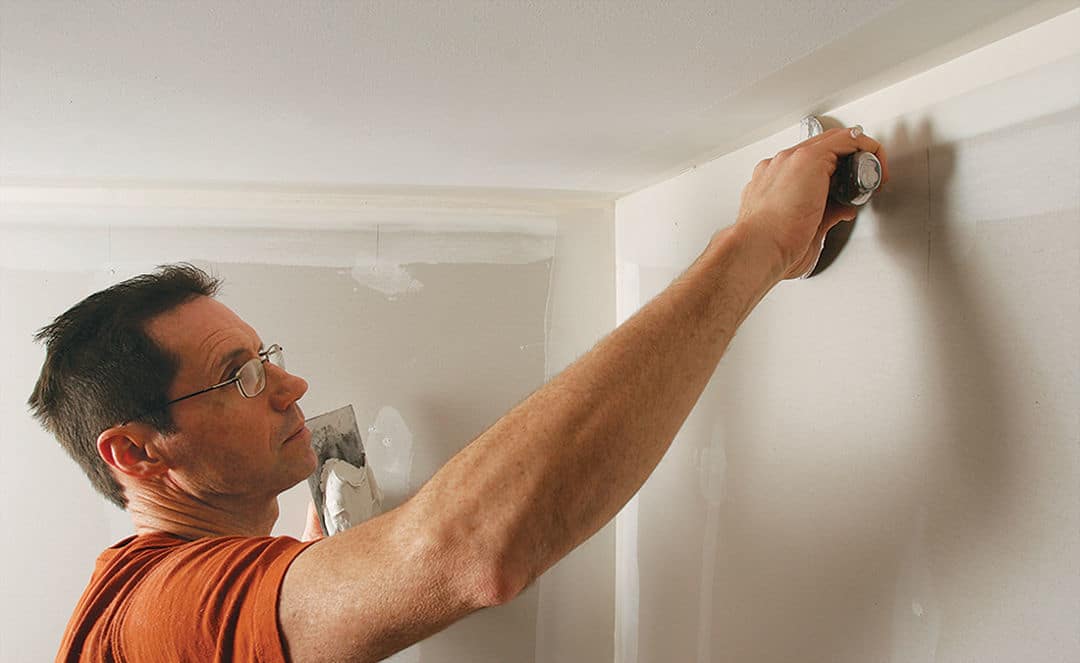
After the joint compound has dried, it’s time to sand the corners to achieve a seamless finish. Use a fine-grit sandpaper or a sanding sponge to gently sand the dried compound, smoothing out any imperfections or ridges. Be careful not to sand too aggressively, as this can damage the corner bead or the underlying drywall. Remember to practice patience and precision, as mastering this skill may take some time and practice. With the right techniques and tools, you can transform your drywall corners into seamless and visually appealing features of your home.
Do you need corner bead for inside corners?
Corner bead is typically only used on outside corners because it’s vulnerable to wear and tear. Although corner beads are used on inside corners, they aren’t necessary, since a simple paper tape installation will suffice.
Importance of Corner Bead:
Corner bead serves multiple purposes when it comes to inside corners. Firstly, it provides structural support, preventing the corners from cracking or chipping over time. This is especially important in high-traffic areas or in buildings where the walls are prone to movement. Secondly, corner bead helps to create a smooth and even surface, ensuring that the finished walls look professional and well-crafted. Without corner bead, the corners may appear uneven or jagged, detracting from the overall aesthetic of the space.
Types of Corner Bead:
There are different types of corner bead available, each designed to suit specific needs. Additionally, there are corner beads with built-in tape, which simplify the taping and mudding process during drywall installation.
Considerations for Using Corner Bead:
Corner bead is a valuable component for achieving strong, durable, and aesthetically pleasing inside corners. Its use depends on factors such as the type of wall material, desired finish, and level of durability required. By carefully considering these factors, you can determine whether or not corner bead is necessary for your specific project.
Should drywall inside corners overlap?
Perfecting the skill takes practice but having the right techniques and materials is a step in the right direction. Drywall corners should NOT overlap when applying drywall to the walls because overlapping could leave bumps. They don’t need an exact fit either.
Drywall installation is a crucial step in the construction or renovation of any building. One common question that arises during this process is whether drywall inside corners should overlap. This query is important as it directly impacts the overall appearance and durability of the finished walls.
Understanding drywall inside corners:
Before delving into the debate of whether drywall inside corners should overlap, it is essential to understand what these corners are. Inside corners are the meeting points of two walls in a room, forming a 90-degree angle. Drywall is typically installed on these corners to create a smooth and seamless transition between the walls. However, achieving a perfect finish on inside corners can be challenging due to the nature of the materials and the angle involved.
The argument for overlapping:
Some professionals argue that overlapping drywall inside corners can help create a stronger and more durable joint. By overlapping the drywall sheets, the joint becomes less prone to cracking or separating over time. This method also provides additional support to the corner, reducing the risk of damage from accidental impacts. Moreover, overlapping can help create a smoother surface, making it easier to achieve a seamless finish during the mudding and taping process.
The argument against overlapping:
On the other hand, there are those who believe that overlapping drywall inside corners is unnecessary and can even lead to more problems. They argue that overlapping can create a bulge or bump in the corner, making it difficult to achieve a smooth finish. Additionally, overlapping may require more joint compound and tape, increasing the overall cost and time required for the installation. Some professionals prefer to use a technique called “”butt jointing,”” where the drywall sheets meet at the corner without overlapping, as it allows for a cleaner and more visually appealing finish.
How many coats on inside corners?
When the second coat has dried, apply a third coat to one side of the corner and trim off any excess mud to smooth the corner from one end to the other, blending with the drywall. Let the first side dry, scrape off any buildup, and repeat for the other side of the corner.
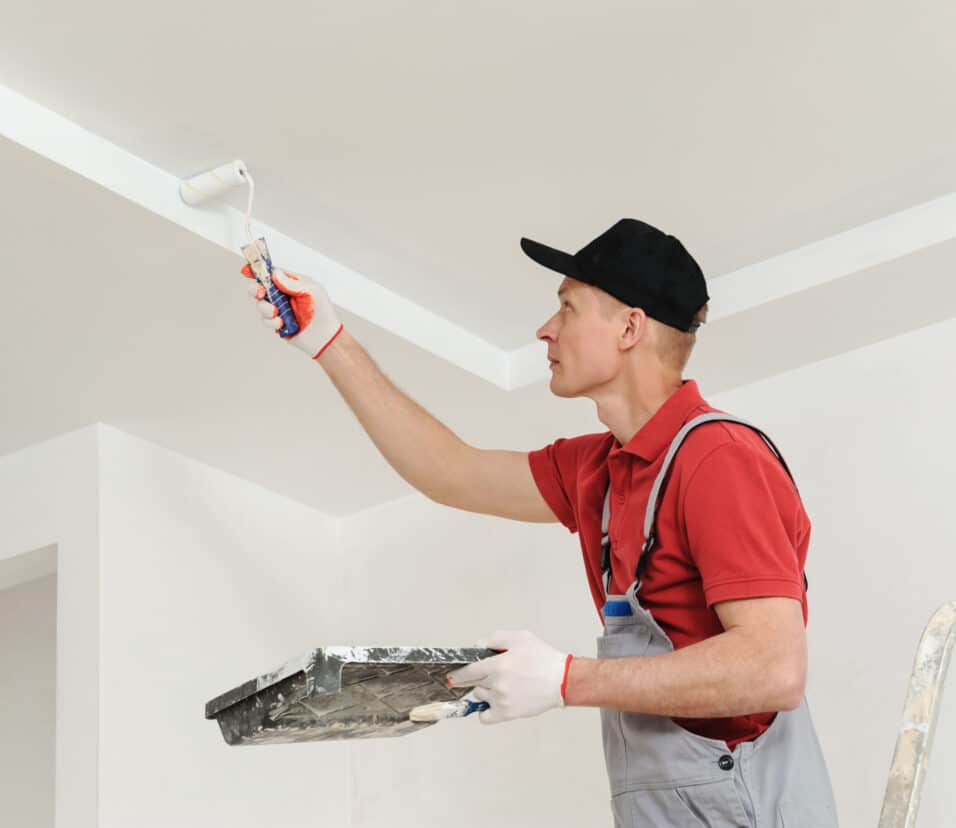
When it comes to painting the interior of a room, one important aspect to consider is how many coats are needed on inside corners. Inside corners, where two walls meet, can be tricky to paint evenly and smoothly. The number of coats required on these corners depends on various factors, such as the condition of the walls, the type of paint being used, and the desired finish. In this article, we will explore the considerations for determining the number of coats needed on inside corners.
Factors influencing the number of coats:
One of the primary factors that determine the number of coats required on inside corners is the condition of the walls. If the walls have imperfections, such as cracks or uneven surfaces, they may require additional coats to achieve a smooth and flawless finish. In such cases, it is recommended to apply a primer coat before the actual paint to ensure better coverage and adhesion.
Another factor to consider is the type of paint being used. Some paints have better coverage and opacity than others. For instance, high-quality paints with a higher concentration of pigments tend to provide better coverage in fewer coats. On the other hand, lower-quality paints may require multiple coats to achieve the desired finish. It is essential to choose a paint that is specifically formulated for interior walls and offers good coverage.
Techniques for painting inside corners:
When painting inside corners, it is crucial to use the right techniques to ensure an even and professional-looking finish. One common technique is to use a small angled brush to carefully paint along the corner, starting from the top and working downwards. This helps to prevent drips and ensures that the paint is evenly distributed. It may be necessary to apply multiple coats, allowing each coat to dry completely before applying the next.
Additionally, using painter’s tape can help create clean lines and prevent paint from bleeding onto adjacent walls. Applying a thin layer of caulk along the inside corners before painting can also help create a seamless finish. Overall, taking the time to properly prepare and paint inside corners can greatly enhance the overall appearance of a room.
Do inside corners need tape?
For a professional finish, you have to tape, then wait. The average house has as much lineal footage of inside corners as it does flat seams. A good system for taping and mudding inside corners improves the look of every room and saves time. A quality drywall job starts with careful planning.
When it comes to painting or wallpapering a room, one of the common questions that arises is whether inside corners need tape. Inside corners, where two walls meet, can be tricky to paint or wallpaper neatly without any smudges or uneven lines. In this article, we will explore the importance of using tape in inside corners and discuss the benefits it offers in achieving a professional finish.
The Importance of Tape in Inside Corners:
Using tape in inside corners is highly recommended for several reasons. Firstly, it helps create clean and crisp lines between the two walls, ensuring a polished and professional look. Without tape, it can be challenging to achieve straight lines, especially if you are not an experienced painter or wallpaper installer.
Secondly, tape acts as a barrier, preventing paint or wallpaper from bleeding onto the adjacent wall. This is particularly important when using contrasting colors or patterns, as any smudges or bleed-through can ruin the overall aesthetic appeal of the room.
Furthermore, tape provides a guide for your brush or roller, helping you maintain a consistent width and avoiding any accidental overlap onto the adjacent wall. This is especially useful when working with textured walls or uneven surfaces, where it can be more challenging to achieve a clean line without the assistance of tape.
Using Tape Effectively:
While using tape in inside corners is essential, it is equally important to use it correctly to achieve the desired results. Firstly, ensure that the tape is firmly pressed against the wall, leaving no gaps or loose edges. This will prevent any paint or wallpaper from seeping underneath the tape.
Additionally, remove the tape carefully and promptly after painting or wallpapering. Waiting for the paint or wallpaper to dry completely can result in the tape sticking to the surface, making it difficult to remove without damaging the finish. Removing the tape at a 45-degree angle can help prevent any accidental peeling or tearing.
Using tape in inside corners is highly recommended for achieving a professional and polished finish when painting or wallpapering a room. It helps create clean lines, prevents bleed-through, and acts as a guide for maintaining consistency. By following the correct techniques for applying and removing tape, you can ensure a seamless and flawless result. So, the next time you embark on a painting or wallpapering project, don’t forget to use tape in your inside corners for a picture-perfect outcome.
What is the best inside corner bead?
Vinyl corner bead can be the best option for many projects. There are two important benefits that make vinyl a superior choice. Adaptability & Flexibility – There are nearly 200 different vinyl corner bead shapes and profiles on the market.
When it comes to choosing the best inside corner bead, there are several factors to consider. The inside corner bead is an essential component in drywall installation, as it provides a clean and finished look to the corners of walls. It helps protect the corners from damage and ensures a smooth transition between walls. With a wide range of options available in the market, it can be overwhelming to determine which inside corner bead is the best fit for your project.
Factors to Consider:
One of the key factors to consider when selecting an inside corner bead is the material. Inside corner beads are commonly made from metal or vinyl. Metal corner beads, such as those made from galvanized steel or aluminum, offer durability and strength. They are resistant to cracking and provide excellent protection for corners. On the other hand, vinyl corner beads are lightweight and flexible, making them easier to install and less prone to denting.
Another important consideration is the profile of the inside corner bead. The profile refers to the shape or design of the bead, which can vary depending on the desired aesthetic and functionality. Some common profiles include L-shaped, bullnose, and chamfered. L-shaped corner beads are the most traditional and provide a sharp edge, while bullnose corner beads offer a rounded finish. Chamfered corner beads have a beveled edge, which can create a unique look.
Selecting the best inside corner bead involves considering factors such as the material, profile, and ease of installation. It is essential to choose a corner bead that not only provides protection and durability but also complements the overall aesthetic of your project. By carefully evaluating these factors, you can ensure a successful and visually appealing finish to your walls.
The following steps outline the process:
Step 1: Begin by applying joint compound to the inside corner using a taping knife. Start at the top and work your way down, ensuring that the compound is evenly spread along the corner.
Step 2: Next, embed a paper or fiberglass drywall tape into the wet compound. Press it firmly into the corner, making sure it is centered and free of wrinkles or bubbles.
Step 3: Once the tape is in place, apply a second layer of joint compound over it, extending it beyond the edges of the tape. Use the taping knife to smooth and feather the compound, blending it with the surrounding wall.
Step 4: Allow the compound to dry completely, which typically takes 24 hours. Once dry, lightly sand the area to remove any imperfections or ridges.
Step 5: Finally, apply a second and third coat of joint compound, feathering each layer further out from the corner. Sand between each coat to achieve a smooth and seamless finish.
By following these steps and paying attention to detail, you can achieve a professional-looking finish on inside drywall corners.
What tools and materials are needed to finish inside drywall corners?
Before we get into drywall taping inside corners, ensure you have the right tools necessary for the job.
- Drywall compound.
- Drywall paper tape.
- Putty Knife (4-inch)
- Mud pans for drywall compound.
- Sander.
- Mask.
- Water.
When it comes to finishing inside drywall corners, there are several essential tools and materials that you will need to achieve a professional and seamless result. These include:
1. Joint compound: This is a crucial material for filling in the gaps and seams between drywall panels. It is available in pre-mixed or powdered form, and you will need a sufficient amount to cover the corners.
2. Drywall tape: This tape is used to reinforce the joints and prevent cracking. It is typically made of paper or fiberglass, and it is essential for creating a strong and durable corner.
3. Corner bead: This metal or plastic strip is used to protect the corners and provide a clean and straight edge. It is available in different shapes, such as L-shaped or bullnose, depending on the desired finish.
4. Taping knife: A taping knife is a versatile tool that is used for applying joint compound and smoothing it out. It is available in various sizes, and having a few different sizes can be helpful for different areas of the corner.
5. Sandpaper: Sandpaper is essential for achieving a smooth and even finish. It is used to sand down the dried joint compound and create a seamless transition between the corner and the surrounding wall.
Overall, having the right tools and materials is crucial for achieving a professional and smooth finish on inside drywall corners. By using joint compound, drywall tape, corner bead, taping knife, and sandpaper, you can ensure that your corners are strong, durable, and visually appealing.
Are there any specific techniques or tips for achieving a smooth finish on inside drywall corners?
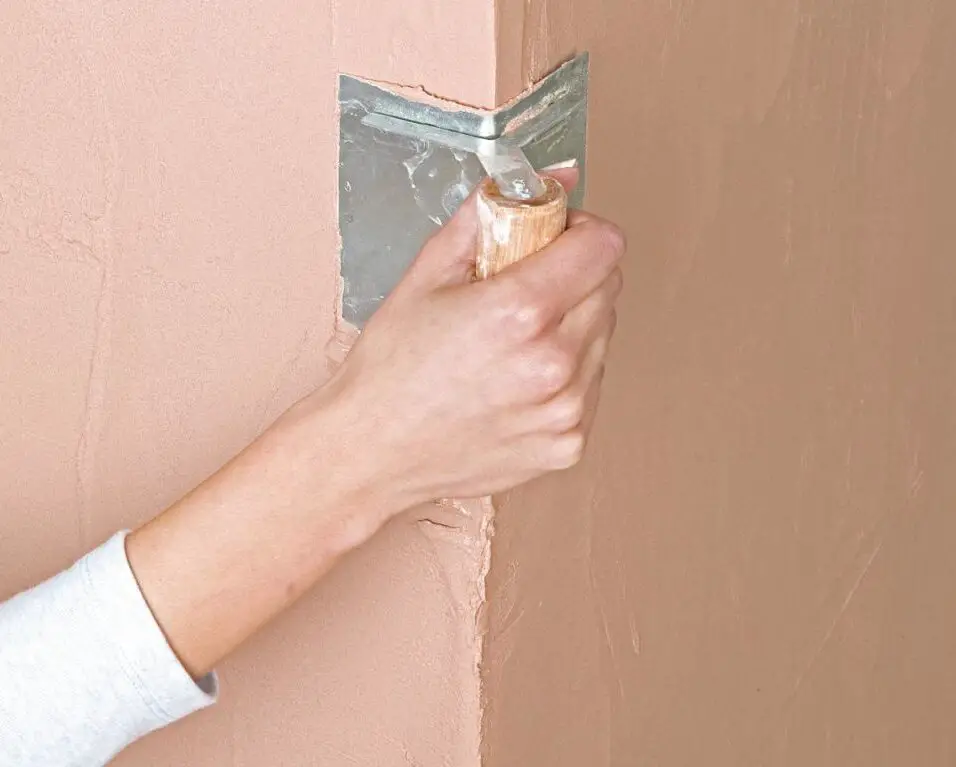
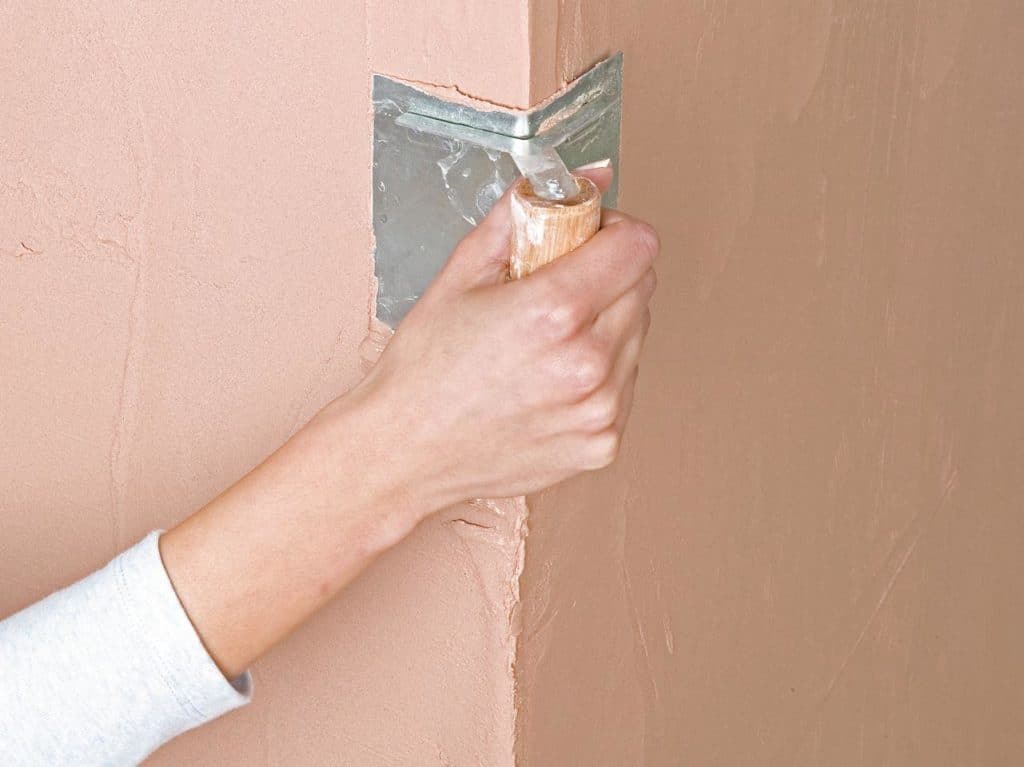
When it comes to achieving a smooth finish on inside drywall corners, there are a few specific techniques and tips that can greatly improve the overall result. One important technique is to use a corner trowel or a corner knife to apply joint compound to the inside corners. This specialized tool allows for precise application and helps create a clean, crisp edge.
Additionally, it is crucial to feather the joint compound beyond the corner itself. Feathering involves gradually thinning out the compound as you move away from the corner, blending it into the surrounding wall. This technique helps to create a seamless transition and prevents visible lines or ridges.
How long does it typically take to finish inside drywall corners?
Finishing inside drywall corners can vary in time depending on the complexity of the project and the experience of the person doing the work. On average, it can take anywhere from a few hours to a full day to complete the finishing process for inside drywall corners in a standard-sized room.
The time required is influenced by several factors, including the number of corners that need to be finished, the condition of the existing drywall, and the level of skill of the person performing the task. If the corners are in good condition and only require minor touch-ups, the process can be relatively quick. However, if there are multiple corners that need extensive repair or if the person is inexperienced, it may take longer to achieve a smooth finish.
Are there any common mistakes to avoid when finishing inside drywall corners?
Another mistake to avoid is not properly sanding the joint compound after it has dried. Sanding is crucial to achieving a smooth and seamless finish. Failing to sand the corners can leave behind rough patches and visible lines, which can be quite noticeable once the walls are painted. It is recommended to use a fine-grit sandpaper and sand in a circular motion, gradually smoothing out the compound until it is flush with the wall.
Additionally, not using a corner trowel or knife can also lead to mistakes. These specialized tools are designed to help create crisp and clean corners. Using a regular trowel or knife may result in rounded or uneven corners, which can be difficult to correct later on. Investing in a corner trowel or knife is worth it to achieve professional-looking corners.
Conclusion
Finishing inside drywall corners is an essential skill for any homeowner or DIY enthusiast. It not only enhances the overall appearance of a room but also ensures the longevity and durability of the walls. By following the instructions provided, one can achieve professional-looking results without the need for expensive tools or professional help.
The first step in finishing inside drywall corners is to properly prepare the area. This involves removing any loose or damaged drywall, sanding down rough edges, and ensuring that the surface is clean and free from dust or debris. Once the area is prepared, it is important to apply a primer to the corners to ensure proper adhesion of the joint compound.
The next step is to apply joint compound to the inside corners. This can be done using a taping knife or a corner trowel. It is important to apply the compound evenly and smoothly, ensuring that it fills any gaps or imperfections in the corners. Once the compound is applied, it should be allowed to dry completely before proceeding to the next step.
After the joint compound has dried, it is time to sand the corners. This step is crucial in achieving a smooth and seamless finish. Using a fine-grit sandpaper, gently sand the corners until they are smooth to the touch. It is important to be careful not to sand too aggressively, as this can damage the drywall and create more work.
Finishing inside drywall corners is a task that can be easily accomplished with the right tools and techniques. By following the instructions provided, anyone can achieve professional-looking results and enhance the overall appearance of their walls. Whether you are a seasoned DIY enthusiast or a beginner, taking the time to properly finish inside drywall corners is well worth the effort.