How To Install Decorative Wall Paneling
Introduction
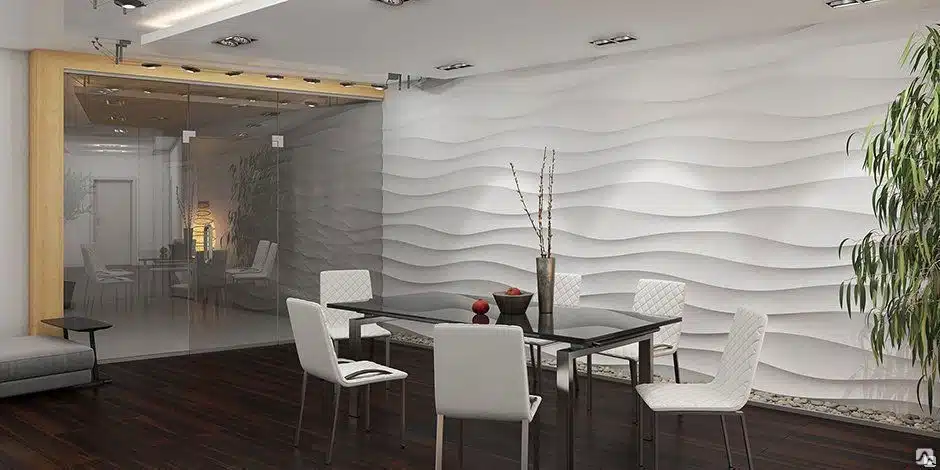
How To Install Decorative Wall Paneling: Decorative wall paneling is a fantastic way to enhance the aesthetic appeal of any space. Whether you want to add a touch of elegance to your living room or create a cozy atmosphere in your bedroom, installing decorative wall paneling can transform the look and feel of your home. In this article, we will guide you through the process of installing decorative wall paneling, providing you with step-by-step instructions to ensure a successful project.
Before diving into the installation process, it is important to understand the different types of decorative wall paneling available in the market. From traditional wood paneling to modern PVC options, there is a wide range of materials to choose from. Each material has its own unique characteristics and benefits, so it is essential to select the one that best suits your needs and preferences. Consider factors such as durability, maintenance requirements, and overall design compatibility with your existing interior.
Once you have chosen the perfect decorative interior wall paneling for your space, it is time to prepare the area for installation. This will help you determine the quantity of panels needed and ensure a precise fit. Repairing cracks or uneven surfaces will ensure a smooth and flawless finish.
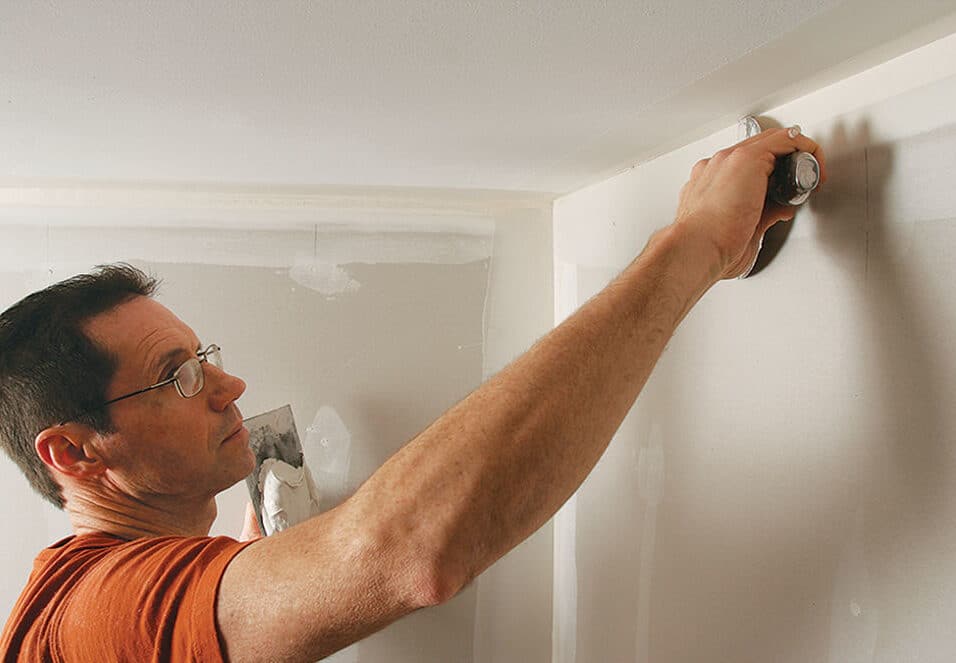
Now that you have prepared the area, it is time to begin the installation process. Start by marking the desired height and width of the paneling on the wall using a pencil and a level. This will serve as a guide to ensure accurate placement. Next, apply adhesive to the back of the first panel and press it firmly against the wall, aligning it with the marked guidelines. Use a level to ensure the panel is straight and adjust if necessary. Repeat this process for each panel.
Ensuring a tight and seamless fit between them.
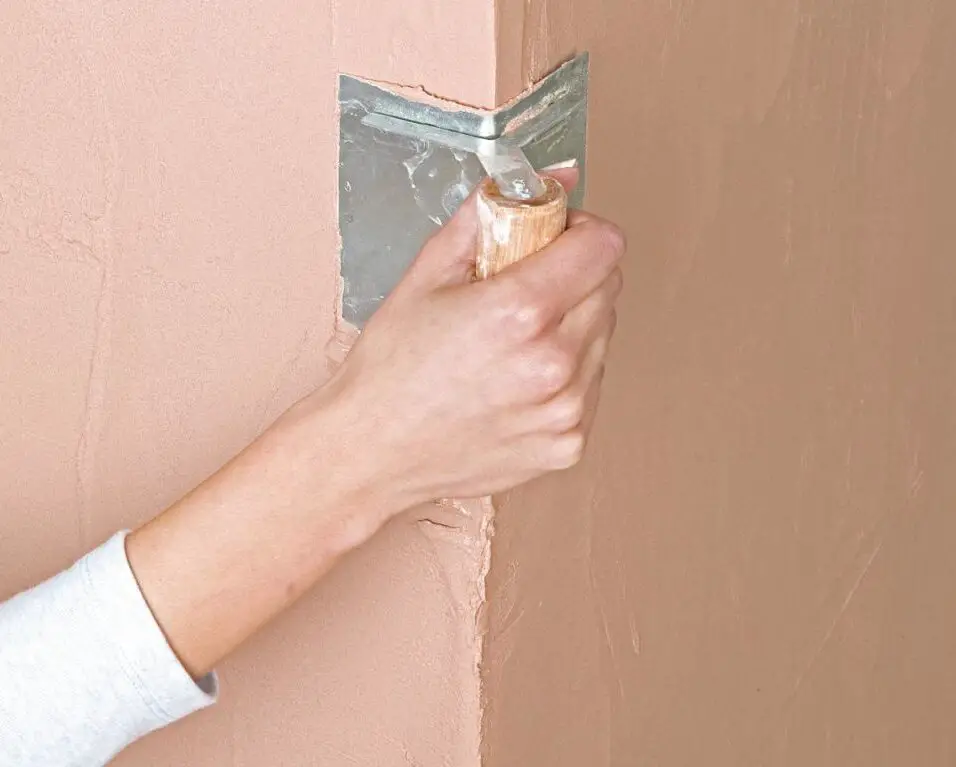
After all the panels have been installed, it is important to give them a finishing touch. Fill any gaps or seams between the panels with caulk or putty, ensuring a smooth and even surface. Once the caulk or putty has dried, sand the surface lightly to remove any rough edges or imperfections. Finally, apply a coat of paint or stain to the paneling to enhance its appearance and protect it from wear and tear. With these final steps, your decorative wall paneling installation is complete, and you can now enjoy the beauty and elegance it brings to your space.
Installing decorative wall paneling is a rewarding DIY project that can significantly enhance the overall look of your home. By following these step-by-step instructions, you can achieve a professional-looking installation and create a stunning focal point in any room.

Is wall paneling easy to install?
Installing paneling is easy, especially when you remember these tips: With unfinished walls, nail paneling sheets right onto the studs or blocks of wood nailed between the studs. When nailing into plastered walls, you may need to attach furring strips first to provide a secure place for the nail to grab hold.
Wall paneling refers to the process of covering the walls of a room with panels made of various materials such as wood, plastic, or fabric. It is a popular choice for homeowners and interior designers due to its ability to enhance the aesthetic appeal of a space while also providing practical benefits. Many people are interested in knowing whether wall paneling is easy to install, and in this article, we will explore this topic in detail.
Firstly, it is important to note that the ease of installing wall paneling depends on several factors, including the type of paneling material, the condition of the walls, and the individual’s level of experience and skill. However, in general, wall paneling can be a relatively straightforward and hassle-free process, especially when compared to other home improvement projects.
One of the main advantages of wall paneling is its versatility.
Whether you prefer a traditional, rustic look or a more modern and sleek design, there are numerous options available to suit your taste and style. Additionally, wall paneling can be installed in various patterns and configurations, allowing for endless possibilities in terms of creativity and customization.
However, it is important to note that certain types of wall paneling may require professional installation or more advanced skills. For example, installing solid wood paneling or intricate designs may be more challenging and time-consuming. In such cases, it is advisable to seek the assistance of a professional carpenter or contractor to ensure a high-quality and durable installation.
While the ease of installing wall paneling may vary depending on various factors, it is generally considered to be a relatively straightforward process. With the wide range of paneling materials and styles available, individuals can easily find an option that suits their preferences and skill level. Whether you are looking to add a touch of elegance to your living room or create a cozy atmosphere in your bedroom, wall paneling can be a great choice for enhancing the overall look and feel of your space.
How do you prepare a wall for Panelling?
- Prep. The first step for installing paneling is to remove all wall plates, outlets and any nails in the wall.
- Measure. To install sheet paneling, determine how many sheets you will need.
- Level.
- Trim to Fit.
- Cut Openings.
- Apply Adhesive.
- Use Finishing Nails.
Introduction:
Preparing a wall for paneling is an essential step to ensure a smooth and professional-looking finish. Whether you are planning to install wood, PVC, or any other type of paneling, proper preparation is crucial for the success of your project.
Step 1: Assess the Wall Condition
Before starting the preparation, it is important to assess the condition of the wall. Check for any cracks, holes, or uneven surfaces that may need to be repaired. Use a putty knife to fill in any gaps or cracks with spackling compound. Once the compound is dry, sand it down to create a smooth surface. This step is crucial as it ensures that the paneling adheres properly to the wall.
Step 2: Clean the Wall
Next, thoroughly clean the wall to remove any dirt, dust, or grease. Use a mild detergent mixed with water and a sponge or cloth to wipe down the entire surface. Pay special attention to areas near windows, doors, and corners where dirt tends to accumulate. Rinse the wall with clean water and allow it to dry completely before proceeding to the next step.
Step 3: Apply a Primer
Applying a primer is an important step in preparing the wall for paneling. It helps to create a smooth and even surface, enhances the adhesion of the paneling, and prevents the wall from absorbing moisture. Choose a primer that is suitable for the type of paneling you are using and apply it evenly using a paint roller or brush. Allow the primer to dry completely before moving on to the next step.
Step 4: Measure and Mark
Before installing the paneling, it is crucial to measure and mark the wall accurately. Use a measuring tape and a pencil to mark the desired height and width of the paneling. This step ensures that the paneling is installed straight and aligned properly. Take into consideration any electrical outlets or switches on the wall and make necessary adjustments to accommodate them.
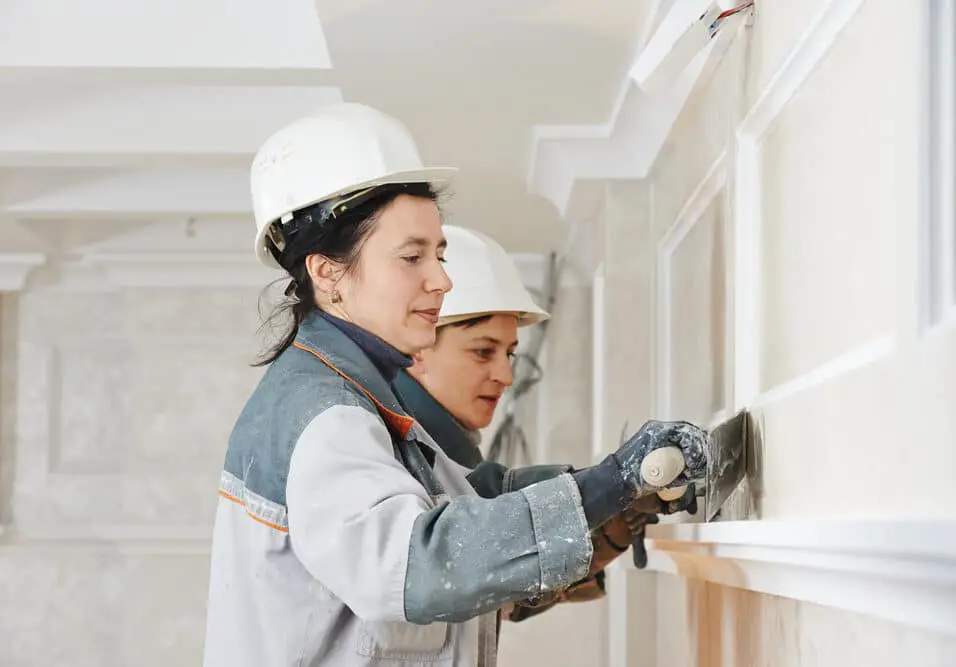
Step 5: Install the Paneling
Once the wall is properly prepared, it is time to install the paneling. Follow the manufacturer’s instructions for your specific type of paneling. Start from one corner and work your way across the wall, using adhesive or nails to secure the paneling in place. Use a level to ensure that the paneling is straight and make any necessary adjustments as you go along. Trim the paneling as needed to fit around windows, doors, or other obstacles.
By following these steps and taking the time to properly prepare the wall, you can ensure a successful and professional-looking paneling installation. Remember to always refer to the specific instructions provided by the manufacturer of your chosen paneling material for the best results.
What is decorative paneling called?
Wainscoting is a decorative wood paneling that protects the lower half of your walls. Beadboard panels are a style of wainscoting that comes in thin long strips of wood (like the photo above). The wood in beadboard is typically vertical and capped in between two thicker boards.
Decorative paneling is a term used to describe a type of wall covering that adds aesthetic appeal and character to interior spaces. It is a popular choice for both residential and commercial settings, as it offers a versatile and stylish way to enhance the overall design of a room.
One of the key advantages of decorative paneling is its ability to add depth and dimension to a space. By incorporating different materials, patterns, and finishes, paneling can create visual interest and make a room feel more dynamic. For example, wood paneling can bring warmth and a natural element to a room, while metal or glass paneling can add a contemporary and sleek touch. Additionally, paneling can be used to create unique patterns or designs on walls, further enhancing the overall aesthetic appeal.
Another benefit of decorative paneling is its versatility.
It may be adapted to many design styles. Paneling can be installed vertically, horizontally, or diagonally, depending on the impact. To customize, it can be mixed with wallpaper or paint. Paneling is also easy to install and remove, making it ideal for frequent decorators.
In addition to its decorative purposes, paneling can also serve functional roles. It can act as an insulator, helping to regulate temperature and reduce noise levels in a room. Paneling can also provide protection to walls, preventing damage from everyday wear and tear. Moreover, some types of paneling are moisture-resistant, making them suitable for use in areas such as bathrooms or kitchens.
Decorative paneling is a versatile and stylish option for enhancing the design of interior spaces. With its ability to add depth, dimension, and visual interest, paneling can transform the look and feel of a room. Whether used as a focal point or as an accent feature, paneling offers a wide range of possibilities to suit different design preferences and styles. Its functional benefits, such as insulation and protection, further contribute to its appeal. Overall, decorative paneling is a popular choice for those looking to create a visually appealing and unique interior environment.
What material to use for wall panelling?
Touted as the best material for wall panelling, MDF offers a wide array of benefits. MDF stands for Medium Density Fiberboard which is strong yet can be easily moulded and finished to create artistic wall panel designs and patterns. If you love simple, clean designs then this MDF panelling is a must-have.
Wall panelling is a popular choice for enhancing the aesthetic appeal of interior spaces. It not only adds a touch of elegance and sophistication but also provides practical benefits such as insulation and soundproofing. In this article, we will explore some of the most commonly used materials for wall panelling and their unique characteristics.
Wood is a classic choice for wall panelling due to its timeless beauty and versatility. It can be crafted into various designs and finishes, ranging from traditional to contemporary. Wood panelling adds warmth and richness to any space, making it a popular choice for living rooms, bedrooms, and dining areas. However, it requires regular maintenance to prevent warping or cracking.
MDF (Medium Density Fiberboard)
Another popular material for wall panelling. It is made from wood fibers and resin, resulting in a smooth and uniform surface. MDF panelling is cost-effective and offers a wide range of design options. It can be easily painted or laminated to achieve different looks. However, it is not as durable as solid wood and may be prone to moisture damage.
PVC (Polyvinyl Chloride) panelling is a practical choice for areas with high moisture, such as bathrooms and kitchens. It is resistant to water, mold, and mildew, making it easy to clean and maintain. PVC panelling comes in various colors and textures, allowing for creative design possibilities. However, it may not offer the same level of elegance as wood or other materials.
Stone and brick panelling can add a rustic and natural charm to any space. They are durable and require minimal maintenance.
In conclusion, the choice of material for wall panelling depends on personal preferences, budget, and the desired style of the space. Wood, MDF, PVC, stone, and brick are all viable options, each with its own unique characteristics and benefits. Consider the durability, maintenance requirements, and design possibilities when making a decision. Whether you prefer the timeless elegance of wood or the practicality of PVC, wall panelling can transform any room into a visually stunning and functional space.
How do you panel a wall step by step?
How to panel a wall: Step-by-step DIY tutorial
1: Measuring your wall. The tricky bit.
2: Ordering the mdf.
3: Installing the panelling.
4: Adding a ledge.
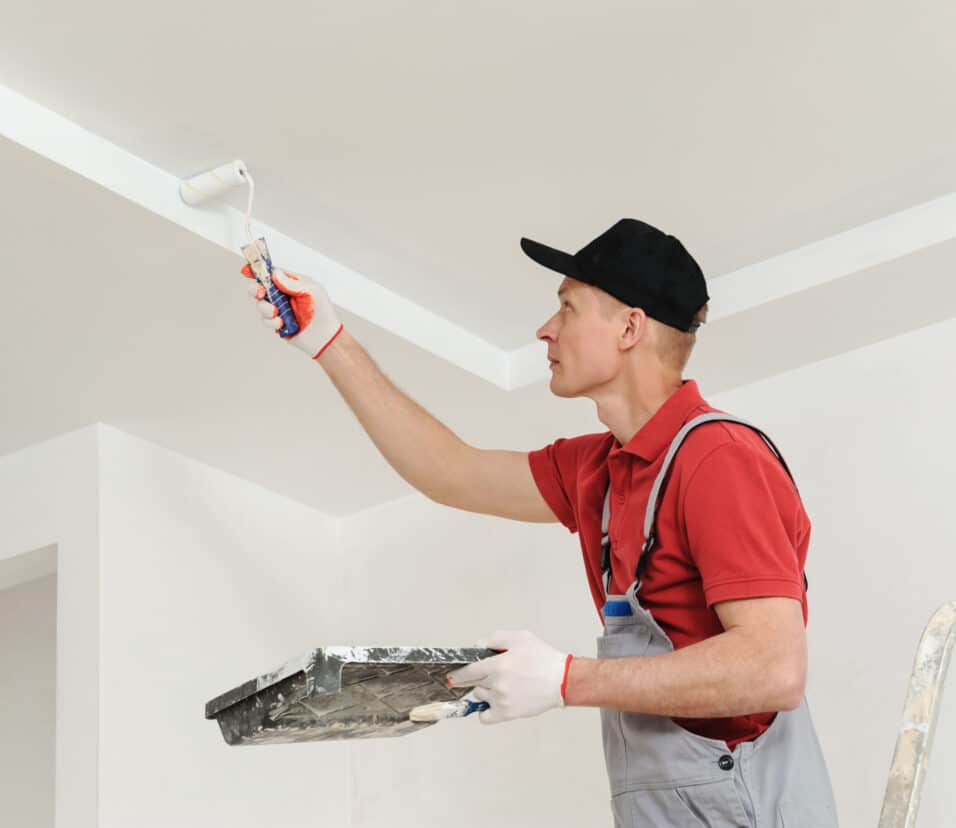
5: Caulking.
6: Prep and paint.
Paneling a wall step by step
Paneling a wall is a great way to add texture, depth, and visual interest to any room. Whether you want to create a cozy and rustic atmosphere or a sleek and modern look, paneling can transform the appearance of your walls. In this guide, we will walk you through the step-by-step process of paneling a wall, from preparation to installation.
Step 1: Prepare the wall
Before you begin paneling, it is essential to prepare the wall properly. Start by removing any existing wallpaper or paint and repairing any cracks or holes. Clean the wall thoroughly to ensure a smooth surface for the paneling. If necessary, sand the wall to remove any imperfections.
Step 2: Measure and cut the panels
Measure the height and width of the wall to determine the size of the panels you will need. It is recommended to start paneling from the bottom and work your way up. Use a saw or a utility knife to cut the panels to the desired size. Remember to leave a small gap between the panels and the floor and ceiling to allow for expansion.
Step 3: Apply adhesive
Apply a construction adhesive to the back of each panel using a caulk gun. Make sure to spread the adhesive evenly to ensure a secure bond. Press the panel firmly against the wall, starting from one corner and working your way across. Use a level to ensure that the panel is straight and plumb.
Step 4: Secure the panels
Once the panel is in place, use a nail gun or paneling nails to secure it to the wall. Place the nails along the edges and in the center of the panel, making sure they are driven flush with the surface. Repeat this process for each panel, ensuring that they are tightly fitted together.
By following these steps, you can panel a wall and achieve a professional-looking result. Remember to take your time and pay attention to detail for the best outcome. Paneling can be a rewarding DIY project that adds character and style to your home.
When it comes to decorative wall paneling, there are numerous options available to suit various styles and preferences. One popular type is wood paneling, which adds a warm and natural touch to any space. Wood paneling comes in different finishes such as oak, pine, and cedar, allowing you to choose the one that best complements your interior design.
In addition to these options, there are also decorative wall panels made from materials like fabric, leather, and acrylic. These panels offer a softer and more textured look, perfect for adding visual interest to your walls. Ultimately, the type of decorative wall paneling you choose will depend on your personal style, the desired ambiance of the room, and the level of maintenance you are willing to undertake.
How do I properly prepare the wall surface before installing decorative wall paneling?
Before installing decorative wall paneling, it is crucial to properly prepare the wall surface to ensure a successful and long-lasting installation. The first step is to thoroughly clean the wall to remove any dirt, dust, or grease that may hinder the paneling’s adhesion. Use a mild detergent and water solution, and scrub the wall gently with a sponge or soft cloth. Rinse the wall with clean water and allow it to dry completely before proceeding.
Next, inspect the wall for any imperfections such as cracks, holes, or uneven surfaces. Fill in any cracks or holes with a suitable filler or spackle, and use sandpaper to smooth out any rough areas. It is important to achieve a smooth and even surface to ensure the paneling adheres properly.
Once the wall is clean and repaired, it is recommended to prime the surface before installing the decorative wall paneling. Priming helps to create a better bond between the wall and the paneling, ensuring a more secure installation. Choose a primer that is suitable for the type of wall surface you have, whether it is drywall, wood, or another material. Apply the primer according to the manufacturer’s instructions and allow it to dry completely before proceeding with the installation.
What tools and materials are needed to install decorative wall paneling?
When it comes to installing decorative wall paneling, there are several essential tools and materials that you will need to ensure a successful installation. Firstly, you will need a measuring tape to accurately measure the dimensions of your wall and the panels themselves. This will help you determine the number of panels required and ensure a precise fit.
A level is crucial for achieving a professional-looking installation. Other important tools include a pencil for marking the wall and panels, a utility knife for cutting the panels to size, and a caulking gun for applying adhesive or caulk.
When it comes to materials, you will need adhesive or caulk to secure the panels to the wall. Additionally, you may need screws or nails for added support, depending on the type of paneling you are installing.
Are there any specific techniques or tips for ensuring a seamless and professional-looking installation of decorative wall paneling?
When it comes to achieving a seamless and professional-looking installation of decorative wall paneling, there are a few techniques and tips that can greatly enhance the overall result. Firstly, it is crucial to properly measure and plan the layout of the panels before starting the installation process. This includes taking accurate measurements of the wall and determining the best placement for each panel.
Another important technique is to ensure that the wall surface is clean, smooth, and properly prepared before installing the decorative wall paneling. This involves removing any existing wallpaper, paint, or debris from the wall and repairing any imperfections such as cracks or holes.
Furthermore, taking the time to carefully align and level each panel during installation is key to achieving a seamless and professional look. Using a level and measuring tape can help ensure that the panels are straight and evenly spaced.
By properly measuring and planning the layout, preparing the wall surface, using the right adhesive, and ensuring precise alignment, you can achieve a seamless and professional-looking installation of decorative wall paneling. Following these techniques and tips will not only enhance the aesthetic appeal of your space but also contribute to the longevity and durability of the paneling.
Are there any maintenance or care instructions to follow after installing decorative wall paneling to keep it in good condition?
After installing decorative wall paneling, it is important to follow certain maintenance and care instructions to ensure its longevity and keep it in good condition. Regular cleaning is essential to remove dust, dirt, and any other debris that may accumulate on the surface of the panels. Use a soft cloth or sponge dampened with a mild detergent solution to gently wipe down the panels, taking care not to scrub too hard or use abrasive cleaners that could damage the finish.
Moisture can cause warping or swelling of the panels, leading to potential damage. Therefore, it is important to keep the panels away from areas with high humidity or direct water contact.
Furthermore, it is advisable to protect the decorative wall paneling from direct sunlight, as prolonged exposure to UV rays can fade or discolor the panels over time. Consider using curtains or blinds to shield the panels from direct sunlight, especially in rooms with large windows. Additionally, avoid placing hot objects or exposing the panels to extreme heat sources, as this can cause the material to warp or melt.

Conclusion
Overall, installing decorative wall paneling can be a great way to enhance the aesthetic appeal of any space. Whether you are looking to add a touch of elegance to your living room or create a cozy atmosphere in your bedroom, wall paneling offers a versatile and stylish solution. By following the instructions provided, you can easily transform your walls and give your space a fresh new look.
Furthermore, decorative wall paneling offers a wide range of design options to suit any style or preference. Whether you prefer a classic, traditional look or a more modern, contemporary design, there are paneling options available to match your taste. From sleek and minimalist designs to intricate and ornate patterns, you can find the perfect panels to complement your existing decor and create a cohesive and visually appealing space.
Installing decorative wall paneling is a fantastic way to add beauty and style to any room. With its easy installation process, durability, and wide range of design options, wall paneling offers a practical and aesthetically pleasing solution. By following the provided instructions and taking the time to carefully select the right panels for your space, you can transform your walls and create a stunning focal point that will impress both residents and guests alike.