How To Install Unfaced Insulation In Ceiling
Introduction
How To Install Unfaced Insulation In Ceiling: Installing unfaced insulation in a ceiling is a crucial step towards enhancing the energy efficiency and comfort of your home. Unfaced insulation, which lacks a vapor barrier or backing, is an excellent choice for ceilings as it helps regulate indoor temperatures and control sound transmission without impeding moisture management. This guide will walk you through the essential steps of properly installing unfaced insulation in your ceiling. Before you begin, ensure you have the necessary tools and safety equipment, including gloves, a mask, safety goggles, a utility knife, a tape measure, and a ladder.
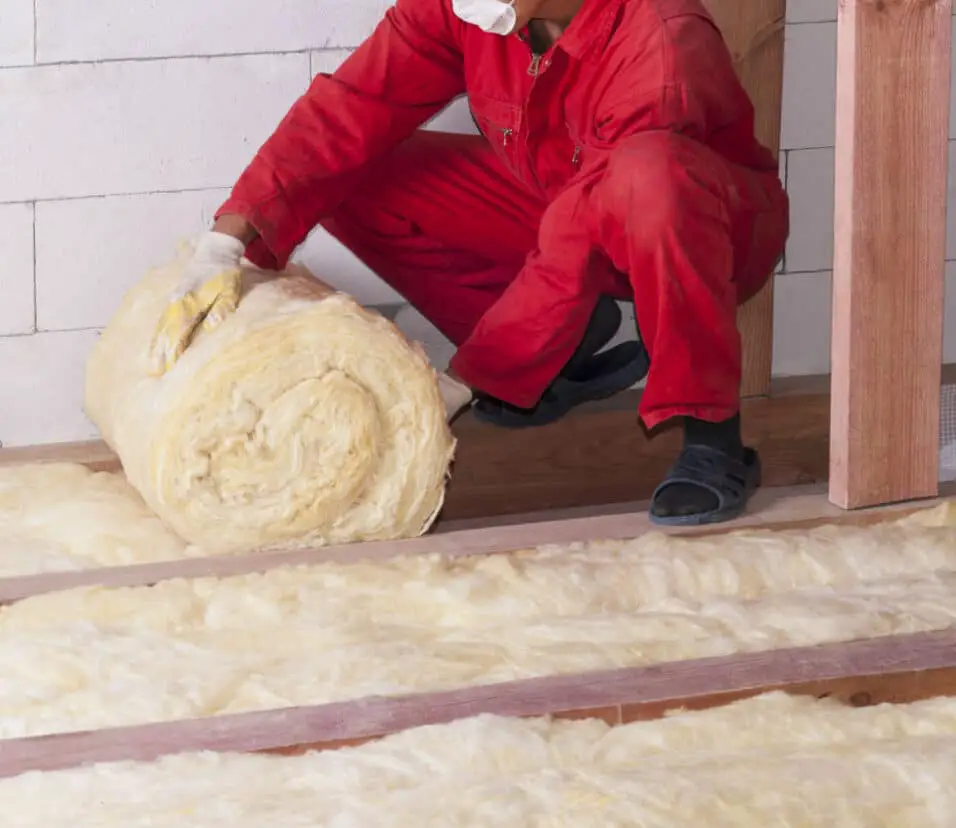
Start by measuring the dimensions of your ceiling to determine the amount of board insulation needed. Remember to account for any obstacles such as vents or electrical fixtures. Preparation is key. Clear the area of any debris or obstructions, and make sure the attic or crawl space above the ceiling is accessible. Carefully read the manufacturer’s instructions on handling and installing the insulation.
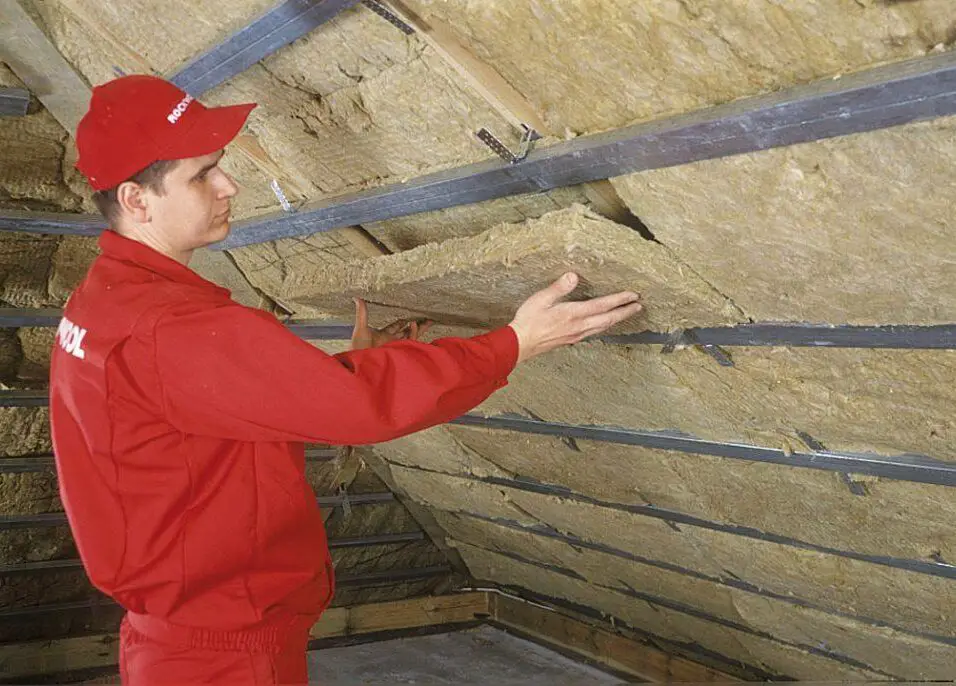
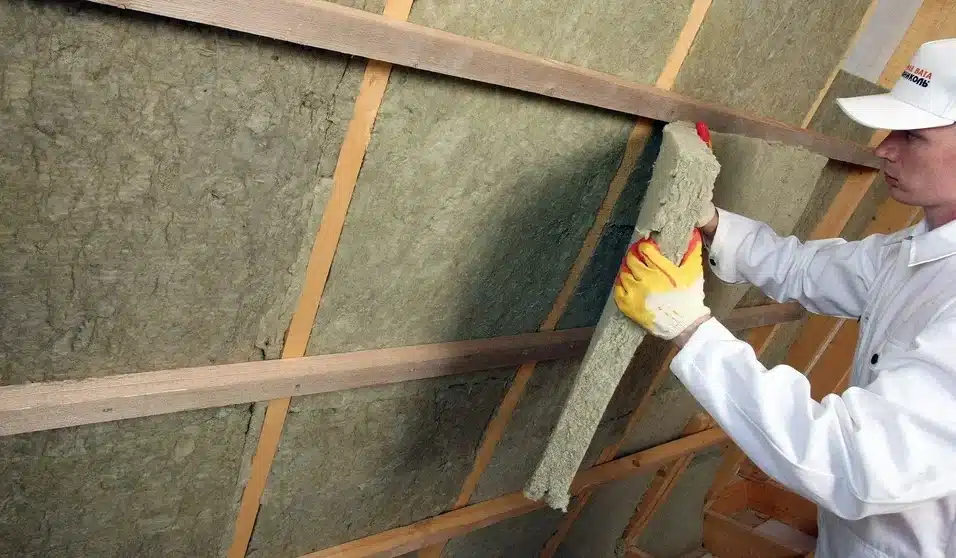
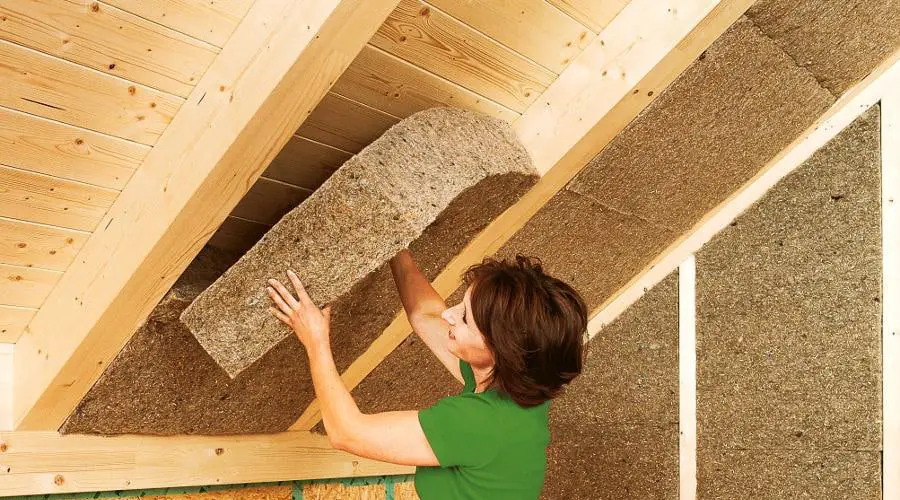
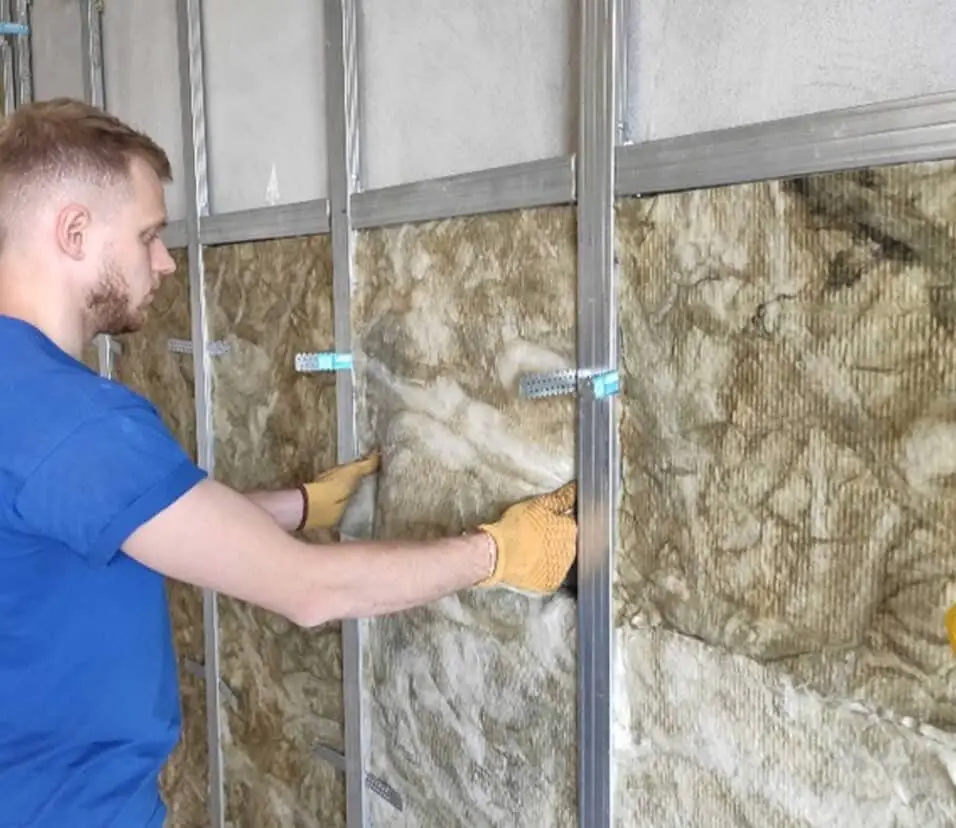
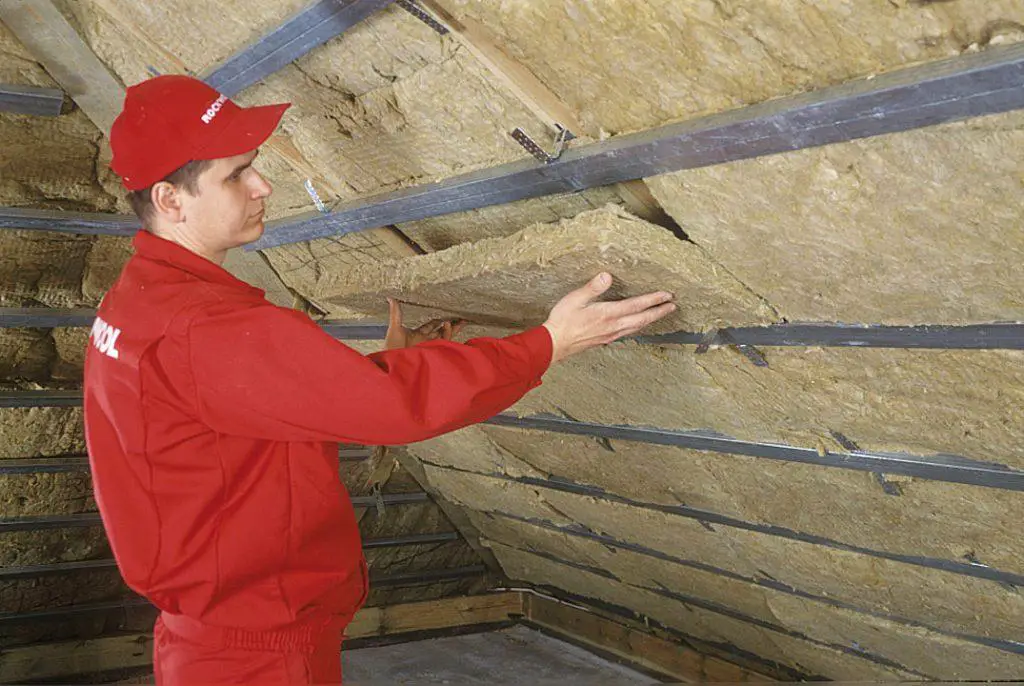
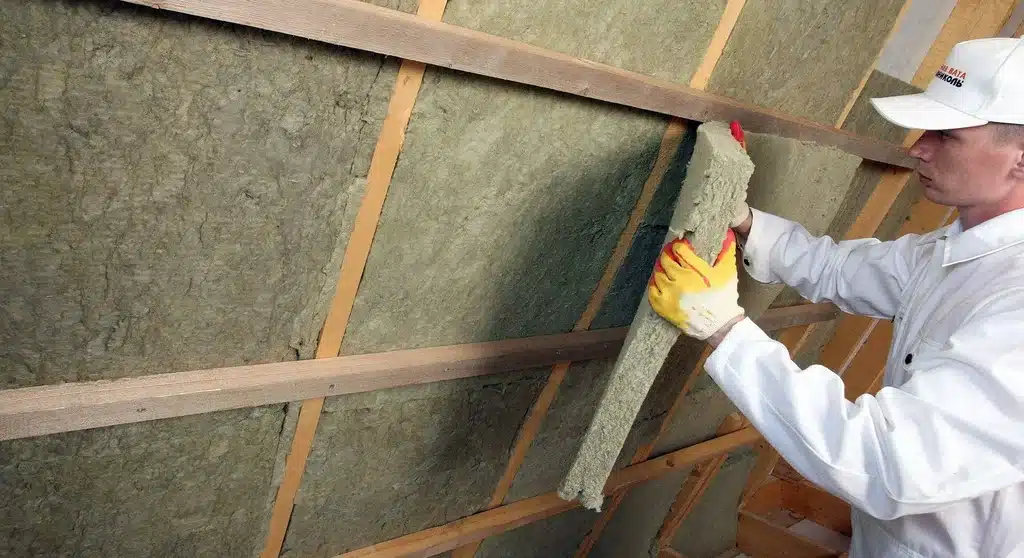
When installing, work methodically across the ceiling, starting from one corner and progressing systematically. Fit the insulation snugly between joists or beams, ensuring there are no gaps or compressed areas. Maintain proper clearances around vents and fixtures to prevent overheating. Handle the insulation material with care to avoid irritation.

Can you use unfaced insulation in ceiling?
New construction, remodels, walls, floors, ceilings, basements, attics, and crawlspaces benefit from unfaced insulation. It works well for indoor wall applications that don’t face the outdoors and in rooms without moisture management, like living rooms, dining rooms, and studies.
Ceilings can have unfaced insulation. In some cases, ceiling installations might use unfaced insulation without a vapor barrier or backing. Unfaced insulation is useful in attics and other well-ventilated ceilings where moisture management is not a priority.
Flexibility makes unfaced insulation ideal for ceilings. It’s easier to place between joists or beams without stapling or securing to a vapor barrier. This insulation is ideal for adding to existing insulation or when the ceiling has a vapor barrier.
However, local construction rules and climate may affect the decision between faced and unfaced insulation. Professionals or local building authorities can assist you choose the right insulation for ceiling installation. Unfaced insulation improves ceiling thermal performance and comfort in some situations.
How do you keep unfaced insulation from falling down?
Use mechanical fasteners, such as staples or clips to attach the insulation to the studs or joists. You can also use an adhesive to glue the insulation in place. The last method is to install a vapor barrier over the insulation, which will help to keep it in place and prevent it from sag- ping.
To prevent unfaced insulation from falling down, proper installation techniques and supporting mechanisms are essential. Since unfaced insulation lacks a vapor barrier or backing, it can be more prone to shifting or settling over time. To mitigate this issue, ensure a snug and secure fit between the insulation and the framing members, such as joists or beams.
One effective method is to use insulation supports, like wire mesh or insulation hangers, to hold the insulation in place. These supports can be installed perpendicular to the framing members, providing a framework that prevents the insulation from sagging. Additionally, avoid over compression of the insulation, as it can reduce its effectiveness and cause it to settle.
For added stability, consider creating a raised platform within the ceiling by attaching additional framing members perpendicular to the existing joists, forming a “cage” to hold the insulation securely. Properly sealing gaps and joints also contributes to insulation stability and overall performance.
What insulation is good for ceiling?
Many installers will reply without hesitation that wool will be the best for a ceiling, especially in energy-efficient buildings. This may be mineral wool (ceiling insulation wool) or glass wool.
When selecting insulation for ceilings, several factors come into play to ensure optimal performance and energy efficiency. Among the various options, blown-in fiberglass, cellulose, and spray foam insulation are popular choices.
Blown-in fiberglass insulation offers excellent thermal resistance and is relatively easy to install in attics or areas with irregular framing. It forms a seamless blanket that covers gaps and voids, providing consistent coverage. Cellulose insulation, made from recycled paper, is another effective choice. It has the advantage of being eco-friendly, and its dense composition effectively reduces air infiltration and offers sound control.
Spray foam insulation, both open-cell and closed-cell varieties, is known for its exceptional insulating properties and ability to create an airtight seal. This makes it a great option for ceilings where air leakage can be a concern. It provides high R-values and acts as both an insulator and an air barrier. Ultimately, the best insulation for your ceiling depends on factors like your climate, budget, and the level of existing insulation. Consulting with professionals can help you make an informed decision tailored to your specific needs, ensuring an energy-efficient, comfortable, and well-insulated living space.
Should ceiling insulation be faced or unfaced?
Faced insulation is best for locations prone to moisture, while unfaced insulation is best for dry, interior locations.
The choice between faced and unfaced insulation for ceilings depends on the specific requirements of your project and the climate conditions in your region. Faced insulation, with its built-in vapor barrier or foil facing, is ideal in areas where moisture control is crucial, such as humid climates or spaces prone to condensation. The facing helps prevent moisture from entering the insulation and causing damage.
On the other hand, unfaced insulation is a suitable option for ceilings in well-ventilated spaces where moisture management is less of a concern. Unfaced insulation can be beneficial when adding to existing insulation, as it can easily integrate without impeding existing vapor barriers. It’s also appropriate for ceilings in attics or crawl spaces that are properly ventilated, as it allows moisture to escape and contributes to better air circulation.
To make the right decision, consider consulting local building codes, climate conditions, and the advice of professionals. In some cases, a combination of both faced and unfaced insulation might be recommended to achieve the desired level of thermal efficiency and moisture control for your ceiling insulation project.
What are the essential tools and safety equipment needed before beginning the installation of unfaced insulation in a ceiling?
Before embarking on the installation of unfaced insulation in a ceiling, it’s crucial to gather the essential tools and safety equipment to ensure a smooth and secure process. Safety should be a top priority, so be prepared with safety gear such as gloves, a mask, and safety goggles to protect yourself from potential irritants in the insulation material.
In terms of tools, a utility knife is necessary for cutting the insulation to fit between ceiling joists accurately. A tape measure is indispensable for taking precise measurements of the ceiling area to determine the required amount of insulation. A sturdy ladder is essential to safely access the installation area, especially if the ceiling is located in an attic or a high space.
While not an exhaustive list, these tools and safety equipment form the foundation of a successful insulation installation. Always refer to manufacturer guidelines and any relevant safety standards when selecting tools and gear. By being properly equipped, you can ensure both your safety and the effectiveness of the unfaced insulation installation in your ceiling.
How should you measure your ceiling accurately to determine the amount of unfaced insulation required for the project?
Accurate measurement of your ceiling is pivotal in determining the precise amount of unfaced insulation required for your project. To achieve this, start by measuring the length and width of the ceiling area in feet using a tape measure. Multiply these two dimensions to calculate the total square footage.
Next, account for any obstructions such as vents, chimneys, or fixtures that won’t be insulated. Measure their dimensions and subtract their square footage from the total. This will provide the net area that needs insulation.
Keep in mind the desired R-value for your insulation, which corresponds to the level of thermal resistance you want to achieve. Consult local building codes or insulation guidelines to determine the recommended R-value for your region.
Divide the net area by the coverage area of a single insulation batt or roll to find the number of units required. It’s advisable to purchase slightly more insulation than calculated to account for any waste or gaps during installation. By meticulously measuring your ceiling and factoring in insulation thickness and R-value, you can ensure that you have the right amount of unfaced insulation to effectively insulate your ceiling and create a comfortable and energy-efficient indoor environment.
What key preparations should be made in the area before installing unfaced insulation in the ceiling?
Effective preparations are vital before installing unfaced insulation in a ceiling to ensure a successful and hassle-free process. Firstly, clear the area of any debris, clutter, or obstacles that could hinder installation or pose safety risks. This includes removing stored items, ensuring access to the attic or ceiling space is unobstructed, and creating a clean and organized workspace.
Inspect the ceiling for any existing insulation or damaged areas that might need repair before installing the new insulation. Address any leaks or structural issues to prevent future complications. Ensure that you have all the necessary tools and safety equipment ready, including gloves, a mask, safety goggles, a utility knife, a tape measure, and a sturdy ladder. This helps create a safe environment for both yourself and the installation process.
If necessary, mark the ceiling joists or framing members where the insulation will be placed, ensuring accurate and consistent placement. This step contributes to a uniform and effective insulation layer. Finally, familiarize yourself with the manufacturer’s instructions for handling and installing the specific type of unfaced insulation you’re using. Adhering to these guidelines is essential for proper installation and insulation performance.
By meticulously preparing the installation area and gathering the required tools, you lay the foundation for a successful unfaced insulation installation that enhances your home’s energy efficiency and comfort.
Can you provide an overview of the step-by-step process of installing unfaced insulation in a ceiling?
The step-by-step process of installing unfaced insulation in a ceiling involves several key stages. Begin by preparing the area, clearing any debris and ensuring access to the ceiling space. Wear appropriate safety gear like gloves, a mask, and safety goggles.
Measure and Calculate: Accurately measure the ceiling dimensions and subtract the area of any obstructions. Calculate the required insulation amount based on the desired R-value and the insulation’s coverage area.
Mark Framing: If needed, mark the framing members (joists or beams) on the ceiling to guide the insulation placement.
Cut Insulation: Using a utility knife, cut the unfaced insulation rolls or batts to the appropriate length to fit between the framing members. Make sure the insulation fits snugly without compression.
Install Insulation: Begin installing insulation at one corner and work your way systematically across the ceiling. Fit the insulation between framing members, gently pushing it into place. Avoid leaving gaps or compressing the insulation, as this affects its effectiveness.
Around Obstacles: Cut and fit insulation carefully around vents, fixtures, or other obstacles, ensuring they’re well-covered without hindering airflow.
Complete the Area: Continue installing insulation until the entire ceiling area is covered. Double-check for consistent coverage and no gaps.
Safety and Clean-Up: Once the insulation is in place, ensure it doesn’t block ventilation paths or fixtures. Clean up any debris and secure insulation supports like wire mesh if required.
Sealing: Seal any gaps or joints to prevent air leakage and maintain insulation integrity.
Dispose of Waste: Dispose of any waste material properly and in accordance with local regulations.
By meticulously following these steps and adhering to safety guidelines, you can successfully install unfaced insulation in your ceiling, contributing to improved energy efficiency and overall comfort in your living space.
Conclusion
Installing unfaced insulation in your ceiling is a practical and beneficial endeavor that can significantly enhance your home’s energy efficiency and overall comfort. By carefully following the steps outlined in this guide, you can ensure a successful insulation installation process.
Proper preparation, including measuring your ceiling accurately and clearing the area of any obstacles, sets the stage for a smooth installation. Remember to prioritize safety by wearing the appropriate gear and adhering to manufacturer guidelines. Working methodically across the ceiling, fitting the insulation snugly between joists, and maintaining clearances around fixtures will contribute to optimal insulation performance.
The advantages of this installation are manifold. Unfaced insulation provides effective temperature regulation and sound control, all while allowing proper moisture management. By taking the time to install insulation correctly, you’re making a proactive step toward a more energy-efficient and comfortable living space.
Incorporating unfaced insulation in your ceiling not only improves the thermal efficiency of your home but also offers long-term benefits, reducing energy bills and minimizing environmental impact. This project is a worthy investment in the long-term well-being of your home and those who inhabit it.