How To Install Rolled Insulation In Ceiling
Introduction
How To Install Rolled Insulation In Ceiling: Installing rolled insulation in a ceiling is a crucial step in enhancing energy efficiency and maintaining indoor comfort. By creating a thermal barrier that prevents heat loss or gain, you can significantly reduce energy bills and ensure a cozy living space year-round. Whether you’re embarking on a home improvement project or constructing a new property, mastering the art of installing rolled insulation is essential. This guide will walk you through the process, providing clear, step-by-step instructions to make your insulation installation a seamless experience.
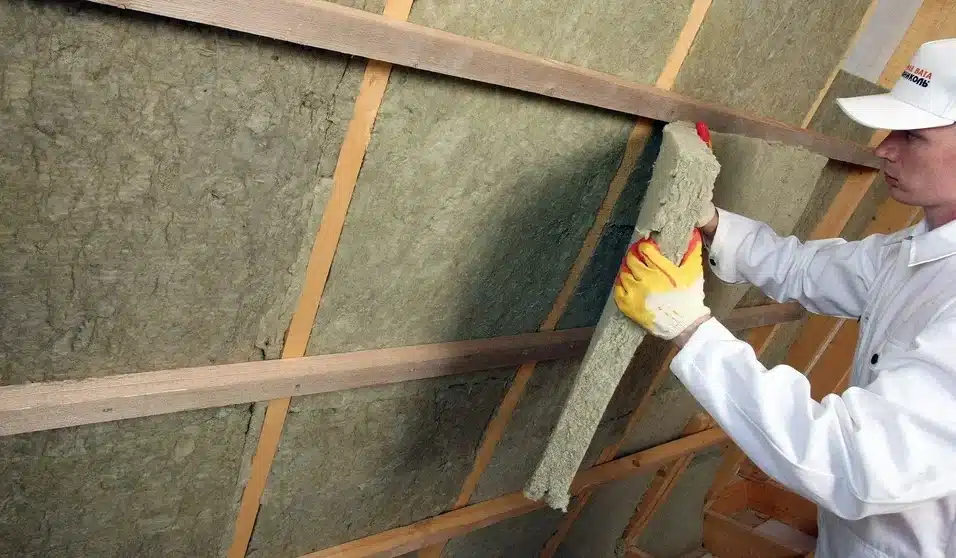
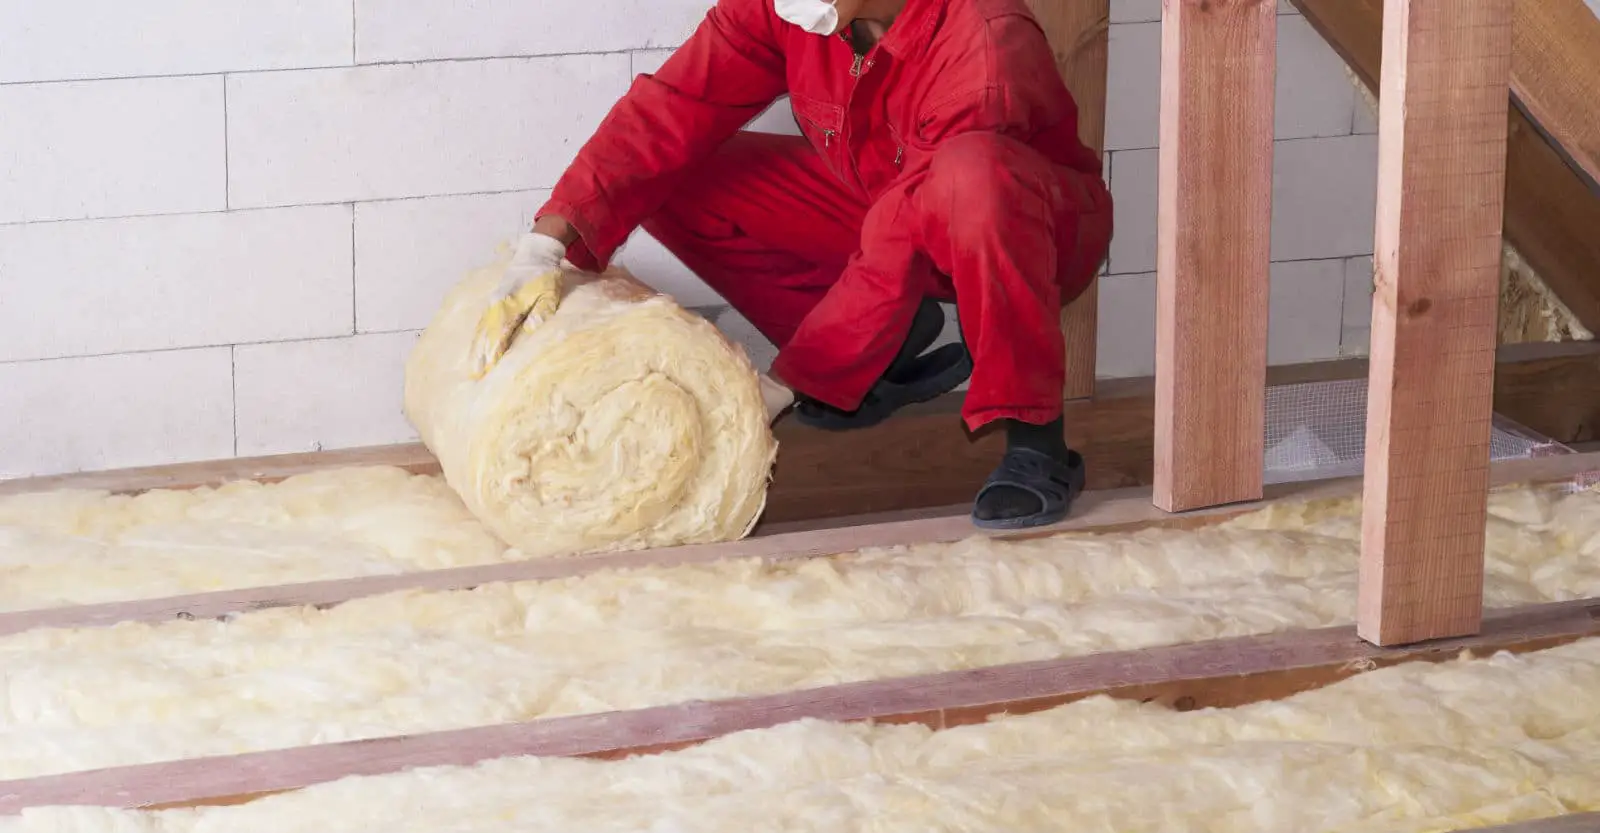
Before you begin, it’s important to gather the necessary tools and materials, including the rolled insulation itself, a utility knife, measuring tape, safety gear (gloves, goggles, and a mask), a staple gun, and a ladder. Proper preparation is key to ensuring a successful installation. Throughout the process, safety remains paramount, so be sure to take necessary precautions to protect yourself from potential hazards.
In the following sections, we will delve into the detailed steps of installing rolled board insulation in your ceiling. From measuring and cutting the insulation to fitting it securely between the joists, this guide will provide you with the knowledge and confidence needed to effectively complete the task. With a little patience and attention to detail, you’ll be well on your way to a well-insulated ceiling that promotes energy efficiency and enhances the overall comfort of your living space.
Can you use rolled insulation on ceiling?
While rolls can be ‘rolled’ out between the ceiling joists, insulation batts are installed in pieces.
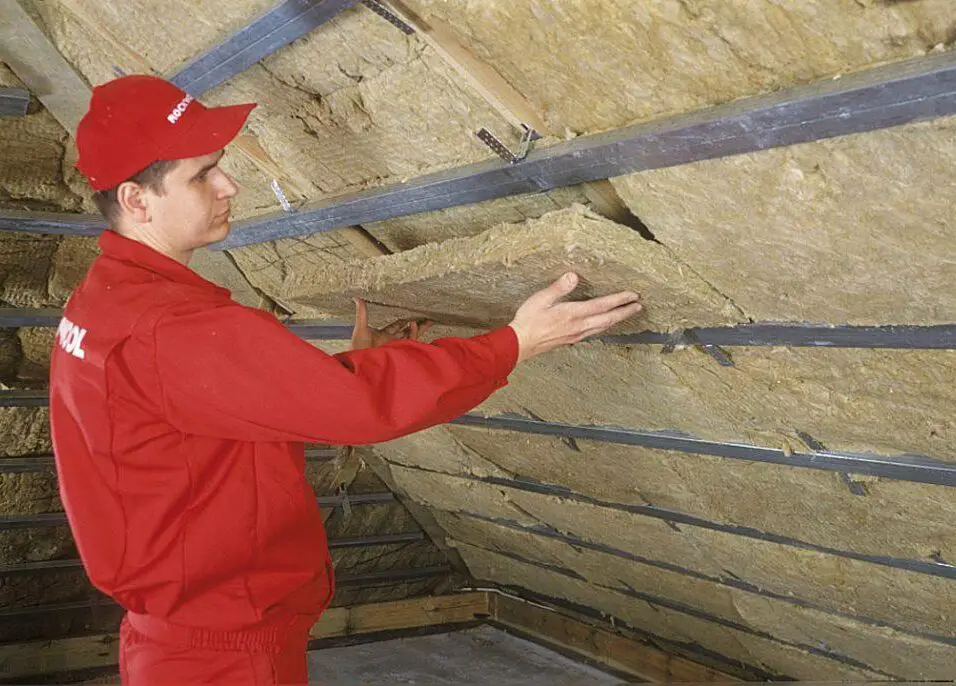
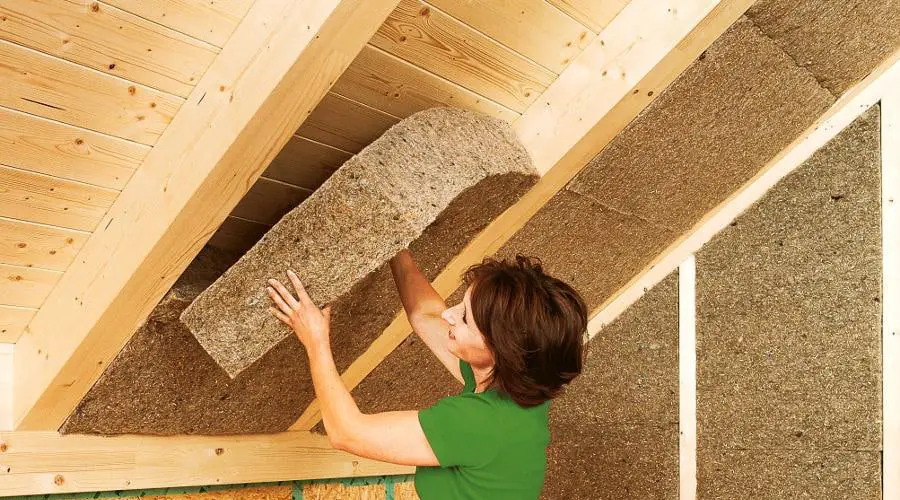
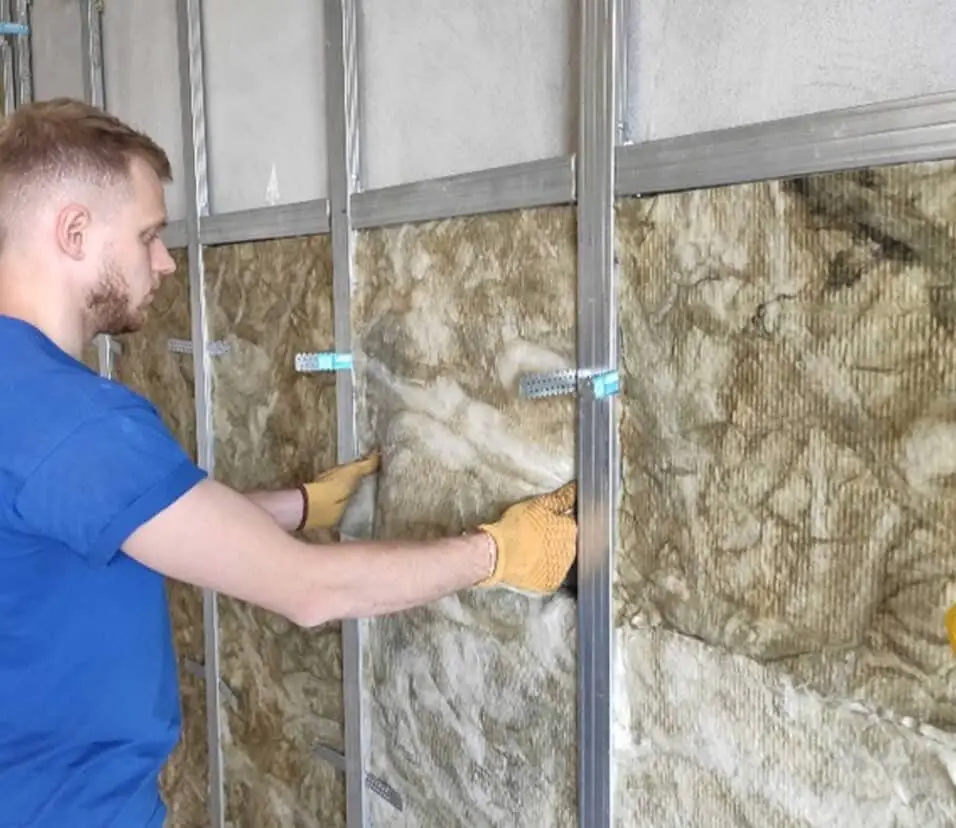
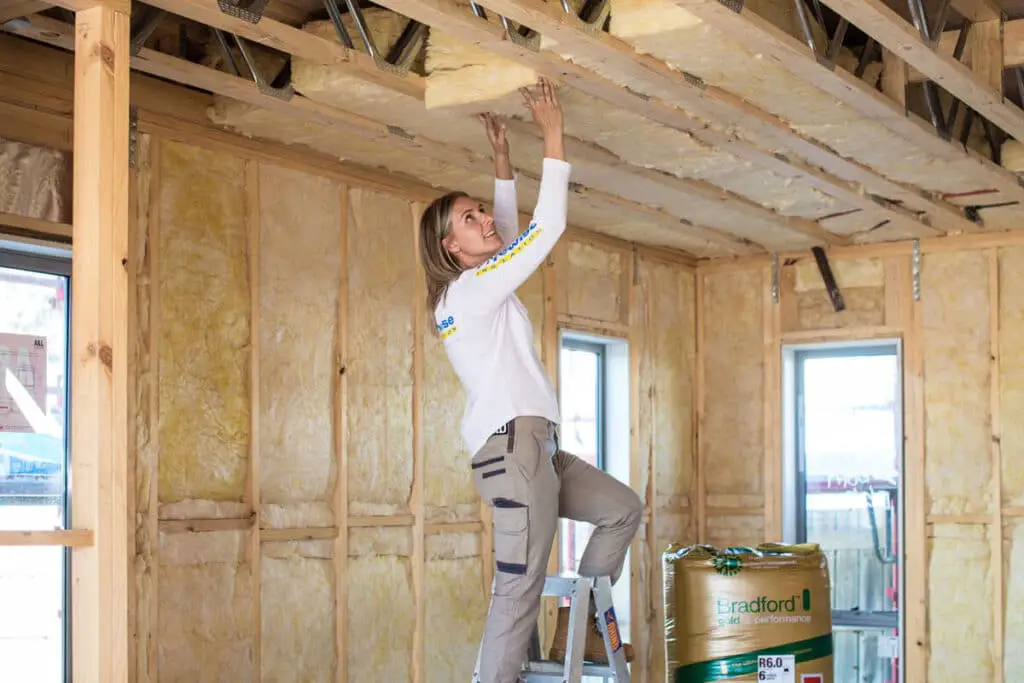
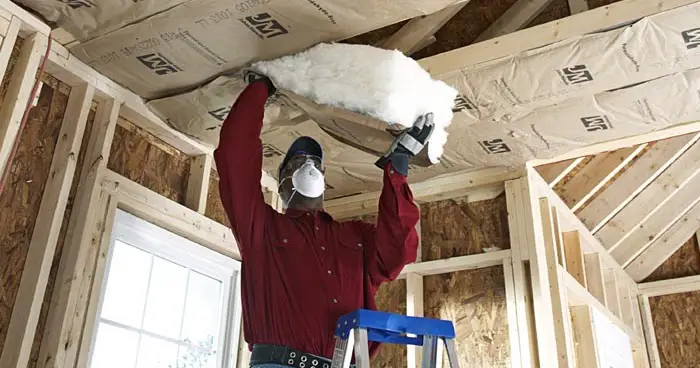
Installing rolled insulation in ceilings involves carefully unrolling the material between the ceiling joists, ensuring a snug fit without compression. This helps create a thermal barrier that prevents heat transfer between your living space and the outdoors. It’s important to follow proper installation guidelines, leaving no gaps or spaces that could compromise the insulation’s effectiveness. Additionally, safety precautions such as wearing appropriate protective gear and working in a well-ventilated area should be observed. Proper installation, adherence to guidelines, and attention to detail are key to achieving optimal results.
Can I install ceiling insulation myself?
The good news is, you can do it yourself without much hassle if you have the right insulation batts. Our blog today will be concentrating on steps you should take to install insulation in your home’s ceiling.
Yes, you can certainly install ceiling insulation yourself, but it’s essential to approach the task with the right knowledge, tools, and safety precautions. Installing ceiling insulation can be a rewarding DIY project that contributes to energy savings and increased comfort in your home. However, it requires careful planning and attention to detail.
Before you begin, thoroughly research the type of insulation that suits your needs and the specific requirements of your ceiling structure. Rolled insulation is a popular choice for ceilings and is relatively straightforward to install. Make sure to wear appropriate safety gear, including gloves, goggles, and a mask, to protect yourself from potential irritants in some insulation materials.
Prepare the installation area by clearing any obstacles, ensuring proper ventilation, and taking necessary measurements. Follow manufacturer guidelines and best practices for unrolling and placing the insulation between the ceiling joists. Avoid compressing the insulation, as this can reduce its effectiveness. Take care to seal any gaps or joints to maintain a continuous thermal barrier.
What is roll insulation used for?
Rolled Insulation
Best for unfinished walls, floors, ceilings and wherever long and continuous insulation pieces are needed. Available in pre-cut widths to fit between studs and joists.
Roll insulation is commonly used to provide thermal insulation in various parts of buildings, making them more energy-efficient and comfortable. It is designed in the form of rolls, which are easy to transport, handle, and install. This type of insulation is often made from materials like fiberglass, mineral wool, or natural fibers.
One of the primary uses of roll insulation is for insulating walls, attics, and ceilings. When installed in walls, it helps prevent heat loss during colder months and heat gain during warmer months, creating a more consistent indoor temperature. In attics, roll insulation is placed between joists or rafters to reduce heat transfer between the attic and living spaces. It’s also commonly used to insulate crawl spaces and floors, providing a barrier against temperature fluctuations and improving overall energy efficiency.
Which side of rolled insulation faces out?
Fiberglass insulation with a vapor barrier (Kraft paper or foil on one side) requires careful face selection. Always face the warm-in-winter side. Thus, it should face the interior in cold areas and the exterior in hot, humid climates.
Due to changes in manufacturer’s instructions and insulation type, it’s important to follow them when installing rolled insulation. However, rolled insulation’s paper or foil facing usually faces the building.
The face of rolled insulation is functional. If the insulation has a vapor barrier (paper or foil), it should face the warm side of the building, the interior. A vapor barrier prevents moisture from penetrating insulation and causing mold development and performance loss. This structure prevents moisture from entering the insulation and condensing toward the cooler exterior in cold climes.
When installing rolled insulation without a facing, place the bulk of the insulation between framing parts like wall studs or ceiling joists and face the inside. Always follow the manufacturer’s instructions for your insulation product and local building codes for insulation installation.
What are the essential tools and materials required for installing rolled insulation in a ceiling?
To successfully install rolled insulation in a ceiling, you’ll need a set of essential tools and materials. Firstly, you’ll require the rolled insulation itself, available in various materials like fiberglass, mineral wool, or natural fibers. Other necessary materials include vapor barriers or facings if recommended by the insulation type. Additionally, a staple gun and staples are crucial for securing the insulation in place between the ceiling joists.
Safety gear is paramount, so ensure you have gloves, safety goggles, and a dust mask to protect against potential irritants. A utility knife is essential for accurately cutting the insulation to the required lengths, while a measuring tape will help ensure precise fits. A ladder or scaffold is needed for safe access to the ceiling area. Lastly, having a flashlight on hand can assist in navigating dimly lit spaces and identifying potential obstructions.
By gathering these tools and materials, you’ll be well-equipped to execute a successful installation of rolled insulation in your ceiling, contributing to energy efficiency and improved indoor comfort.
How does proper insulation in the ceiling contribute to energy efficiency and indoor comfort?
Proper insulation in the ceiling plays a pivotal role in enhancing both energy efficiency and indoor comfort within a building. By creating a thermal barrier between the interior and exterior spaces, ceiling insulation minimizes heat transfer, effectively preventing heat from escaping during colder months and preventing heat from infiltrating during warmer periods. This insulation layer reduces the workload on heating and cooling systems, resulting in substantial energy savings and lower utility bills.
Moreover, adequate ceiling insulation contributes to maintaining a consistent indoor temperature. It prevents cold drafts in winter and hot spots in summer, ensuring a more comfortable living environment year-round. By reducing temperature fluctuations, occupants can enjoy a cozy atmosphere without over-relying on heating or cooling equipment.
Beyond temperature control, ceiling insulation also aids in noise reduction, as it acts as a sound barrier, dampening both airborne and impact-related noises. This contributes to a quieter and more peaceful indoor atmosphere.
Proper ceiling insulation is a crucial investment that significantly improves energy efficiency, reduces utility costs, enhances indoor comfort, and fosters a quieter living environment. It’s a key step toward creating a sustainable and pleasant living space while also contributing to overall environmental conservation.
What safety precautions should be taken before and during the installation of rolled insulation in a ceiling?
Firstly, wear appropriate personal protective equipment (PPE) to shield yourself from potential hazards. This includes safety goggles to protect your eyes from debris, gloves to prevent skin irritation, and a dust mask to avoid inhaling particles from the insulation material.
Prior to starting, ensure the area is well-ventilated by opening windows and using fans if necessary. This helps minimize the concentration of airborne particles and fumes, promoting better air quality.
When working in an elevated area like a ceiling, use a sturdy ladder or scaffold and ensure it’s set up on stable ground. Avoid overreaching or leaning precariously. Keep your balance and maintain three points of contact with the ladder at all times.
If the insulation material contains potential irritants, make sure to work in long sleeves and pants to minimize skin contact. Additionally, be cautious of sharp tools like utility knives and staple guns. Always point them away from your body and keep your fingers clear of the blade or trigger.
What factors should be considered when selecting the appropriate R-value for the rolled insulation in the ceiling?
Choosing the appropriate R-value for rolled insulation in a ceiling is critical to ensuring optimal energy efficiency and comfort within your space. The R-value represents the insulation’s ability to resist heat transfer, with higher values indicating better performance.
Climate Zone: The climate of your region plays a crucial role. Colder climates require higher R-values to effectively retain heat during winters and maintain comfortable indoor temperatures.
Ceiling Space: The available space between the ceiling joists will dictate the maximum thickness of insulation you can install. Adequate coverage without compressing the insulation is essential.
Building Codes: Local building codes often stipulate minimum R-values for ceilings to meet energy efficiency standards. Be sure to adhere to these regulations.
Energy Costs: If energy costs are high in your area, investing in higher R-value insulation can lead to substantial long-term savings on heating and cooling bills.
Usage: Consider how the space below the insulated ceiling will be used. Living areas may require more insulation than storage spaces.
Insulation Material: Different materials have varying R-values per inch. Research the R-value per inch of the specific insulation material you’re considering.
Future Plans: Think about potential changes to your living situation. If you plan to sell your property, a higher R-value could be an attractive selling point.
By carefully evaluating these factors, you can choose the appropriate R-value for rolled insulation in your ceiling, optimizing energy efficiency and creating a comfortable indoor environment.
Conclusion
Mastering the installation of rolled insulation in your ceiling is a valuable skill that can lead to long-lasting benefits. By taking the time to properly insulate your ceiling, you’re not only contributing to a more energy-efficient home but also creating a comfortable environment that can stand up to varying weather conditions. The step-by-step process outlined in this guide empowers you to make informed decisions throughout the installation journey.
As you wrap up your project, take a moment to appreciate the effort invested in enhancing your living space. A well-insulated ceiling can lead to reduced energy consumption, lower utility bills, and a decreased carbon footprint. It’s a home improvement endeavor that pays dividends for years to come.
Safety, precision, and attention to detail are vital throughout this process. As you admire your handiwork, you can bask in the satisfaction of a job well done, knowing that your newfound expertise in installing rolled insulation ceiling will contribute positively to your home’s efficiency and comfort. So go ahead, take the leap, and create a cozier, more energy-efficient living space through the art of rolled insulation installation.