How To Install Foam Board Insulation On Interior Walls
Introduction
How To Install Foam Board Insulation On Interior Walls: Installing foam board insulation on interior walls is a effective way to enhance energy efficiency and indoor comfort within your living space. This process involves adding a layer of foam insulation to the interior wall, creating a thermal barrier that prevents heat transfer and minimizes drafts. By improving insulation, you can regulate indoor temperatures better and potentially reduce heating and cooling costs.
We will walk you through the essential steps to successfully install foam board insulation on your interior walls. We will cover the necessary tools and materials, the preparation of the walls, and the step-by-step installation process. Whether you’re looking to increase the energy efficiency of your home or create a more comfortable living environment, foam board insulation offers a practical solution.
Prior to beginning the installation, it’s important to assess the type of foam insulation suitable for your needs and consider any safety precautions. With the right approach and attention to detail, you can complete this project with confidence, enjoying the benefits of improved insulation and enhanced indoor comfort for years to come. Read on to learn the ins and outs of installing foam board insulation on your interior walls.
Can foam board insulation be used inside?
Interior Application
Generally, Halo Interra insulation installed on interior walls should be covered. However, as we’ve said before, a number of jurisdictions in the US allow exposed foam board insulation inside a building if they’ve passed NFPA 286 testing.
Yes, foam board insulation can be used effectively on the interior of buildings. It’s a versatile and popular option for enhancing energy efficiency, thermal comfort, and noise reduction within living spaces. Installing foam board insulation on interior walls helps create a thermal barrier that prevents heat transfer through walls, thus maintaining consistent indoor temperatures. This can result in reduced energy consumption and lower utility bills.
Foam board insulation is commonly used in various interior applications, including walls, ceilings, and floors. It’s particularly advantageous when renovating or finishing spaces, as it can be added easily between wall studs or glued directly onto surfaces. Additionally, foam board insulation contributes to soundproofing, dampening noises from both within and outside the building.
When opting for foam board insulation on the interior, it’s important to choose the right type of foam board suitable for the specific needs of the area. The installation process typically involves measuring and cutting the insulation to fit snugly, followed by securing it in place using adhesive, staples, or other appropriate methods. Overall, foam board insulation serves as an effective solution for improving indoor comfort and energy efficiency, making it a valuable choice for interior applications.
How do you insulate interior walls?
If you’re adding insulation to existing interior walls, the best option is loose-fill insulation. Available in common insulation materials like mineral wool, cellulose, and fiberglass, loose-fill can be blown into a small hole cut into your drywall, minimizing the amount of work (and mess) of the project.
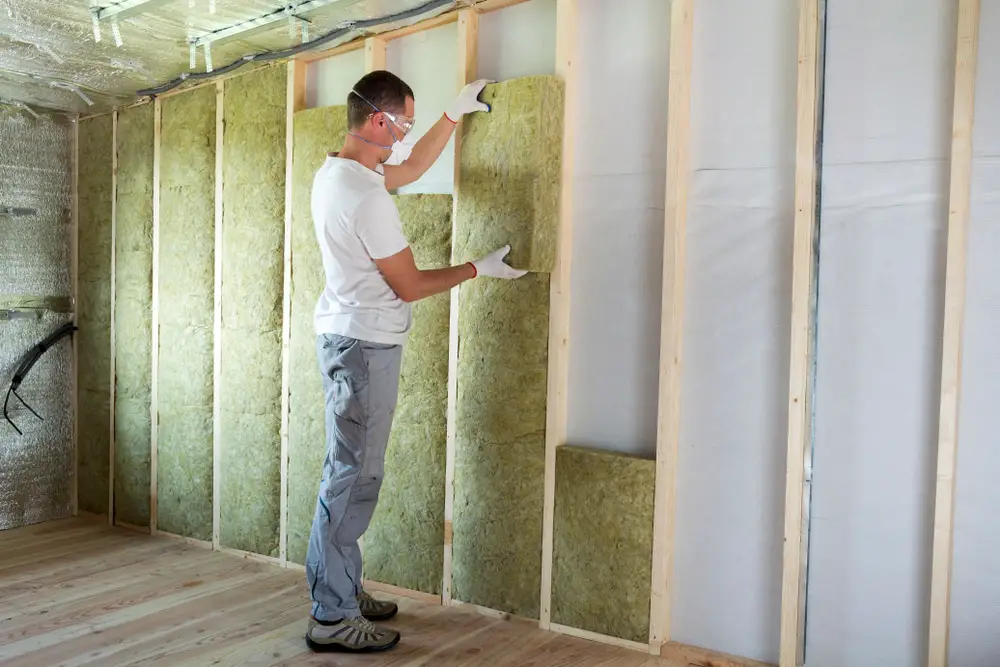
Insulating interior walls is a process that enhances both thermal comfort and energy efficiency within buildings. To insulate interior walls, start by selecting the appropriate insulation material. Fiberglass batts, cellulose, foam board, or spray foam are commonly used options. Before installing insulation, ensure the wall surface is clean and dry.
If using fiberglass batts, measure the space between wall studs and cut the batts to fit snugly. Insert them between studs, ensuring they are properly positioned and not compressed. Secure them with staples or insulation supports. For blown-in insulation like cellulose, a small hole is drilled in the wall, and the insulation is blown into the cavity.
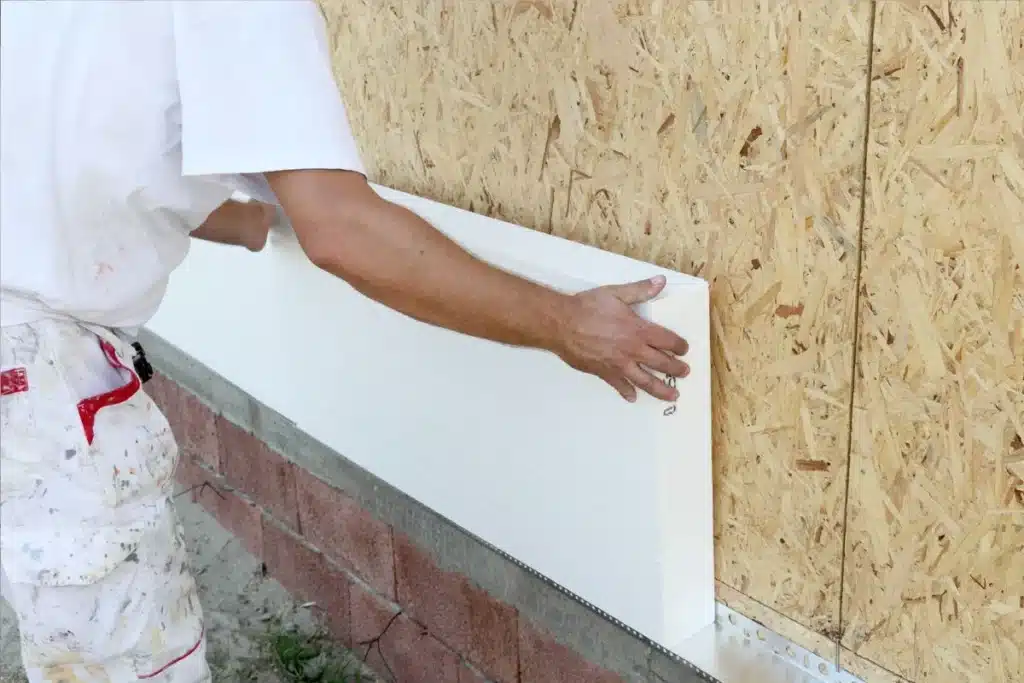
Foam board insulation can be adhered to the interior wall surface using construction adhesive. Cut the foam boards to fit around obstacles and corners accurately. Spray foam insulation is applied as a liquid that expands to fill cavities. However, professional application is recommended due to its potential mess and proper technique requirements.
Remember to follow manufacturer guidelines and local building codes throughout the insulation process. Properly insulated interior walls contribute to consistent indoor temperatures, reduced energy consumption, and improved soundproofing, fostering a more comfortable living environment.
Should you glue foam board insulation?
Insulation Foam and Adhesive Reactions
Using too much hot glue in conspicuous areas can also lead to indents and weak areas in your insulation foam, so we’d only recommend using hot glue in very hidden areas if necessary.
Yes, using adhesive to attach foam board insulation to various surfaces is a common and effective method. Gluing foam board insulation offers several benefits, such as creating a continuous and airtight barrier that minimizes heat transfer and improves energy efficiency.
When using adhesive for foam board insulation, select a high-quality construction adhesive suitable for your specific insulation material and the surface it will be attached to. Follow the adhesive manufacturer’s instructions and ensure proper ventilation during application. Before gluing, clean and dry the surface to promote better adhesion.
One advantage of gluing foam board insulation is that it eliminates the need for mechanical fasteners, preventing potential thermal bridging. It also allows for a smoother installation, especially when dealing with irregular surfaces or obstacles. However, ensure the adhesive is evenly applied and that the foam boards are securely pressed against the surface to prevent gaps or shifting.
In summary, gluing foam board insulation is a practical method that offers effective insulation and contributes to a more energy-efficient and comfortable indoor environment. Always adhere to best practices and recommended procedures to achieve optimal results in your insulation project.
What is the best adhesive for foam insulation board?
We highly recommend the original Gorilla Glue as it’s consistent and strong. We also love the spray adhesive 3M 78 Polystyrene Foam Insulation Spray Adhesive, but all of the above will work well (just be safe with the hot glue).
The best adhesive for foam insulation board depends on the type of foam insulation and the specific application. For polystyrene or polyisocyanurate foam boards, solvent-based construction adhesives are often recommended due to their compatibility with these materials. Loctite PL300 Foamboard Adhesive and DAP DynaGrip Heavy Duty Max are examples of such adhesives.
For expanded polystyrene (EPS) foam, which is more sensitive to solvents, water-based adhesives like Liquid Nails LN-609 or certain foam-specific adhesives are preferable to prevent potential damage to the foam.
When choosing an adhesive, consider factors like drying time, curing process, and environmental conditions. Ensure the adhesive provides strong initial tack and a durable bond that will withstand temperature fluctuations and moisture over time. Always follow the manufacturer’s recommendations and guidelines to ensure proper application and adhesion.
Ultimately, the best adhesive varies based on the foam insulation type and the intended surface. It’s advisable to consult the foam insulation manufacturer’s recommendations and seek advice from experts or professionals familiar with insulation installations to ensure the most suitable adhesive is selected for your specific project.
What are the essential tools and materials needed for installing foam board insulation on interior walls?
Installing foam board insulation on interior walls requires several essential tools and materials to ensure a successful and efficient process. Before you begin, gather the following items:
Foam Board Insulation: Choose the appropriate type of foam board insulation based on your specific needs and the characteristics of your interior walls. Common types include expanded polystyrene (EPS) and extruded polystyrene (XPS).
Measuring Tape and Utility Knife: Accurate measurements are crucial for cutting the foam board insulation to the right dimensions. A sharp utility knife will help you achieve clean cuts.
Straight Edge or T-Square: Use these tools to ensure precise cuts and maintain straight edges on the foam insulation.
Adhesive: Select a high-quality adhesive that is compatible with foam insulation and the surface you’re attaching it to. Solvent-based or water-based construction adhesives might be suitable, depending on the foam type.
Caulk Gun: If using adhesive in a caulk tube, a caulking gun will help you apply the adhesive smoothly and evenly.
Staple Gun or Insulation Supports: Depending on the type of foam board insulation, you may need to secure it with staples or insulation supports to keep it in place.
Safety Gear: Safety goggles, gloves, and a dust mask will help protect you from any potential irritation or health hazards while handling the insulation materials.
Straight Edge Ruler or Level: These tools can assist in ensuring that the foam board insulation is installed straight and level.
Marker or Pencil: Use these tools to mark cutting lines on the foam insulation and the wall surfaces.
Foam Applicator Gun (for Spray Foam): If using spray foam insulation, a foam applicator gun is necessary to accurately apply the foam into cavities.
Drop Cloth or Plastic Sheeting: Place these under your work area to catch any adhesive or foam overspray and prevent messes.
Having these essential tools and materials ready before you start the installation will help streamline the process and contribute to a successful foam board insulation installation on your interior walls.
How should you prepare the interior walls before starting the foam board insulation installation process?
Preparing the interior walls before installing foam board insulation is crucial to ensure a smooth and effective installation process. Follow these steps to properly prepare the walls:
Clean the Surface: Remove any dirt, dust, or debris from the wall surface using a broom, vacuum, or a damp cloth. A clean surface will promote better adhesion of the insulation and adhesive.
Repair Any Damage: Inspect the walls for any cracks, holes, or damage. Patch and repair these areas using appropriate wall repair products, and ensure the surface is smooth and even.
Address Moisture Issues: Check for signs of moisture or water damage on the walls. Address any leaks or moisture problems before proceeding, as moisture can affect the effectiveness of the insulation and lead to mold growth.
Remove Obstacles: Take down any fixtures, electrical outlets, or wall-mounted items that could hinder the installation process. This ensures the foam board insulation can be applied smoothly and evenly.
Plan for Wiring and Outlets: If applicable, consider the positioning of electrical wiring and outlets. Cut openings in the foam board insulation for these elements to pass through, ensuring a proper fit.
Layout and Marking: Use a measuring tape, level, and pencil to mark the locations where the foam board insulation will be installed. These markings will guide you during the installation process and ensure accurate placement.
Safety Precautions: Put on safety gear, including gloves, safety goggles, and a dust mask, to protect yourself from any potential irritation caused by insulation materials.
By meticulously preparing the interior walls, you create an optimal foundation for the foam board insulation installation. This preparation enhances adhesion, helps avoid potential obstacles, and ensures the insulation fits securely, contributing to improved energy efficiency and indoor comfort.
What safety precautions should you consider when working with foam board insulation on interior walls?
Working with foam board insulation on interior walls requires careful attention to safety to prevent potential health risks and ensure a smooth installation process. Here are important safety precautions to consider:
Personal Protective Equipment (PPE): Wear appropriate PPE, including safety goggles, gloves, and a dust mask. These items protect your eyes, skin, and respiratory system from potential irritation caused by insulation particles and adhesive fumes.
Ventilation: Ensure proper ventilation in the work area. Open windows and doors, and use fans to help dissipate any fumes from adhesives and minimize the concentration of airborne particles.
Avoid Ingestion and Inhalation: Avoid eating, drinking, or smoking in the work area. Also, refrain from touching your face while working with insulation to prevent accidental ingestion or inhalation of particles.
Work in a Controlled Environment: Choose a well-lit and clean workspace to minimize the risk of accidents. Clear the area of unnecessary clutter or obstacles to ensure safe movement during the installation.
Safe Handling: Handle the foam board insulation with care to avoid skin contact and irritation. When cutting insulation, direct the knife away from your body and other people.
Proper Disposal: Dispose of any waste materials, such as off-cuts or trimmings, in accordance with local regulations. Do not burn foam insulation, as it can release toxic fumes.
First Aid: Have a first aid kit readily available in case of minor cuts or injuries. Familiarize yourself with the procedures for treating cuts, scrapes, or potential allergic reactions to insulation materials.
Read Labels and Instructions: Follow the manufacturer’s instructions on adhesive application and handling of foam insulation products to ensure proper usage and adherence to safety guidelines.
By prioritizing safety precautions, you create a secure working environment that safeguards your health and well-being while ensuring the successful installation of foam board insulation on interior walls.
What are the key considerations when choosing the right type of adhesive for attaching foam board insulation to interior walls?
Selecting the appropriate adhesive for attaching foam board insulation to interior walls is crucial for a successful and long-lasting installation. Consider the following key factors when making your choice:
Compatibility: Ensure the adhesive is compatible with both the type of foam insulation you’re using (such as polystyrene, polyisocyanurate, or expanded polystyrene) and the material of the interior walls. Some adhesives may react negatively with certain foam types, compromising their integrity.
Adhesion Strength: Opt for an adhesive that provides strong initial tack and forms a durable bond between the foam insulation and the wall surface. This prevents the insulation from shifting or detaching over time.
Airtight Seal: Choose an adhesive that helps create an airtight seal, minimizing heat transfer and improving energy efficiency. An airtight seal also prevents moisture infiltration, which could lead to mold growth.
Curing Time: Consider the adhesive’s curing time. Some adhesives require longer curing periods, which may impact the pace of your installation project.
Environmental Impact: Select adhesives that have minimal volatile organic compounds (VOCs) and low toxicity levels. This choice is particularly important for indoor applications to maintain indoor air quality.
Application Method: Determine whether the adhesive can be applied using a caulk gun, foam applicator gun, or other tools. Choose an application method that aligns with your skills and the specific requirements of your installation.
Temperature and Moisture Resistance: Verify that the adhesive maintains its integrity under the expected temperature and moisture conditions within your interior space.
Manufacturer Recommendations: Always follow the adhesive manufacturer’s recommendations for application, surface preparation, and any other relevant guidelines to ensure optimal results.
By carefully considering these factors, you can choose an adhesive that not only securely attaches the foam board insulation to interior walls but also contributes to energy efficiency, durability, and overall project success.
Conclusion
Installing foam board insulation on interior walls is a valuable investment that can significantly improve your home’s energy efficiency and overall comfort. By creating a thermal barrier, you can effectively reduce heat transfer and drafts, resulting in more consistent indoor temperatures and lower energy bills.
Throughout this guide, we’ve outlined the step-by-step process of installing foam board insulation, from gathering the necessary tools and materials to preparing the walls and executing the installation. It’s crucial to choose the appropriate type of foam insulation for your specific needs and to prioritize safety during the entire process.
As you embark on this insulation project, keep in mind that attention to detail is key. Properly installed foam board insulation can have a lasting impact on your home’s sustainability and your quality of life. By minimizing temperature fluctuations, you’ll enjoy a more comfortable living space year-round.
Remember, this process might require some time and effort, but the rewards are well worth it. Not only will you experience a more energy-efficient home, but you’ll also contribute to reducing your carbon footprint. With the knowledge gained from this guide, you’re equipped to tackle the installation with confidence and achieve a more insulated, comfortable, and environmentally friendly living environment.