How To Paint A Camper Interior
Introduction
How To Paint A Camper Interior: Painting the interior of a camper can be a great way to give it a fresh, new look and make it feel more like home. Whether you have just purchased a used camper or want to update the look of your current one, painting the interior can completely transform the space. However, it can be a daunting task if you don’t know where to start or what materials to use. In this article, we will guide you through the process of painting a camper interior, from preparation to finishing touches.
Before you begin painting, it is important to properly prepare the interior of your camper. Start by removing any furniture, fixtures, or accessories that can be easily taken out. This will give you more space to work and prevent any accidental paint splatters. Next, thoroughly clean the walls, ceiling, and any other surfaces you plan to paint. Use a mild detergent and warm water to remove any dirt, grease, or grime. Once everything is clean and dry, sand the surfaces lightly to create a smooth and even base for the paint.
Choosing the Right Paint: When it comes to choosing the right choice for your camper interior paint , there are a few factors to consider. First, decide on the type of paint finish you want. Matte finishes are great for hiding imperfections, while semi-gloss or high-gloss finishes are more durable and easier to clean. Additionally, look for paint that is specifically designed for use in RVs or campers. These paints are formulated to withstand the unique conditions of a camper, such as temperature changes and vibrations.
What kind of paint do you use on camper walls?
I’ve heard every possible brand of paint recommended by different RVers! Any good brand of interior latex paint will work—especially if you have started with a good primer. RV Flipper, Erin Cherry, says she always chooses Sherwin Williams Emerald Acrylic Latex Paint for her walls and cabinets.
When it comes to painting the walls of your camper, it is important to choose the right type of paint that will adhere well to the surface and provide a durable finish. The type of paint you use on camper walls will depend on the material of the walls and the desired look you want to achieve. In general, there are a few options to consider when it comes to painting camper walls.
If your camper walls are made of wood or a wood composite material, such as plywood or particle board, you can use a regular interior paint. Look for a paint that is specifically designed for use on wood surfaces and provides good coverage and durability. It is also a good idea to use a primer before applying the paint to ensure better.
Adhesion and a smoother finish.
For camper walls made of metal, such as aluminum or steel, you will need to use a paint that is specifically formulated for use on metal surfaces. These paints are designed to adhere well to metal and provide protection against rust and corrosion. Look for a paint that is labeled as suitable for use on exterior metal surfaces.
If your camper walls are made of fiberglass, you will need to use a paint that is specifically formulated for use on fiberglass surfaces. These paints are designed to adhere well to fiberglass and provide a durable finish. Look for a paint that is labeled as suitable for use on fiberglass or marine surfaces.
Before painting your camper walls, it is important to properly prepare the surface by cleaning it and removing any dirt, grease, or loose paint. This will ensure better adhesion and a smoother finish. It is also a good idea to sand the surface lightly to create a rough texture that will help the paint adhere better.
What is the best paint to use inside a camper?
What Kind of Paint Do You Use on an RV Interior? Just like painting the inside of a house, you can use latex paint for an RV interior. Using paint with primer in it will save you time. Use a cut-in brush first to get the edges, then finish with a roller to smooth out those paint strokes.
One popular option for painting the interior of a camper is acrylic paint. Acrylic paint is known for its durability and versatility. It is available in a wide range of colors and finishes, allowing you to achieve the desired look for your camper’s interior. Acrylic paint is also easy to clean, making it ideal for a space that may be exposed to dirt and stains. Furthermore, it is resistant to moisture and mildew, which is crucial in preventing damage and maintaining.
a healthy environment inside the camper.
Another suitable paint option for the interior of a camper is enamel paint. Enamel paint is known for its durability and high-gloss finish. It provides a hard and smooth surface that is resistant to scratches and stains, making it ideal for high-traffic areas in the camper. Enamel paint is also moisture-resistant, which is important in preventing the growth of mold and mildew. However, it is important to note that enamel paint may require additional ventilation during the painting process due to its strong odor.
If you are looking for a more eco-friendly option, consider using low-VOC (volatile organic compounds) paint. Low-VOC paint is formulated with fewer harmful chemicals, making it a safer choice for both the environment and your health. It is available in a variety of finishes and colors, allowing you to achieve the desired look for your camper’s interior. Low-VOC paint is also easy to clean and resistant to moisture, making it a suitable option for the unique conditions inside a camper.
Can you paint the inside of a camper?
With the interior of your RV primed, you can begin painting, using high-quality paint that will last the longest and look the best. If you cheap out on the paint, it will last less time, which could mean you’ll be doing touchups often and maybe re-doing the entire job only a short time down the road
Yes, it is possible to paint the inside of a camper. Many people choose to paint the interior of their campers to give them a fresh, updated look or to personalize the space to their liking. Painting the inside of a camper can be a fun and rewarding DIY project that allows you to transform the space into something that reflects your personal style and preferences.
Before you begin painting the inside of your camper
It is important to properly prepare the surfaces. This includes cleaning the walls and removing any dirt, grease, or other debris. You may also need to sand the walls to create a smooth surface for the paint to adhere to. Additionally, it is recommended to use a primer before applying the paint to ensure better adhesion and a more durable finish.
When choosing paint for the interior of your camper, it is important to consider the specific needs and requirements of the space. Campers are subject to different conditions than traditional homes, such as temperature fluctuations and vibrations while on the road. Therefore, it is advisable to use paint that is specifically designed for use in RVs or campers. These paints are often more durable and resistant to these unique conditions.
When it comes to color choices, the possibilities are endless. You can opt for neutral colors to create a clean and timeless look, or you can choose bold and vibrant colors to make a statement. It is important to consider the size and layout of your camper when selecting colors, as certain shades can make a small space feel even smaller. Additionally, using lighter colors can help to make the space feel more open and airy.
What to use for camper interior walls?
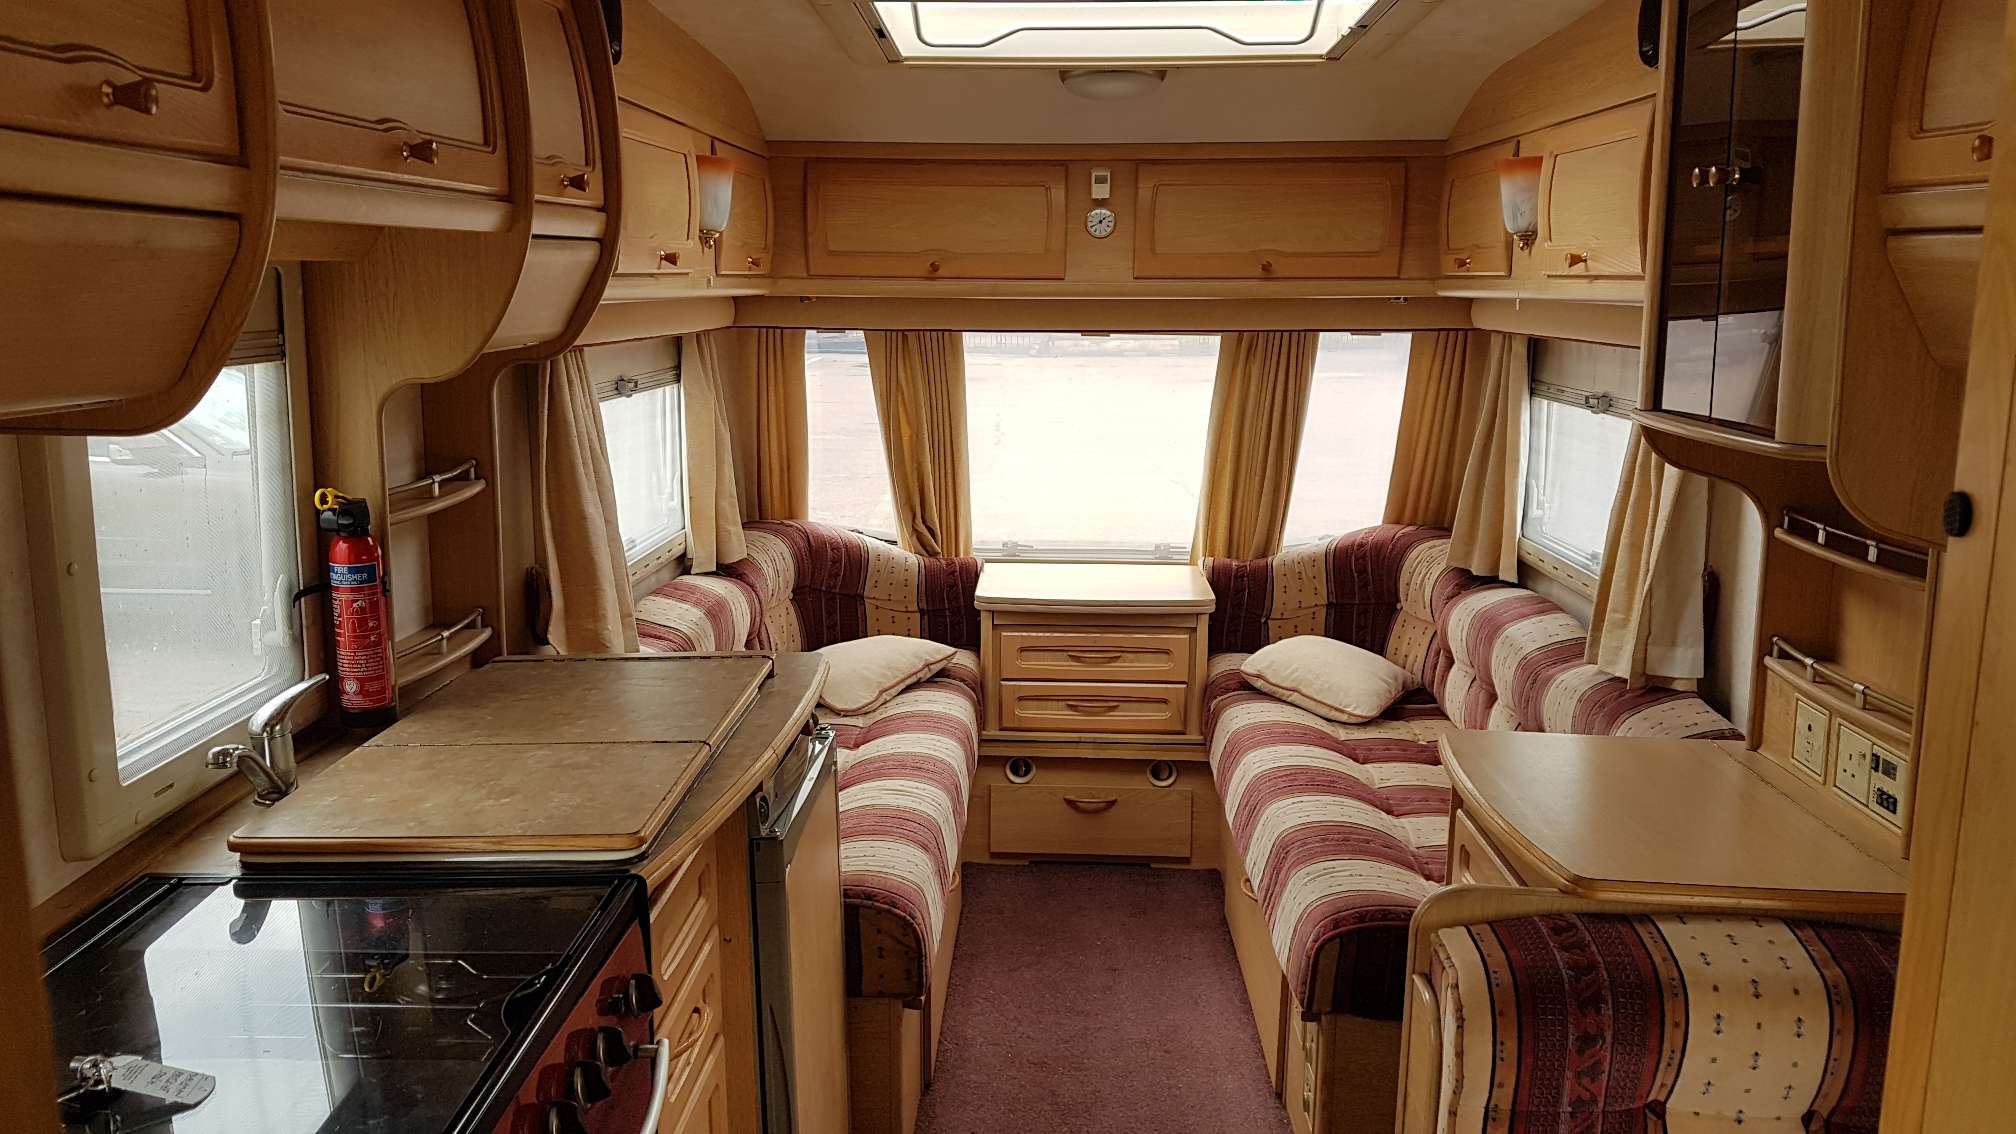
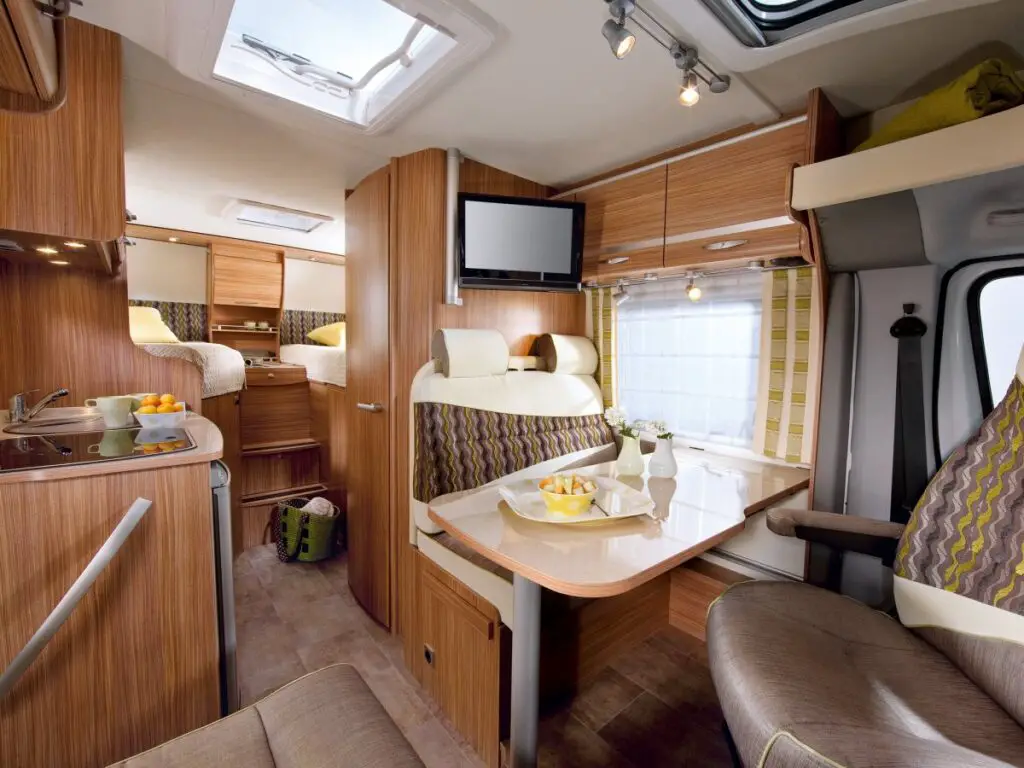
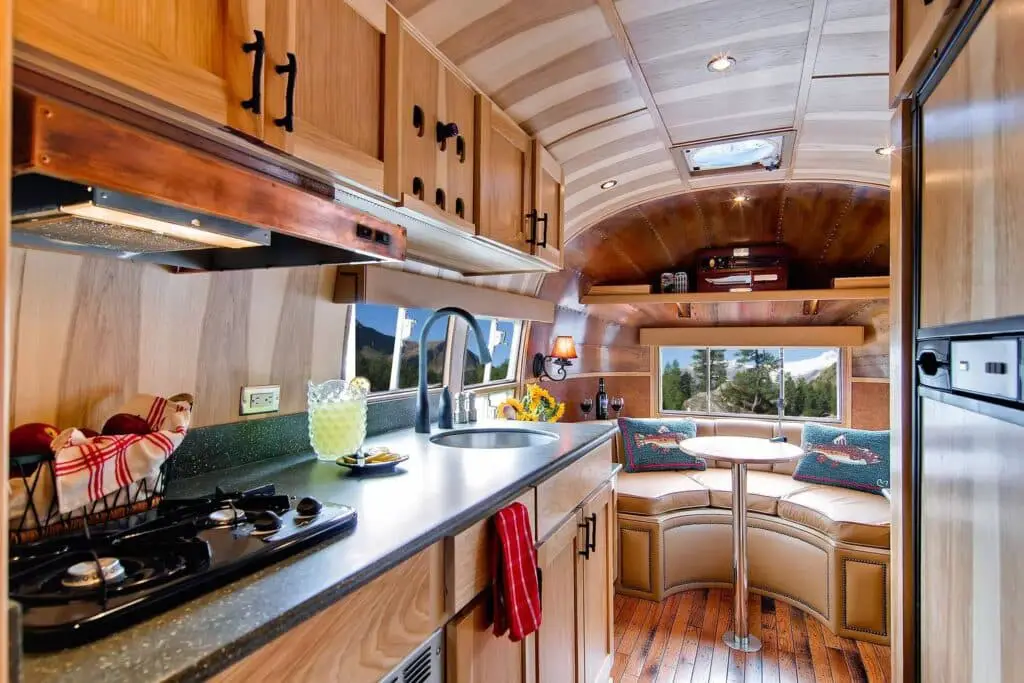
In most RVs, you’ll find that the interior layer — which includes walls and ceilings — is made up of two different materials. RV walls are usually covered in thin plywood or medium density fiberboard (MDF). In higher end or more expensive campers, you may see vinyl paneling used as well.
When it comes to designing the interior of your camper, one of the most important decisions you’ll need to make is what material to use for the walls. The walls of your camper not only serve as a structural element, but they also play a crucial role in creating a comfortable and inviting living space. There are several options available for camper interior walls, each with its own advantages and disadvantages.
One popular choice for camper interior walls is wood paneling. Wood paneling gives your camper a warm and rustic look, and it can be stained or painted to match your desired aesthetic. It is also relatively easy to install and can be a cost-effective option. However, wood paneling may not be the best choice if you plan on taking your camper off-road or if you are concerned about weight, as it can be heavy and may not withstand rough conditions.
Another option for camper interior walls is fiberglass
Fiberglass is a lightweight and durable material that is resistant to moisture and mold. It is also easy to clean and maintain, making it a popular choice for campers. However, fiberglass can be more expensive than other options, and it may not provide the same level of insulation as other materials.
One of the most versatile options for camper interior walls is vinyl. Vinyl is a lightweight and affordable material that is available in a wide range of colors and patterns. It is also easy to clean and resistant to moisture, making it a practical choice for campers. Additionally, vinyl can be easily installed and removed, allowing you to change the look of your camper’s interior whenever you want.
If you are looking for a more eco-friendly option, you may consider using bamboo for your camper interior walls. Bamboo is a sustainable and renewable material that is known for its strength and durability. It is also resistant to moisture and mold, making it a practical choice for campers. However, bamboo can be more expensive than other options, and it may require special tools and techniques for installation.
What is the best primer for camper walls?
Best Primers for RV Walls
- Glidden Gripper Acrylic Primer. Glidden is highly recommended throughout the RV renovating community.
- Zinsser Bulls Eye Water Based Primer. This was our FAVORITE primer.
- Kilz All Purpose Primer. This is what we used to prime some of our walls with.
When it comes to painting camper walls
Using a primer is essential to ensure a smooth and long-lasting finish.
One of the top choices for a primer for camper walls is a high-quality acrylic primer. Acrylic primers are known for their excellent adhesion properties and ability to seal porous surfaces. They are also easy to apply and dry quickly, making them a convenient option for camper wall painting projects. Additionally, acrylic primers are resistant to moisture and mildew, which is crucial for maintaining the integrity of the camper walls.
If you are looking for a primer that offers superior stain-blocking capabilities, an oil-based primer is a great option. Oil-based primers are known for their ability to seal in stubborn stains, such as watermarks, smoke damage, and tannin bleed.
For camper walls that have been previously painted or have a glossy finish, a bonding primer is recommended. Bonding primers are specifically designed to adhere to slick or glossy surfaces, ensuring that the paint adheres properly and does not peel or chip over time. These primers create a strong bond between the surface and the paint.
Resulting in a smooth and professional-looking finish.
Ultimately, the best primer for camper walls depends on the specific needs and conditions of your camper. Consider factors such as the type of surface, the presence of stains or previous paint, and the desired finish. It is also important to follow the manufacturer’s instructions and recommendations for the primer to achieve the best results.
Preparing a camper interior for painting involves several important steps to ensure a smooth and long-lasting finish. Firstly, it is crucial to thoroughly clean the interior surfaces to remove any dirt, grease, or grime. This can be done using a mild detergent and water solution, followed by a rinse and thorough drying.
Next, it is important to inspect the surfaces for any damages or imperfections. Any holes, cracks, or dents should be repaired using a suitable filler or putty. Once the repairs are complete, sanding the surfaces is necessary to create a smooth and even base for the paint. This can be done using a fine-grit sandpaper or a sanding block.
After sanding, it is essential to properly prime the surfaces before applying the paint. A high-quality primer specifically designed for the type of material being painted should be used. This will help the paint adhere better and provide a more durable finish.
What type of paint is recommended for painting a camper interior?
When it comes to painting a camper interior, it is important to choose the right type of paint that will adhere well to the surfaces and provide a durable finish. The recommended type of paint for painting a camper interior is acrylic latex paint. Acrylic latex paint is known for its excellent adhesion and durability, making it ideal for use on camper interiors that are subject to constant movement and potential wear and tear.
When selecting acrylic latex paint for your camper interior, it is important to choose a high-quality brand that is specifically formulated for use on interior surfaces. This will ensure that the paint provides good coverage, adheres well to the surfaces, and dries to a smooth and durable finish. It is also recommended to use a primer before applying the paint to ensure better adhesion and a more even finish.
Are there any specific techniques or tools that should be used when painting a camper interior?
When painting a camper interior, there are several specific techniques and tools that can help you achieve a professional-looking finish. Firstly, it is important to properly prepare the surface before painting. This includes cleaning the walls thoroughly to remove any dirt, grease, or previous paint residue. Sanding the walls lightly can also help create a smooth surface for the paint to adhere to.
Next, it is recommended to use a primer before applying the paint. A primer helps to seal the surface and provides a better base for the paint to adhere to. It also helps to prevent any stains or discoloration from bleeding through the paint. Choose a primer that is specifically designed for use on camper interiors.
When it comes to tools, using high-quality brushes and rollers can make a significant difference in the final result. Invest in brushes with synthetic bristles that are designed for use with latex paint. These brushes will provide a smooth and even application. Additionally, using a roller with a medium nap can help achieve a consistent finish on larger surfaces.
How long does it typically take to paint a camper interior?
The time it takes to paint a camper interior can vary depending on several factors, including the size of the camper, the condition of the walls, and the complexity of the design. On average, however, it can take anywhere from a few days to a week to complete the painting process.
Before starting the painting process, it is important to properly prepare the camper interior by cleaning the walls, removing any existing wallpaper or paint, and repairing any damages. This preparation stage can take a significant amount of time, especially if there are extensive repairs or renovations needed.
Once the preparation is complete, the actual painting process can begin. This typically involves applying a primer coat, followed by multiple coats of paint. The number of coats required will depend on the desired color and finish. Each coat of paint will need time to dry before applying the next, which can add to the overall time it takes to complete the project.
Are there any additional tips or recommendations for achieving a professional-looking paint job on a camper interior?
When it comes to achieving a professional-looking paint job on a camper interior, there are a few additional tips and recommendations that can make a big difference in the final result. Firstly, it is important to properly prepare the surface before painting. This includes cleaning the walls thoroughly to remove any dirt, grease, or grime. Sanding the walls lightly can also help to create a smooth and even surface for the paint to adhere to.
Another important tip is to use high-quality paint and tools. Investing in a good quality paint will not only ensure a better finish but also provide better durability and longevity. Additionally, using the right tools such as brushes, rollers, and paint sprayers can help to achieve a more professional-looking result. It is also recommended to use multiple thin coats of paint rather than one thick coat, as this can help to prevent drips and achieve a smoother finish.
Conclusion
It can be fun and rewarding to paint the inside of a camper. It can also make your mobile home look and feel very different. If you want to add your own style to a new or used camper and make it more unique, painting the inside is a great way to do it. An easy step-by-step guide and the right tools will help you paint the inside of your camper like a pro.
After the primer has dried, you can begin applying your chosen paint color. It is recommended to use a high-quality, water-based paint that is specifically formulated for use on camper interiors. This type of paint is durable, easy to clean, and resistant to fading and yellowing.
Painting the interior wall of a camper is a great way to update and personalize your mobile home. By following the proper steps and using the right materials, you can achieve professional-looking results that will last for years to come. Whether you are looking to create a cozy and inviting space or a bright and modern one, painting the interior of your camper allows you to express your style and make your mobile home truly your own.