How To Attach Exterior Stairs To House
Introduction
How To Fasten Exterior Stairs To House: Putting exterior steps to your home can make it look better and make it more useful. Attaching exterior ramps to your home is a creative and useful way to make it easier to get to a yard, a terraced living space, or a rooftop terrace.
Adding exterior steps not only makes it easier to get to different parts of your property, but they also make it possible to relax, party, and garden outside. With these stairs, you can easily connect your own indoor and outdoor areas, which will make your home feel bigger and friendlier. Whether you’re a seasoned DIY enthusiast or seeking professional guidance, this guide will equip you with the knowledge and insights necessary to embark on this project with confidence. From initial planning and design considerations to selecting the right materials and complying with local building codes, we will cover every aspect of attaching exterior stairs to your house flipper. You’ll discover various design options, such as straight stairs, spiral stairs, or multi-level staircases, allowing you to choose the style that best complements your home’s architecture and landscape.
Safety is the most important thing to think about when adding outdoor stairs, and this guide will talk about important things like the right support, enough lighting, non-slip surfaces, and installing handrails. By following these safety rules, you can make sure that your outside stairs not only look nice, but also give you and your guests safe, easy access.
How are stairs attached to the wall?
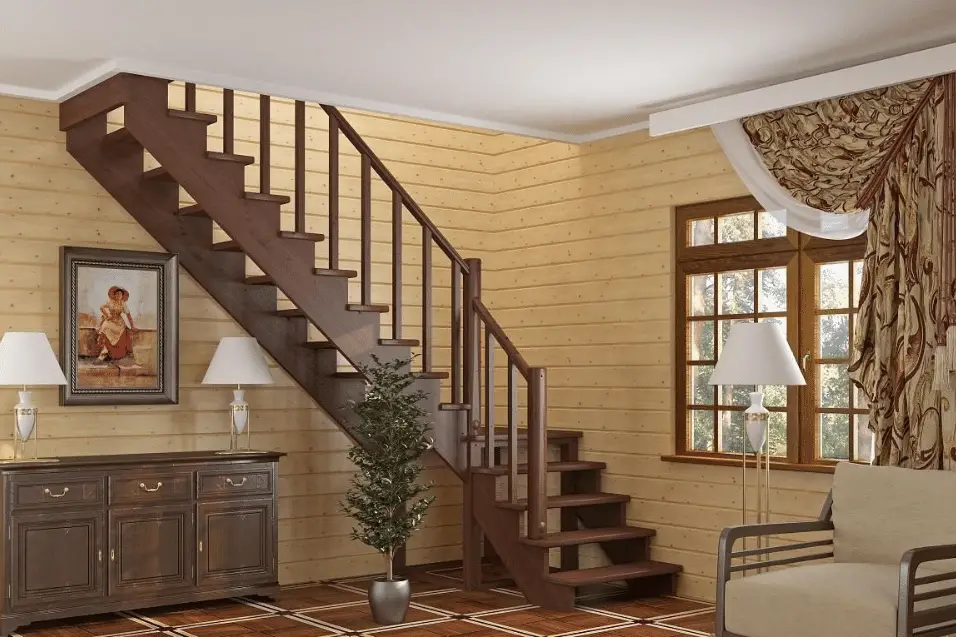
The stringer or strings board holds the wheels and risers in place. Each flight of stairs has two stringers. Both stringers are visible; the inner one is against the wall while the outer one is on the other side of the steps.
Different types of stairs and designs may require different techniques of mounting to the wall. In most cases, a set of stairs will be attached to the wall in the following manner:
Brackets and Hangers:
Wall stringers are often attached using metal hangers or brackets. These brackets are often fastened to the wall studs or other solid structural elements. Strings attached to these frames provide stability.
Wall Cleats:
Stringers can rest on wooden cleats affixed to the wall. Screws or bolts hold the stringers to the cleats.
Wall Anchors:
Stringers can be secured with specific wall anchors for concrete or masonry walls. Anchors drilled into the wall offer a secure fastening.
Balusters and Handrails:
It is very important to make sure that the way of attaching is safe and follows all local safety and building rules. Stair design, wall material, and individual preference can all influence the technique of attachment employed.
How do you waterproof external steps?
Lay a slab of your choice on a wet mortar mix to cover your steps. Point the gaps around the slabs with a wet mortar mix and press it tightly into the seams to seal the stairs.
It is important to waterproof outside steps to keep them safe from water, weather, and falling. Here are the steps to make outside steps waterproof:
Choose Waterproof Materials:
Choose materials that are waterproof For example, you can use pressure-treated timber, cedar, redwood, or naturally water-resistant composite flooring.
Seal the Wood:
If you’re using wooden steps, apply a waterproofing sealer or stain to the wood. This creates a protective barrier that prevents water penetration. Reapply the sealer periodically to maintain its effectiveness.
Install a Membrane:
Before putting on the final finish, you might want to put a waterproof covering over the steps’ surface. Waterproof membranes come in different forms, like sheet gaskets or liquid coats, and they add another layer of defense against water getting in.
Use Non-Slip Treads:
To prevent slipping on wet steps, use non-slip treads or adhesive strips designed for outdoor use. These provide extra traction and reduce the risk of accidents.
Proper Drainage:
Ensure that the steps are designed with proper drainage in mind. Water should be able to flow away from the steps to prevent pooling.
Regular Maintenance:
Inspect the steps regularly for signs of wear and damage. Replace any damaged or worn-out waterproofing materials promptly.
Gutters and Downspouts:
If the steps are close to the house, make sure that gutters and downspouts are in good working order. Redirect water away from the steps to minimize water exposure.
Elevate the Steps:
Consider raising the steps slightly above ground level to prevent direct contact with soil and reduce moisture absorption.
Choose Anti-Mold and Mildew Products:
Use anti-mold and mildew products on the steps to prevent the growth of mold and mildew, which can thrive in moist conditions.
Remember that proper waterproofing is crucial not only for the longevity of the steps but also for safety, as wet and slippery steps can lead to accidents.
What can I put on outside steps to prevent slipping?
What to put on outside steps to prevent slipping? Effective non slip carpet with a granular surface should be laid. On outdoor steps and stairs to prevent slips. GRP Sheets, GRP Stair Nosing and GRP Stair Treads are ideal for preventing slips outdoors, they are durable and easy to install.
Preventing slips and falls on outdoor steps is crucial for safety, especially in wet or icy conditions. Here are several options to consider to prevent slipping on outside steps:
Non-Slip Treads:
These treads provide traction and help prevent slipping. They are available in various sizes, colors, and patterns to match your steps.
Non-Slip Paint or Coating:
Use paint or a covering that is made to not slip that is made for outdoor use. Textured chemicals in these coatings make the surface rough and non-slip. Make sure that the color or finish will work with the steps’ surface, whether it’s concrete, wood, or something else.
Anti-Slip Adhesive Strips:
Self-adhesive anti-slip strips are easy to install on step surfaces. They are able to be used in a pattern throughout the whole step to prevent slipping or individually to high-use regions.
Non-Slip Mats:
Outdoor non-slip mats or rugs can be placed on steps for added traction. Look for mats designed for outdoor use, as they are weather-resistant and have drainage features to prevent water accumulation.
Gravel or Grit:
Sprinkling coarse sand, grit, or cat litter on wet steps can provide temporary traction. This method is cost-effective but requires periodic reapplication.
Stair Nosing:
The nosing on stairs is a specific device that prevents people from slipping. For further protection, it can be mounted on the leading edge of the stairs.
Pressure-Treated Wood:
If your stairs are made of wood, pressure-treated lumber is a good option because it resists moisture and stays less slippery.
Regular Cleaning:
Keep your steps clean and free from debris, moss, or algae, which can make them slippery when wet.
Heated Stair Mats:
Heated stair mats or wires can be applied to melt snow and ice and prevent dangerous slips and falls in cold climates.
When picking a way to keep people from slipping on outside steps, you should think about your climate, the material of the steps, how they look, and how much maintenance they need. It’s important to check and keep up with the anti-slip methods to make sure they work and keep people safe.
What screws to use for stairs?
I also use 1 5/8-inch trim-head screws to secure the backs of the treads to the bottoms of the risers. Once everything is put together, I pack PL into any remaining voids. By the way, it’s a good idea to drill pocket-screw holes in the back of the bottom riser.
steps can be fastened with a wide variety of screws, according to the material building the steps and the components being fastened. Some typical examples of stair screws are as follows:
Wooden Stairs:
If your stairs have been constructed of wood, you should use wood screws. The coarse threads on these screws are meant to hold wood firmly. Depending on the amount of thickness of the wood and the parts you’re connecting, like handrails, treads, risers, and stringers, you can use screws of different lengths and sizes.
Deck Screws:
Deck screws are ideal for outdoor wooden staircases. Their corrosion-resistant construction makes them perfect for outdoor steps.
Concrete Screws:
Staircases are attached to concrete porches or foundations with concrete or masonry screws. These concrete screws anchor securely.
Lag Screws:
Lag screws, also known as lag bolts, are heavy-duty screws with a hexagonal head.Use these to securely attach heavy objects like railing brackets to sturdy supports made of wood or metal.
Anchor Screws:
Anchor screws, sometimes called wall anchors as anchor bolts, are used to secure stair sections to walls and other surfaces. They provide strong support and are ideal for handrails and balusters.
Machine Screws:
Brackets, handrail supports, and baluster connections are just some of the hardware items that can be fastened to a set of stairs with machine screws. They typically require nuts to secure them in place.
Self-Tapping Screws:
When driven into the material, the pointed tip of a self-tapping screw forms threads. Their primary function is as metal-to-stair attachment points.
When choosing screws for your stairs, you should think about the material of the stairs, how much weight they need to hold, and the parts you want to connect. You should also make sure that the pins you please choose are right for the job and will work with the construction of the stairs. To make sure safety and the integrity of the structure, always choose screws based on what the manufacturer says and what the local building rules say.
What is a structural support for stairs?
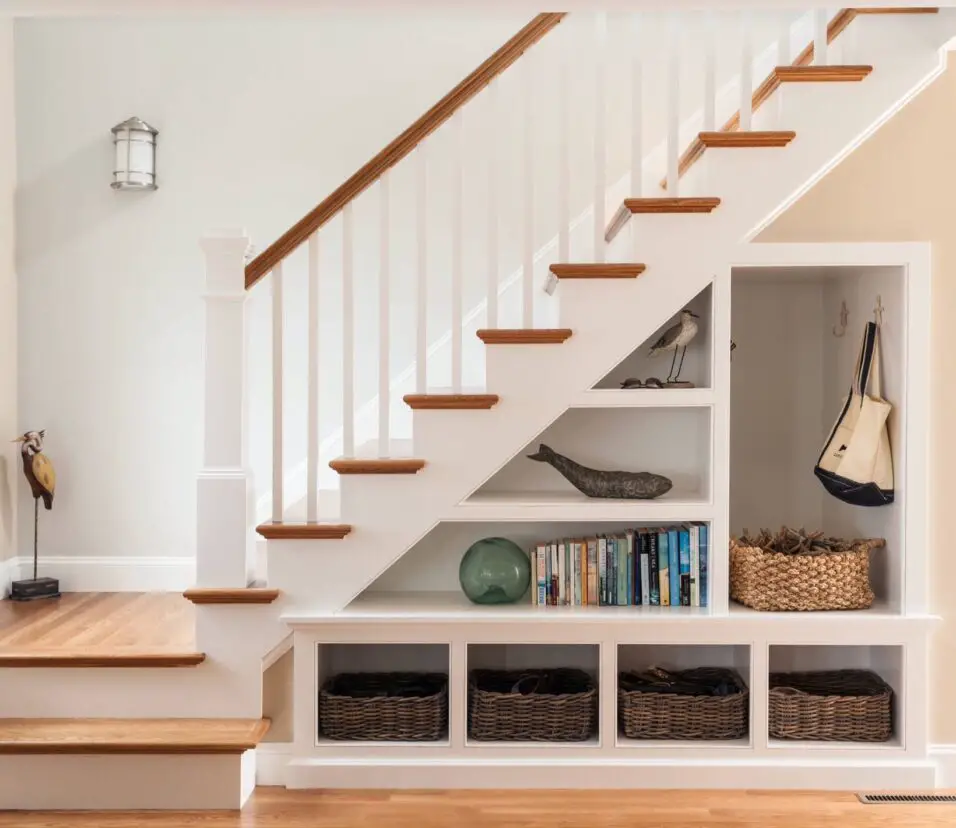
A stringer is a board or other vertical structure that spans the width of a staircase from side to side or down the middle. The stringer holds the wheels and risers in place. Countless stair configurations are possible due to the wide range of threads and stair steps available.
Structural assistance for steps are the structure and parts that make a staircase stable, strong, and able to hold weight. Staircases need strong supports to make sure they are safety and work right. Some important structural components of a staircase that hold it up are
Stringers:
Stringers are the straight or vertical pieces of wood that hold up the sides of a staircase. They hold the treads (the flat parts of the stairs) and risers (the straight parts between the treads) most of the way. Stringers are necessary to spread the weight of people using the stairs. They can be made of wood, steel, or other materials.
Risers:
Risers are the vertical components that connect one tread to the next. They contribute to the structural integrity of the staircase by preventing the treads from sagging and distributing the weight evenly. The height and material of risers can vary based on design and building codes.
Treads:
Treads are the horizontal surfaces that people step on when using the stairs. They must be adequately supported to prevent flexing or sagging. The way treads are attached to the stringers or other support structures can affect the staircase’s structural integrity.
Balusters:
Balusters, also known as spindles or pickets, are the vertical posts that fill the space between the handrail and the treads. They contribute to the overall stability of the staircase and provide safety by preventing falls.
Handrails:
Most of the time, safety handrails are mounted on balusters or frames. Users can keep their hands safe and avoid damage. There must be handrails installed in public spaces.
Newel Posts:
Newel posts are large, sturdy posts that anchor the handrail and provide additional support and stability to the staircase, especially at the top and bottom.
Supporting Structure:
The overall structural support of the staircase also depends on the underlying building structure. The stairs must be securely anchored to the floor, wall, or structural beams to prevent movement or instability.
Properly designed and constructed structural support for stairs is crucial for safety and longevity. Staircases must adhere to local building codes and engineering principles to ensure they can withstand the weight and stress placed on them over time.
What supports concrete stairs?
Steel Reinforcement for Concrete Stairs
Steel bars should be added to the concrete steps to make them stronger so they can handle the weight of people walking up and down them. A structural engineer will figure out how many steel bars to use and what size to use based on the weight of the people using the stairs.
Concrete stairs are supported by a combination of structural elements and materials that provide stability and durability. Here are the key components that support concrete stairs:
Stringers:
Some steps have stringers that go around the edges. Stairs made of concrete use steel or strengthened concrete stringers to make them strong.
Reinforcement:
Adding steel rebar or wire to concrete stairs makes them stronger and stops them from cracking or sagging. The support is put into the concrete while it is being built.
Concrete Slab:
Concrete slabs form stair treads and risers. These slabs are cast in situ, creating a sturdy walking surface. Stair design and use determine concrete slab thickness and strength.
Footings:
Concrete stairs usually have footings or foundations. Footings evenly distribute stair and user weight to the ground or a supporting structure like a concrete pad or foundation wall.
Anchors:
Concrete steps are attached to floors or walls to prevent movement. Construction often embeds anchors in concrete.
Handrails and Balusters:
Handrails and balusters are essential components for safety on concrete stairs. They offer security and support for anyone using the steps and are usually fixed in place.
Expansion Joints:
Concrete stairs are popular for indoor and outdoor use due to their strength and durability. Concrete stairs need proper construction, reinforcement, and structural support to last and be safe.
Do you glue or nail stair treads?
Don’t fasten treads and or risers with only nails or staples. The adhesive is much more important than the fasteners. There will be times when fastening may be limited, so a good adhesive is critical. Don’t use the stringer as a level for the treads.
Depending on the steps, the materials, and individual preference, stair steps can be fastened using either glue or nails. Here’s how both approaches are typically employed:
Gluing Stair Treads:
- Gluing stair treads is a common method for attaching wood or laminate treads to the frame below, like subfloor or stringers.
- On the underside of the tread, you’ll want to apply a construction adhesive of wood glue of high quality.
- The stair tread is then carefully set in position on the stronger or flooring.
- The bond formed between the treads and the ground can be strengthened through application of pressure.
- Clamps or weights are often used to hold the tread in place while the glue cures. Follow the manufacturer’s instructions for curing time.
Nailing Stair Treads:
- Nailing stair treads involves driving nails or screws through the tread and into the underlying structure for additional support.
- Pre-drilling holes in the tread is advised if it is made of hardwood to prevent splitting.
- Use finishing nails, brad nails, or screws that are appropriate for the material and thickness of the tread.
- Space the nails or screws evenly along the length of the tread and near the edges to ensure a secure attachment.
- Sink the nail heads slightly below the surface of the tread and fill the holes with wood filler for a smooth finish.
The choice between gluing and nailing stair treads depends on factors such as the type of stairs, the material of the treads, and personal preference. Gluing provides a strong bond and a clean, nail-free appearance on the surface of the tread. Nails provide further mechanical support and are therefore ideal for oak treads or other applications where more durability is required.
Some builders and do-it-yourselfers choose to use a mix of the two, using glue as the main attachment and a few nails or screws here and there for extra protection. When gluing, be sure to use a high-quality construction adhesive designed for the materials you’re affixing together, and to apply and let it dry in accordance with the manufacturer’s instructions.
How can I make my outdoor stairs safer?
We recommend installing handrails, painting stairways and steps a highly visible color, and texturing the stair surface to provide traction for shoes in order to make outdoor stairways safer.
Making outdoor stairs safer is crucial to prevent accidents and ensure the well-being of those using them. Here are several steps you can take to enhance the safety of your outdoor stairs:
Install Handrails:
Handrails give you support and security as you go up or down stairs. Make sure that both sides of your outdoor stairs have strong bars, especially if they are steep or have a lot of steps. Both the steps and any neighboring structures should have sturdy handrails installed at an appropriate height.
Add Non-Slip Treads:
Apply non-slip treads or adhesive strips to the stair treads. Products like these exist to make it easier to keep one’s footing, even in slippery circumstances like rain or snow. Make sure to install them properly, following the manufacturer’s instructions.
Provide Adequate Lighting:
Safety depends on having the right lights, especially at night or when there isn’t much light. Put up outdoor lights near the stairs to make the whole thing brighter. Think about getting lights that turn on when you walk by for extra convenience and to save energy.
Maintain Good Drainage:
Ensure that water does not accumulate on your stairs. Proper drainage is essential to prevent slippery surfaces. Make sure that downspouts, gutters, and other drainage systems direct water away from the stairs.
Regular Maintenance:
Inspect your outdoor stairs regularly for signs of wear and damage. Replace or repair any loose, damaged, or rotting components promptly. Keep the stairs clean and free from debris, moss, or algae, which can make them slippery.
Install Stair Nosing:
Stair nosing, a trim piece for the front edge of each step, improves visibility and prevents tripping.
Use Bright Paint or Tape:
Paint the edges of the stair treads with bright, contrasting colors or apply reflective tape to make the edges more visible. This is particularly helpful in low-light conditions.
Keep Vegetation in Check:
Trim back any overhanging vegetation, such as tree branches or bushes, that might obstruct the path of the stairs or contribute to a slippery surface.
Use Anti-Icing Products:
In regions prone to ice and snow, consider using ice-melting products or sand on your stairs during winter to prevent icy conditions.
Build Handicap Ramps:
You should install handicap ramps next to or in place of your outdoor steps if people with mobility impairments commonly use them. Ramps provide a safer and more accessible alternative.
Implement a No-Slip Coating:
Apply a non-slip coating or paint to the stair treads. These coatings will prevent you from slipping and falling on wet stairs.
Secure Loose Railings and Balusters:
Check that the stair railings and rails have been in good condition and properly fastened. Loose or damaged railings can pose a significant safety hazard.
Educate Household Members:
Teach your family or household members about stair safety, especially children and the elderly. Encourage them to use handrails and tread carefully.
Prioritizing safety when it comes to outdoor stairs is essential for preventing accidents and injuries. By implementing these measures, you can create a safer environment for everyone who uses your outdoor stairs, regardless of the weather conditions
Conclusion
With this comprehensive instruction manual on how to connect exterior staircases to your home, you’ll be able to make the process safer, more useful, and more attractive. Adding exterior stairs to your home not only makes it easier for people to get around, but it also lets you enjoy your outdoor areas more. This guide has gone over the important steps, things to think about, and design decisions that go into making an outdoor staircase that is safe and works well. We’ve talked about every important part of this project, from the planning and design phases where you thought about the design and purpose of your outdoor stairs, to the careful construction process and following of local building codes. The design and materials of the stairs, as well as the lighting and handrails that you place, are all choices that affect how well they work and how nice they look.
Safety has been a recurring theme, emphasizing the importance of proper support, non-slip surfaces, adequate lighting, and handrails. Ensuring that your exterior stairs meet safety standards is not only a practical concern but also a responsibility to your household and guests. As you embark on your journey to attach stairs to your house, remember that this project is an opportunity to bridge the gap between your living spaces and the great outdoors. Whether you’re a seasoned DIY enthusiast or collaborating with professionals, the knowledge and insights gained from this guide will empower you to take on this project with confidence.