How To Winterize Plumbing In Vacant House
Introduction
How To Winterize Plumbing In Vacant House: As the winter months approach, it becomes essential to safeguard vacant houses from the harsh temperatures that can cause extensive damage to plumbing systems. Whether you’re a homeowner preparing to leave your property unoccupied or a landlord responsible for a vacant rental property, winterizing the plumbing is crucial to prevent frozen and burst pipes, which can lead to costly repairs.
By taking a few precautionary steps, you can protect the plumbing tape from the frigid conditions and ensure a smooth transition when you or your tenants return. In this guide, we will explore the key measures you need to undertake to winterize the plumbing in a vacant house, safeguarding your property and minimizing the risk of potential water damage.
From draining the pipes to insulating vulnerable areas, you with valuable insights to help you navigate through the winterization process effectively. Let’s delve into the essential steps for winterizing plumbing in a vacant house to ensure peace of mind during the colder months. The lack of heating and regular water usage increases the risk of frozen pipes. Water expands when it freezes, leading to pressure build-up within the pipes, which can cause them to crack or burst. This can result in significant water damage, flooding, and even mold growth if not addressed promptly.
Why do you winterize plumbing?
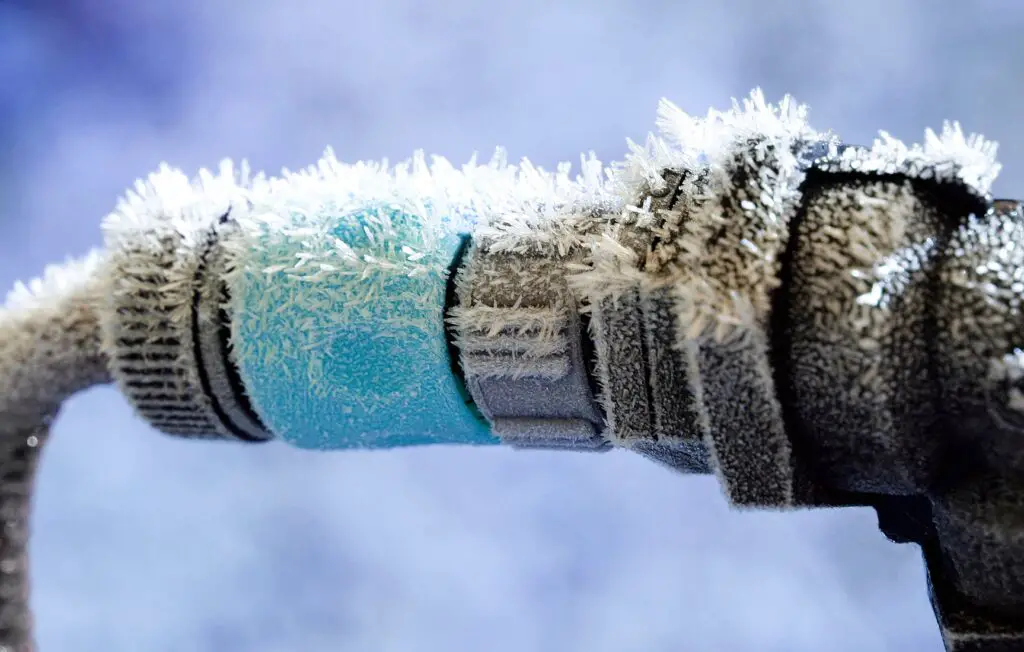
Winterizing pipes involves a series of steps that prepare a home’s interior and exterior plumbing to withstand extreme cold temperatures without freezing, therefore protecting against devastating pipe bursts and leaks. As water freezes and becomes ice, it expands.
Preventing Frozen Pipes: The primary reason for winterizing plumbing is to prevent frozen pipes. When temperatures drop below freezing, water inside the pipes can freeze and expand, exerting immense pressure on the pipes. This pressure can cause them to crack or burst, resulting in water leakage once the ice thaws. Frozen pipes can lead to flooding, damage to walls and ceilings, and the growth of mold and mildew. Winterizing the plumbing system helps to insulate and protect the pipes, minimizing the risk of freezing.
Avoiding Costly Repairs: Dealing with burst pipes and the subsequent water damage can be an expensive endeavor. Repairing or replacing damaged pipes, fixing water-soaked walls, floors, and ceilings, and addressing mold issues can drain your finances. By investing a little time and effort in winterizing your plumbing, you can potentially save a significant amount of money by preventing these costly repairs.
Preserving Property Value: Water damage caused by burst pipes can have a detrimental impact on the value of your property. It can lead to structural damage, compromised building materials, and mold growth, which can be challenging to address. By winterizing your plumbing, you protect your property’s value and maintain its structural integrity, ensuring its long-term durability.
Ensuring Insurance Coverage: Some insurance policies may not cover water damage caused by burst pipes if reasonable precautions were not taken to prevent them. By winterizing your plumbing, you demonstrate responsible homeownership or property management, which may increase the likelihood of receiving insurance coverage in the event of water damage.
What does winterize a toilet mean?
Toilets are flushed until empty, and then special antifreeze solution is poured into the toilets and drains. Air is blown into the pipes, forcing all water out of the pipes. Usually, a plastic wrap is placed over the toilet to ensure it is not used.
Shutting Off the Water Supply:
\The first step in winterizing a toilet is to shut off the water supply. Locate the shut-off valve behind the toilet or near the main water supply and turn it off. This prevents water from entering the toilet tank and bowl, reducing the risk of freezing.
Draining the Toilet Tank and Bowl:
After shutting off the water supply, flush the toilet to remove most of the water from the tank and bowl. Then, use a sponge or towel to soak up any remaining water in the tank and bowl. Completely emptying the toilet of water minimizes the chance of freezing and prevents potential damage to the toilet’s internal components.
Applying Antifreeze:
To provide an extra layer of protection against freezing, you can consider applying antifreeze to the toilet bowl and drain trap. Choose a non-toxic, specifically formulated antifreeze suitable for plumbing systems. Pour a small amount of antifreeze into the bowl and flush it down, ensuring it coats the drain trap. This helps prevent any residual water from freezing and potentially causing damage.
Insulating the Toilet:
Insulating the toilet further enhances its winterization. Wrap the toilet tank and bowl with insulation materials such as foam sleeves or blankets. These insulating materials help retain heat and prevent the temperature from dropping too low, reducing the risk of freezing.
Sealing Leaks:
Use weatherstripping or caulk to seal any gaps or cracks that may allow cold air to enter. This helps maintain a more stable temperature in the vicinity of the toilet and reduces the likelihood of freezing.
How do you winterize plumbing?
Outdoor Plumbing Winterization Tips
Disconnect hoses. Remove and drain all exterior hoses.
- Drain water lines. Turn off the water supply to outdoor faucets, and drain any remaining water by opening the taps until they run dry.
- Dress up faucets.
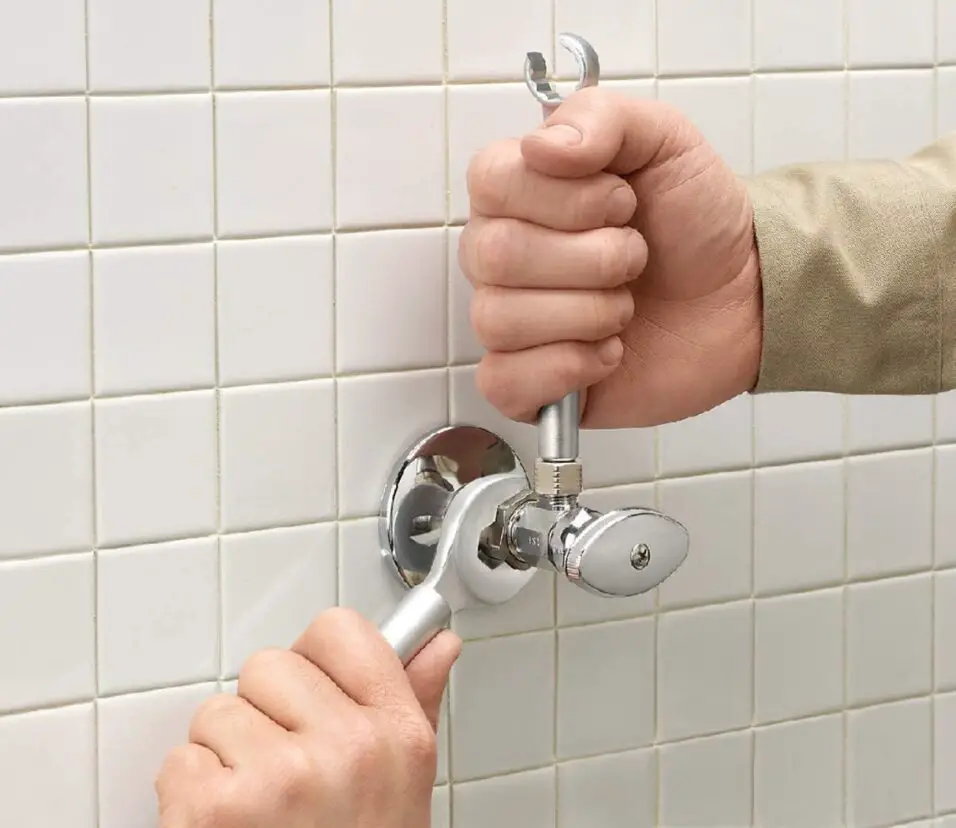
Shut Off the Main Water Supply:
Locate the main water shut-off valve in your home or property and turn it off. This valve is typically found near the water meter or where the main water line enters the building. Shutting off the water supply prevents water from entering the plumbing system and eliminates the risk of freezing.
Drain Water Supply Lines:
Starting from the highest point in your home, open all faucets, including sinks, showers, and tubs, to allow the water to drain out completely. Flush toilets to empty the tanks and bowls. Once the water stops flowing, close the faucets. Be sure to drain any outdoor water supply lines, such as hose bibs, as well.
Drain the Water Heater:
If your property has a water heater, turn off the power supply (electricity or gas) and let the unit cool down. Attach a garden hose to the drain valve at the bottom of the water heater and direct the other end to a suitable drainage area. Open the drain valve and allow the water to drain completely. Once drained, close the drain valve and disconnect the hose.
Insulate Exposed Pipes:
Identify any exposed pipes in unheated areas of your property, such as basements, crawl spaces, or attics. Use pipe insulation sleeves or wrap the pipes with heating tape to provide insulation and prevent freezing. Pay special attention to pipes near exterior walls, as they are more susceptible to freezing.
Seal Air Leaks:
Check for any air leaks around doors, windows, and foundation cracks. Use weatherstripping or caulking to seal these gaps, preventing cold air from entering and compromising the temperature around the plumbing system.
How do you keep water from freezing in an empty house?
Insulate pipes on exterior walls, crawl spaces & the attic. Open cabinet doors to allow heat to circulate around un-insulated pipes under sinks & appliances. Let warm water drip overnight to keep pipes from freezing.
Drain the Water Lines: Open all faucets, including sinks, showers, and tubs, to allow water to drain completely from the pipes. Start from the highest point in the house and work your way down, ensuring all water is emptied from the plumbing system. Flush toilets to drain the tanks and bowls.
Drain the Water Heater: If your house has a water heater, turn off the power supply (electricity or gas) and allow the unit to cool down. Attach a garden hose to the drain valve at the bottom of the water heater and direct the other end to a suitable drainage area. Open the drain valve and let the water heater drain completely. Close the drain valve and disconnect the hose once drained.
Add Antifreeze: Consider adding non-toxic antifreeze to the toilet bowls and drains. This helps prevent any remaining water in the traps from freezing and causing damage. Choose antifreeze specifically formulated for plumbing systems and follow the manufacturer’s instructions carefully.
Insulate Exposed Pipes: Identify any exposed pipes in unheated areas of the house, such as basements, crawl spaces, or attics. Insulate these pipes using foam insulation sleeves or wrapping them with heating tape. Pay extra attention to pipes near exterior walls or in colder areas, as they are more vulnerable to freezing.
Seal Air Leaks: Check for any air leaks around doors, windows, and foundation cracks. Use weatherstripping or caulking to seal these gaps, preventing cold air from entering and compromising the temperature inside the house.
What does it mean to winterize plumbing?
Winterizing your homes plumbing is recommended when the house will be vacant for a long period of time and no water will be running through the pipes. The winterizing process involves emptying the water heater, draining all water from the pipes, and filling all fixtures with an antifreeze solution.
Draining the water heater: If the property has a water heater, it is important to drain it to prevent freezing. Turn off the power supply (electricity or gas) and let the water heater cool down. Attach a hose to the drain valve and direct the other end to a suitable drainage area. Open the drain valve and allow the water to drain completely.
Insulating exposed pipes: Identify any pipes that are exposed to cold temperatures or located in unheated areas such as basements, crawl spaces, or attics. Insulate these pipes using foam insulation sleeves or wrapping them with heating tape. Insulation helps retain heat and prevents the pipes from reaching freezing temperatures.
Sealing air leaks: Check for any air leaks around doors, windows, and foundation cracks. Use weatherstripping or caulking to seal these gaps, preventing cold air from entering and affecting the temperature around the pipes.
Setting up temperature monitoring: Consider installing a temperature monitoring system or using a smart thermostat that alerts you if the temperature drops below a certain threshold. This allows you to take immediate action if freezing conditions are detected.
How do I winterize my house?
Whether it’s for your primary residence or a second home you’re leaving vacant, here are tips for winterizing your house:
- Prepare your plumbing.
- Clean out gutters and clear the roof.
- Insulate the attic.
- Have your heating system serviced.
- Adjust your thermostat.
- Call a chimney sweep.
- Check for drafts.
- Keep rodents out.
Maintain a Consistent Temperature: Set your thermostat to a consistent temperature, even when you are away from home. Keeping a minimum temperature helps prevent freezing and provides a comfortable living environment. Consider using a programmable or smart thermostat for efficient temperature control.
Prepare the Fireplace and Chimney: If you have a fireplace, have it inspected and cleaned by a professional chimney sweep. Ensure the damper is working correctly and install a chimney cap to prevent drafts and animals from entering.
Check Insulation in Basements and Crawl Spaces: Ensure that your basement or crawl space is properly insulated. Inspect for any signs of water leaks, condensation, or mold growth. Seal any gaps or cracks in the foundation to prevent drafts and water intrusion.
Clean Gutters and Downspouts: Remove debris from gutters and downspouts to prevent clogging. This helps ensure proper drainage and prevents water backup, which can lead to ice dams and roof leaks.
Stock Up on Winter Supplies: Prepare for winter storms by stocking up on essentials such as extra blankets, non-perishable food, bottled water, batteries, and flashlights. Consider having a backup generator or alternative heating methods in case of power outages.
What is the best pipe insulation to prevent freezing?
For many residential plumbing applications a PE pipe insulation product like Tubolit® and Tundra® is the perfect option. Economical and easy to install, PE foam insulation will prevent pipes from freezing and keep hot pipes hot and cold pipes cold.
Inspect and Seal Air Leaks: Check for air leaks around windows, doors, and other openings. Use weatherstripping, caulking, or door sweeps to seal any gaps or cracks. This helps prevent drafts and keeps cold air from entering your home.
Insulate Windows and Doors: Consider adding insulation to windows and doors, especially if they are older or poorly insulated. Proper insulation helps retain heat and improves energy efficiency.
Service and Insulate HVAC Systems: Schedule a professional inspection and maintenance for your heating system before winter. Clean or replace air filters, check the ductwork for leaks, and ensure that the system is running efficiently. Additionally, insulate exposed ductwork to prevent heat loss.
Insulate Attic and Walls: Ensure that your attic is properly insulated to prevent heat from escaping through the roof. Insulate walls, especially in older homes or areas prone to cold drafts. Proper insulation helps maintain a consistent indoor temperature and reduces heating costs.
Protect Pipes from Freezing: Insulate exposed pipes in unheated areas of your home, such as basements, crawl spaces, and garages. Use pipe insulation sleeves or heating tape to prevent freezing and potential pipe bursts. Remember to disconnect and drain outdoor hoses and turn off the water supply to exterior faucets.
How do you winterize your pipes?
How to Winterize Your Pipes
- Insulate Your Pipes.
- Disconnect Exterior Hoses.
- Shut Off the Main Water Valve.
- Blow Excess Air Out of Your Pipes.
- Drain Your Toilets and Water Heater.
Foam Pipe Insulation: Foam pipe insulation is one of the most popular and widely used options. It is made of polyethylene or neoprene foam and comes in pre-slit tubes that can easily fit around pipes. Foam insulation provides excellent thermal resistance and helps maintain the temperature of the pipes. It is relatively affordable, easy to install, and readily available in different sizes to fit various pipe diameters.
Fiberglass Pipe Insulation: Fiberglass insulation consists of glass fibers formed into a dense material that provides effective thermal insulation. It is available in rolls or pre-formed tubes. Fiberglass insulation has excellent heat retention properties and can withstand high temperatures. It provides good protection against freezing and helps reduce heat loss from hot water pipes.
Rubber Pipe Insulation: Rubber pipe insulation is a flexible and durable option that offers excellent resistance to temperature changes and moisture. It is commonly used in areas where pipes are exposed to extreme cold or outdoor conditions. Rubber insulation provides reliable protection against freezing and can be easily installed on both hot and cold water pipes.
Reflective Foil Insulation: Reflective foil insulation consists of a layer of aluminum foil that is laminated to a foam or bubble wrap material. This type of insulation reflects radiant heat and can be used in combination with other insulation methods to enhance thermal resistance. Reflective foil insulation is particularly effective in areas with high temperature differentials or for protecting pipes in unheated spaces.
Conclusion
Winterizing the plumbing in a vacant house is a critical task that should not be overlooked. By following the proper steps and precautions, you can protect your property from the damaging effects of frozen and burst pipes. The key to successful winterization lies in thorough preparation and attention to detail. Lastly, it’s important to periodically check on the vacant property throughout the winter, even after winterizing the plumbing.
Throughout this guide, we have explored the essential measures for winterizing plumbing in a vacant house. From shutting off the main water supply and draining the pipes to insulating vulnerable areas and setting up temperature monitoring systems, each step plays a vital role in preventing potential water damage. Remember to start the process well in advance of the winter season, allowing sufficient time to complete all necessary tasks.
It’s also advisable to consult local plumbing pipes or experts for guidance specific to your region’s climate and requirements. By taking the time and effort to winterize your plumbing, you are safeguarding your property and avoiding costly repairs and restoration work. Additionally, it demonstrates responsible homeownership or property management, ensuring a smooth transition when you or your tenants return.