How To Take Command Hooks Off Wall
Introduction
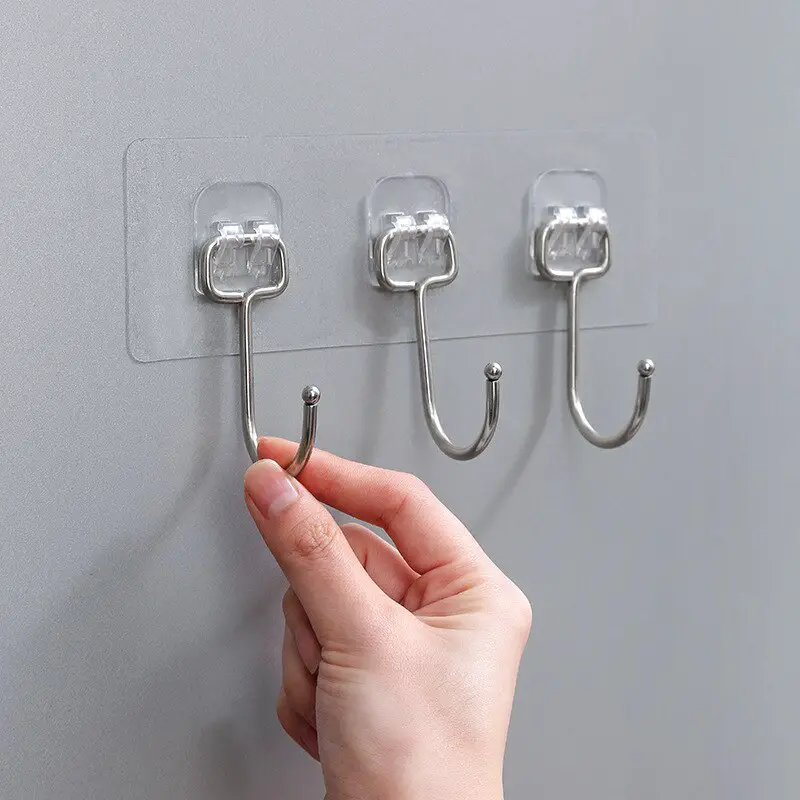
How To Take Command Hooks Off Wall: Command hooks are a popular and convenient solution for hanging items on walls without the need for nails or screws. These adhesive hooks are designed to be easily removable without causing any damage to the surface. However, there may come a time when you need to take them off the wall, whether it’s to reposition them or remove them entirely. In this article, we will guide you through the process of safely removing command hooks from your walls.
There are several reasons why you might need to take command hooks off your wall. Perhaps you want to rearrange your wall decor, or you’re moving to a new place and need to remove the hooks without leaving any residue. Whatever the reason, it’s important to follow the proper steps to ensure a clean removal.
Before you begin removing the command hooks, gather the necessary tools. You will need a hairdryer, dental floss or fishing line, rubbing alcohol, and a clean cloth. The hairdryer will help soften the adhesive, making it easier to remove, while the dental floss or fishing line will aid in gently separating the hook from the wall. Rubbing alcohol will come in handy for removing any remaining adhesive residue, and a clean cloth will help wipe away any dirt or debris.
After removing the hook, you may notice some adhesive residue left on the wall. Dampen a clean cloth with rubbing alcohol and gently rub the residue until it is completely removed. Take care not to scrub too hard, as this could damage the paint or wallpaper. By following these steps, you can safely and effectively remove command hooks from your walls without causing any damage. Remember to always read and follow the instructions provided by the manufacturer for best results. Now that you know how to take command hooks off the wall, you can easily reposition or remove them whenever needed.
What is the easiest way to remove command strips from walls?
Command strips are a popular and convenient way to hang items on walls without the need for nails or screws. They are adhesive strips that can be easily attached to surfaces and provide a strong hold. However, when it comes time to remove them, it can sometimes be a bit tricky. Fortunately, there are several methods you can use to remove command strips from walls without causing any damage.
One of the easiest ways to remove command strips from walls is to simply pull the tab straight down. Most command strips have a tab that you can grasp and pull down firmly and slowly. This will stretch the adhesive and release its grip on the wall. It is important to pull the tab straight down and not at an angle to avoid damaging the wall. If the strip is not coming off easily, you can try using a hairdryer to warm up the adhesive, which will make it easier to remove.
If the tab breaks off or is not present, you can use dental floss or fishing line to remove the command strip. Cut a piece of floss or line that is long enough to wrap around your fingers. Slide the floss or line behind the strip and use a sawing motion to separate the adhesive from the wall. Be gentle and take your time to avoid damaging the wall. Once the strip is removed, you can use a mild adhesive remover to clean off any residue left behind.
Another method to remove command strips from walls is to use a putty knife or a credit card. Insert the edge of the knife or card between the strip and the wall and gently pry it away. Be careful not to apply too much pressure or force, as this can cause damage to the wall. If the strip is not coming off easily, you can try using a heat gun or a blow dryer to warm up the adhesive and make it easier to remove.
Removing command strips from walls can be done easily and without causing any damage. Whether you choose to pull the tab, use dental floss or fishing line, or employ a putty knife or credit card, it is important to be gentle and take your time. By following these instructions, you can safely remove command strips and leave your walls looking as good as new.
Can you take command strips off the wall?
In fact, you can remove Command strips in a few easy steps. First, remove the picture. Then, hold the hook in place gently; don’t press it against the wall. Grasp the exposed tab of the adhesive and slowly stretch it in the same direction as the strip.
Introduction:
Command strips are a popular adhesive solution for hanging items on walls without causing damage. They are designed to be easily removable, making them a convenient choice for renters or anyone who wants to avoid drilling holes. However, it is important to follow the proper instructions and guidelines when removing command strips to ensure a clean and damage-free removal process.
Using Command Strips:
Command strips are designed to adhere to a variety of surfaces, including painted walls, tiles, glass, and metal. They come in different sizes and weight capacities, allowing you to choose the appropriate strip for your hanging needs. The strips consist of two parts: the adhesive strip and the hook or hanger. To use command strips, you need to clean the surface with rubbing alcohol, apply the adhesive strip to the wall, and then attach the hook or hanger to the strip.
Removing Command Strips:
When it comes time to remove command strips, it is essential to follow the recommended removal process to avoid damaging the wall or leaving residue behind. To remove the strips, you should gently pull the tab straight down, parallel to the wall. This action stretches the adhesive, releasing its grip on the wall. It is important not to pull the strip towards you or at an angle, as this can cause the strip to snap and potentially damage the wall surface.
Residue and Wall Damage:
In some cases, command strips may leave behind a small amount of adhesive residue on the wall. This residue can usually be easily removed by gently rubbing it with your fingers or using a mild adhesive remover. However, it is crucial to test any adhesive remover on a small, inconspicuous area of the wall first to ensure it does not cause any damage or discoloration.
Command strips provide a convenient and damage-free solution for hanging items on walls. When used correctly and removed following the recommended process, they should not cause any damage to the wall surface. However, it is always a good idea to read and follow the instructions provided by the manufacturer to ensure a successful and hassle-free removal process. By using command strips properly, you can enjoy the benefits of wall-mounted decorations or storage without worrying about damaging your walls.
How do you remove heavy command strips?
Grasp the exposed tab of the adhesive and slowly stretch it in the same direction as the strip. Always pull down in the same direction as the strip; don’t pull it towards you. Slowly stretch the strip straight down; keep your hand against the wall as you go.
Introduction:
Removing heavy command strips can be a tricky task, especially if they have been securely attached to a surface for a long time. Command strips are adhesive products commonly used for hanging pictures, frames, and other items without damaging the walls. However, when it comes to removing heavy command strips, a specific approach is necessary to ensure a clean removal without causing any damage.
Step 1: Prepare the area
Before attempting to remove the heavy command strips, it is important to prepare the area properly. Start by gathering the necessary tools, such as a hairdryer, dental floss, and rubbing alcohol. Additionally, ensure that the surface where the command strips are attached is clean and free from any dust or debris.
Step 2: Apply heat
One effective method to remove heavy command strips is by applying heat. Use a hairdryer on a low heat setting and direct the warm air towards the strip. This will help soften the adhesive, making it easier to remove. Be cautious not to overheat the strip or the surface, as it may cause damage.
Step 3: Use dental floss
Once the adhesive has been heated, take a piece of dental floss and slide it behind the strip. Gently saw back and forth to separate the adhesive from the surface. This method is particularly useful for heavy command strips that are firmly attached. If the dental floss doesn’t work, try using a plastic putty knife to carefully pry the strip away.
Step 4: Remove residue
After successfully removing the heavy command strip, there may be some adhesive residue left on the surface. To remove this residue, dampen a cloth with rubbing alcohol and gently rub the affected area. The alcohol will help dissolve the adhesive, allowing you to wipe it away easily. Avoid using excessive force or abrasive materials that could damage the surface.
Step 5: Clean and assess
Finally, clean the surface thoroughly to remove any remaining residue or dirt. Once the area is clean, assess whether any damage has occurred. In some cases, the removal process may cause minor paint or surface damage. If this happens, touch up the area with matching paint or consult a professional for repairs.
By following these steps, you can safely and effectively remove heavy command strips without causing damage to the surface. Remember to always proceed with caution and take necessary precautions to ensure a successful removal process.
Do command strips pull off paint?
When used as directed, Command Strips should cause no damage to your wall or paint. Damage is usually associated with removing the product incorrectly. They are not intended to be used on textured walls as they won’t adhere properly. Also, don’t use them on wallpaper because it is too delicate and can rip upon removal.
Do command strips pull off paint?
Command strips are a popular adhesive solution for hanging items on walls without the need for nails or screws. They are designed to be easily removable without causing damage to the surface they are applied to. However, there is always a concern about whether command strips can pull off paint when they are removed.
The good news is that when used correctly, command strips should not pull off paint. These adhesive strips are specifically designed to be gentle on surfaces, including painted walls. They are equipped with a unique stretch-release technology that allows them to be removed without leaving any residue or causing any damage.
It is important to follow the instructions provided by the manufacturer when using command strips. Before applying the strip, make sure the surface is clean and dry. Avoid applying them to freshly painted walls or surfaces with peeling paint, as this may affect their ability to adhere properly. Additionally, it is recommended to wait at least one hour after painting before using command strips.
When it comes time to remove the command strip, it is crucial to do it correctly to minimize the risk of pulling off paint. Start by holding the base of the strip and slowly stretch it straight down against the wall, parallel to the surface. This stretching motion helps release the adhesive bond. Avoid pulling the strip towards you or at an angle, as this may increase the likelihood of paint damage.
If the command strip does cause any paint to come off, it is likely due to improper application or removal. In such cases, touch-up paint can be used to fix any minor damage. However, it is important to note that command strips are not recommended for use on wallpaper or delicate surfaces, as they may cause damage when removed.
In conclusion, when used correctly, command strips should not pull off paint. Following the manufacturer’s instructions, preparing the surface properly, and removing the strips carefully can help ensure a damage-free experience. These adhesive strips provide a convenient and reliable solution for hanging items without the need for nails or screws.
Do Command hooks leave damage?
Command Strips are a beneficial way to hang decor in a space without damaging your wall — however, proper and careful removal methods must be observed. Otherwise, they can leave behind a sticky residue, peeled paint, or even cracks or holes in the wall.
Introduction:
Command hooks are a popular and convenient solution for hanging items without causing damage to walls or surfaces. They are designed to be easily removable, making them an ideal choice for renters or those who frequently change their decor. However, the question of whether command hooks leave damage behind is a common concern among users.
Understanding Command Hooks:
Command hooks are adhesive hooks that can be attached to various surfaces, including walls, doors, and cabinets. They come in different sizes and weight capacities, allowing users to hang a wide range of items, from lightweight decorations to heavier objects. The adhesive used in command hooks is designed to provide a strong hold while also being removable without leaving residue or causing damage.
The Removal Process:
When it comes to removing command hooks, the process is relatively straightforward. To remove a command hook, you simply need to pull the tab downwards, which stretches the adhesive and releases its grip on the surface. This removal technique is designed to minimize the risk of damage, as the adhesive is designed to come off cleanly without leaving marks or residue.
Preventing Damage:
While command hooks are generally considered to be damage-free, there are a few factors to consider to ensure their proper use. It is important to follow the instructions provided by the manufacturer, including weight limits and surface compatibility. Applying command hooks to clean, dry surfaces and avoiding excessive weight can help prevent any potential damage.
Command hooks are designed to be a damage-free solution for hanging items. When used correctly and within their weight limits, they can be easily removed without leaving any damage or residue behind. However, it is always recommended to follow the manufacturer’s instructions and take necessary precautions to ensure the best results. By doing so, you can enjoy the convenience of command hooks without worrying about any potential damage to your walls or surfaces.
The purpose of command hooks on the wall is to provide a convenient and damage-free solution for hanging various items. These hooks are designed to adhere to a variety of surfaces, including painted walls, tiles, glass, and wood, without leaving any residue or causing damage. They are commonly used for hanging lightweight items such as keys, small decorations, utensils, and even small picture frames.
Command hooks are equipped with a special adhesive backing that allows them to stick securely to the wall surface. The adhesive is strong enough to hold the weight of the items being hung, yet it can be easily removed without leaving any marks or holes behind. This makes them an ideal choice for those who want to avoid drilling holes or using nails, especially in rental properties or spaces where permanent damage is not desired.
How do you safely remove command hooks from the wall without causing damage?
When it comes to removing command hooks from the wall, it is important to do so carefully to avoid causing any damage. The first step is to gently pull down on the hook itself, applying steady pressure. It is crucial to avoid yanking or pulling too forcefully, as this can result in paint or plaster being torn off the wall. If the hook does not come off easily, try using dental floss or fishing line to gently slide behind the adhesive strip.
Once the adhesive strip is accessible, slowly and steadily pull it away from the wall, keeping it as parallel to the surface as possible. It is essential to maintain a slow and controlled motion to prevent any sudden jerks that could damage the wall. If the adhesive strip is stubborn and does not come off easily, applying heat with a hairdryer can help soften the adhesive, making it easier to remove.
After successfully removing the adhesive strip, there might be some residue left on the wall. To clean this residue, use a mild adhesive remover or rubbing alcohol. Apply a small amount to a clean cloth and gently rub the area until the residue is gone. It is crucial to test the adhesive remover or rubbing alcohol on a small, inconspicuous area of the wall first to ensure it does not cause any damage or discoloration.
Are there any specific tools or techniques recommended for taking command hooks off the wall?
When it comes to removing command hooks from the wall, there are a few specific tools and techniques that can be helpful in ensuring a safe and damage-free removal process. One recommended tool is a flathead screwdriver or a putty knife, which can be used to gently pry the hook away from the wall. It’s important to use caution and apply gentle pressure to avoid causing any damage to the wall surface.
Another technique that can be useful is to apply heat to the adhesive backing of the command hook. This can be done using a hairdryer on a low heat setting. By directing the warm air towards the adhesive, it can help soften it and make it easier to remove the hook. However, it’s crucial to be careful not to overheat the adhesive or the wall surface, as this can lead to damage.
Overall, using a combination of a flathead screwdriver or putty knife, along with the application of gentle heat, can be an effective way to safely remove command hooks from the wall without causing any damage. Remember to always follow the specific instructions provided by the manufacturer of the command hooks, as they may have additional recommendations or precautions for removal.
Can command hooks be reused after removal, or do they need to be replaced?
Yes, command hooks can be reused after removal, making them a cost-effective and versatile solution for organizing your space. When properly removed, command hooks leave behind little to no damage on the wall surface, allowing you to reuse them in different locations or for different purposes.
To safely remove command hooks without causing damage, follow these steps:
First, hold the base of the hook firmly with one hand to provide support. Then, gently pull down the release tab located at the bottom of the hook with your other hand. This will disengage the adhesive strip from the wall. Slowly and steadily pull the hook downwards, keeping it parallel to the wall surface. Avoid jerking or pulling at an angle, as this may cause the adhesive strip to tear or leave residue on the wall.
Once the hook is removed, you can reuse it by replacing the adhesive strip. Command hooks typically come with extra adhesive strips, but you can also purchase refill packs separately. To attach a new adhesive strip, simply remove the liner from one side and press it firmly onto the back of the hook. Then, remove the liner from the other side and carefully position the hook on the desired spot on the wall, pressing it firmly for about 30 seconds to ensure proper adhesion.
5. Are there any precautions or tips to keep in mind while removing command hooks from the wall?
When removing command hooks from the wall, it is important to take certain precautions to avoid any damage or mishaps. Firstly, before attempting to remove the hook, make sure to read and follow the instructions provided by the manufacturer. This will ensure that you are using the correct technique and tools for removal.
One important tip is to pull the hook straight down and parallel to the wall surface. Avoid pulling it at an angle or sideways, as this can cause the adhesive strip to stretch or tear, potentially damaging the wall. Applying steady and even pressure while pulling downwards will help to release the adhesive bond without leaving any residue or marks.
Another precaution to keep in mind is to avoid using excessive force or tools that may damage the wall surface. Command hooks are designed to be easily removable without causing any harm, so using excessive force can lead to unwanted consequences. If you encounter resistance while removing the hook, try using a hairdryer to gently warm the adhesive strip. This can help soften the adhesive and make removal easier.
Conclusion
Removing command hooks from the wall is a relatively simple task that can be accomplished with a few easy steps. By following the instructions provided, you can ensure that the process is quick and efficient, without causing any damage to your walls or leaving behind any residue. Whether you are looking to rearrange your space or simply remove the hooks for good, these steps will guide you through the process.
First and foremost, it is important to gather the necessary tools before attempting to remove the command hooks. This includes a hairdryer, dental floss, rubbing alcohol, and a clean cloth. These items will help to loosen the adhesive and ensure a smooth removal process. It is also advisable to wear gloves to protect your hands during the procedure.
Once you have gathered the necessary tools, begin by using the hairdryer to warm up the adhesive on the command hook. This will make it easier to remove without causing any damage to the wall. After a few minutes of heating, gently pull the hook away from the wall, using dental floss to separate the adhesive from the surface. Be sure to pull slowly and steadily to avoid any sudden jerks that could damage the wall.
After successfully remove command hook, you may notice some residue left behind on the wall. To remove this, dampen a clean cloth with rubbing alcohol and gently rub the affected area. The alcohol will help to dissolve the adhesive, making it easier to wipe away. Once the residue is removed, allow the wall to dry completely before applying any new hooks or decorations.
Removing command hooks from the wall is a straightforward process that can be accomplished with a few simple steps. By following the instructions provided and using the necessary tools, you can ensure a smooth and damage-free removal. Remember to take your time and be patient during the process, as rushing could result in damage to your walls. With these steps in mind, you can confidently remove command hooks from your walls and enjoy a clean and clutter-free space.


