How To Drill Hooks Into Wall
Introduction
How To Drill Hooks Into Wall: Drilling hooks into a wall may seem like a simple task, but it requires careful planning and execution to ensure a secure and long-lasting installation. Whether you are hanging artwork, shelves, or other decorative items, knowing the proper techniques and tools to use is essential. In this article, we will guide you through the step-by-step process of drilling hooks into a wall, providing you with the knowledge and confidence to tackle this DIY project.
Before you begin drilling, it is crucial to assess the type of wall you are working with. Different wall materials, such as drywall, plaster, or concrete, require specific techniques and tools. For instance, if you have a drywall, you will need to locate the studs to ensure a sturdy anchor for your hooks. Stud finders are handy devices that can help you identify the wooden beams behind the drywall. On the other hand, if you are dealing with a concrete wall, you will need a masonry drill bit and anchors designed for concrete installations.
Once you have determined the type of wall and gathered the necessary tools, it is time to measure and mark the desired location for your hooks. Using a tape measure, carefully determine the height and spacing for your command hooks, ensuring they are level and evenly distributed. Mark the spots with a pencil or painter’s tape, creating a guide for drilling.
Now that you have your measurements and markings in place, it is time to drill the holes. Start by selecting an appropriate drill bit size for your hooks. It is recommended to choose a bit slightly smaller than the diameter of the hook’s anchor or screw. This will provide a snug fit and prevent the hole from being too large. Attach the drill bit to your power drill and position it at the marked spot. Apply gentle pressure and begin drilling, keeping the drill perpendicular to the wall. Take care not to drill too deep, as this can damage the wall or affect the stability of the hook.
Once the holes are drilled, it is time to insert the anchors or screws. If you are using anchors, gently tap them into the holes until they are flush with the wall. For screws, carefully screw them into the holes until they are secure. It is important to follow the manufacturer’s instructions for the specific hooks you are using, as different hooks may have varying installation methods. Once the hooks are in place, give them a gentle tug to ensure they are firmly anchored.
By following these instructions, you can confidently drill hooks into your wall, creating a functional and aesthetically pleasing space. Remember to always prioritize safety and take your time during the process. With practice, you will become proficient in this DIY skill, allowing you to hang various items with ease and precision.

Can you drill hooks into drywall?
Like with most DIY projects, there are some safety considerations to make before mounting hooks to walls. If you’re drilling into a brick wall or masonry, you’ll need a special masonry drill bit for your brick wall hook. For drywall, a regular drill will be fine. Start off by locating the stud in your drywall.
Can you drill hooks into drywall?
Yes, you can drill hooks into drywall, but it is important to follow the proper steps to ensure a secure and long-lasting installation. Drywall is a common material used for interior walls in homes and offices, and it is relatively easy to work with. However, it is not as strong as other materials like wood or concrete, so it requires some special considerations when drilling hooks or any other type of hardware into it.
Firstly, it is important to locate the studs behind the drywall. Studs are the vertical wooden beams that provide structural support to the wall. By drilling into the studs, you can ensure a strong and secure installation. You can use a stud finder or tap on the wall to locate the studs. Once you have found the studs, mark their locations with a pencil.
Secondly, choose the right type of hook for your needs. There are various types of hooks available, such as picture hooks, coat hooks, or utility hooks. Consider the weight and size of the item you want to hang and choose a hook that can support it. It is also important to read the manufacturer’s instructions for the hook to ensure proper installation.
Thirdly, use the right tools for the job. A drill with a suitable drill bit is necessary for drilling into drywall. It is recommended to use a drill bit that is slightly smaller than the size of the hook’s screw. This will provide a tight fit and prevent the hook from becoming loose over time. Additionally, a screwdriver or a drill with a screwdriver bit will be needed to secure the hook in place.
Finally, carefully drill into the marked location on the drywall, making sure to go through the drywall and into the stud. Apply gentle pressure and avoid excessive force to prevent damaging the drywall. Once the hole is drilled, insert the hook’s screw into the hole and use a screwdriver or drill to tighten it securely. Test the hook’s stability by gently pulling on it before hanging any items.
Drilling hooks into drywall is possible, but it requires proper preparation, the right tools, and careful installation. By following these steps, you can ensure a secure and reliable hook installation that will support your items without damaging the drywall.
What are the rules of hooks?
- Rules of Hooks
- Don’t call Hooks inside loops, conditions, or nested functions.
- Don’t call Hooks from regular JavaScript functions.
- You can skip to the next page explaining how to write your own Hooks now.
- This is why Hooks must be called on the top level of our components.
Introduction:
When it comes to programming, hooks are an essential concept that plays a crucial role in enhancing the functionality and reusability of code. Hooks are a feature introduced in React 16.8 that allows developers to use state and other React features in functional components. They provide a way to add stateful logic to functional components without the need for writing a class. In this answer, we will explore the rules of hooks and understand how they can be effectively used in React development.
Understanding Hooks:
React hooks are functions that allow developers to use state and other React features in functional components. They are named hooks because they enable developers to “”hook into”” React features. Hooks are designed to solve the problem of reusing stateful logic between components without the need for writing classes. They provide a simpler and more intuitive way to manage state and side effects in functional components.
Rules of Hooks:
There are a few important rules that need to be followed when using hooks in React:
1. Only Call Hooks at the Top Level: Hooks should always be called at the top level of a functional component or inside other custom hooks. They should not be called inside loops, conditions, or nested functions. This ensures that hooks are called in the same order on every render, allowing React to correctly preserve the state between multiple calls.
2. Only Call Hooks from React Functions: Hooks should only be called from React functional components or custom hooks. They should not be called from regular JavaScript functions. This ensures that hooks are used within the React component lifecycle and can access the necessary React features.
3. Use Hooks in the Same Order: When using multiple hooks in a component, they should always be called in the same order. This helps in maintaining the consistency of the component’s state and ensures that the correct hooks are associated with the correct state variables.
Benefits of Using Hooks:
Using hooks in React development offers several benefits. Firstly, hooks allow for the reuse of stateful logic between components, reducing code duplication and improving code maintainability. They also make it easier to understand and test individual components, as the logic is encapsulated within the component itself. Additionally, hooks enable functional components to have their own state, making them more powerful and flexible compared to traditional functional components.
Hooks are a powerful feature in React that allow developers to add stateful logic to functional components. By following the rules of hooks, developers can effectively utilize hooks to enhance the functionality and reusability of their code. The benefits of using hooks include code reuse, improved maintainability, and increased flexibility. With hooks, React development becomes more intuitive and efficient, enabling developers to create robust and scalable applications.
Can you hammer in hooks?
Hooks are fastened to the wall with nails, but they should be hammered gently into the wall at an angle to maximize their holding power.
Yes, you can indeed hammer in hooks into various types of walls, and it’s a common and relatively simple method for hanging items such as pictures, artwork, mirrors, or decorative items. However, there are several important considerations to keep in mind to ensure a safe and secure installation.
Choose the Right Hook: The first step is to select the appropriate hook for your needs. Hooks come in various shapes and sizes, each designed for specific purposes and weight-bearing capacities. Make sure to choose a hook that can support the weight of the item you want to hang.
Select the Correct Wall: Different types of walls require different installation methods. The most common wall types are drywall, plaster, and concrete. Each of these has its own characteristics and may require specific anchors or hooks for proper installation.
Use the Right Tools: To hammer in hooks effectively, you’ll need the right tools. Typically, this includes a hammer and a nail or hook designed for hammering. Ensure that the nail or hook is compatible with the type of wall you’re working with.
Find the Studs (if applicable): If you’re hanging something heavy or large, it’s advisable to attach the hook to a wall stud for added stability. You can use a stud finder to locate the studs behind your drywall or plaster.
Measure and Mark: Measure and mark the desired location for the hook, ensuring it’s level and at the right height for your item.
Hammer in the Hook: Carefully position the hook on the marked spot and use the hammer to drive it into the wall. Be cautious not to hit it too hard, as excessive force can damage the wall or cause the hook to bend.
Test for Stability: Once the hook is in place, test its stability by gently pulling on it. Ensure it’s securely anchored and can hold the weight of your item.
It’s worth noting that while hammering in hooks is a straightforward DIY task, it may not be suitable for all situations. For extremely heavy items or delicate wall materials, it’s advisable to consult with a professional or consider alternative hanging methods, such as wall anchors or adhesive hooks. Additionally, always follow safety precautions when using tools like hammers and wear appropriate safety gear, such as safety glasses, if needed.
Can you drill into any wall?
Drilling into a wall is a common task that many people need to perform at some point. Whether you want to hang a picture frame, install a shelf, or mount a television, drilling into a wall is often necessary. However, it is important to note that not all walls are suitable for drilling. The type of wall, its composition, and the presence of any electrical or plumbing components can determine whether or not you can safely drill into it.
Firstly, it is crucial to identify the type of wall you are dealing with. Most residential walls are either made of drywall or plaster. Drywall is a popular choice due to its affordability and ease of installation. It consists of a layer of gypsum sandwiched between two layers of paper. On the other hand, plaster walls are more common in older homes and are made of a mixture of gypsum, sand, and water. Both drywall and plaster walls can be drilled into, but there are some differences in the process.
Secondly, before drilling into any wall, it is essential to locate any electrical or plumbing components that may be hidden behind it. This can be done using a stud finder or by consulting building plans if available. Drilling into electrical wires or water pipes can be extremely dangerous and can cause serious damage or injury. Therefore, it is crucial to exercise caution and take the necessary precautions before proceeding.
Furthermore, it is important to consider the weight and size of the object you intend to hang or mount on the wall. For heavier items, such as large mirrors or televisions, it may be necessary to drill into a stud for added support. Studs are vertical wooden or metal beams that provide structural support to the wall. Locating studs can be done using a stud finder or by tapping the wall and listening for a solid sound. If you are unable to locate a stud in the desired location, alternative methods such as using wall anchors or toggle bolts may be necessary.
In conclusion, while drilling into a wall is a common task, it is important to approach it with caution and consideration. Understanding the type of wall, locating any hidden components, and ensuring proper support for the object being installed are all crucial steps in safely drilling into a wall. By following these guidelines, you can ensure a successful and secure installation without causing any damage to the wall or compromising the safety of your home.
How much weight can drywall hold?
While drywall alone can hold about 1.6 pounds to 2 pounds per square foot, mounting an object to the stud with the proper hardware allows the drywall to support up to 100 pounds.
The weight that drywall can hold largely depends on the type of drywall, the thickness of the drywall, and the method of attachment. Here’s a general guideline for typical 1/2-inch thick drywall:
Hanging Pictures and Decorations: For lightweight items like pictures, mirrors, or small decorations, you can often use simple picture hangers or nails directly into the drywall. A single nail or hanger can typically support up to 10-20 pounds.
Shelving: Installing shelves on drywall requires more support. It’s advisable to attach shelves to wall studs whenever possible. A single stud can support significantly more weight than just the drywall. If you’re using anchors, toggle bolts, or other types of wall anchors, they can typically hold between 10-50 pounds each, depending on the type and size.
TVs and Heavier Items: Mounting a TV or other heavy objects on drywall usually necessitates using a wall mount bracket that spans multiple studs. This ensures that the weight is distributed evenly. A properly installed wall mount can support TVs ranging from 20 pounds to well over 100 pounds, depending on the size and type.
It’s crucial to note that the weight-bearing capacity of drywall can vary based on factors like the quality of the drywall, the condition of the wall, and the type of fasteners or anchors used. Additionally, if you’re unsure about the strength of your drywall or the proper installation method for your project, it’s advisable to consult with a professional contractor or a handyman who can assess your specific situation and provide the best guidance for safe and secure installations.
When it comes to drilling hooks into a wall, there are several different types of hooks that can be used, each with its own specific purpose and functionality. One common type of hook is the traditional picture hook, which is designed to hold lightweight frames and artwork. These hooks typically have a small, curved shape and a pointed end that can be easily inserted into the wall.
For heavier items such as mirrors or shelves, it is important to use a more robust hook. One popular option is the toggle bolt hook, which consists of a metal bolt that expands behind the wall when tightened. This type of hook provides excellent support and can hold significant weight.
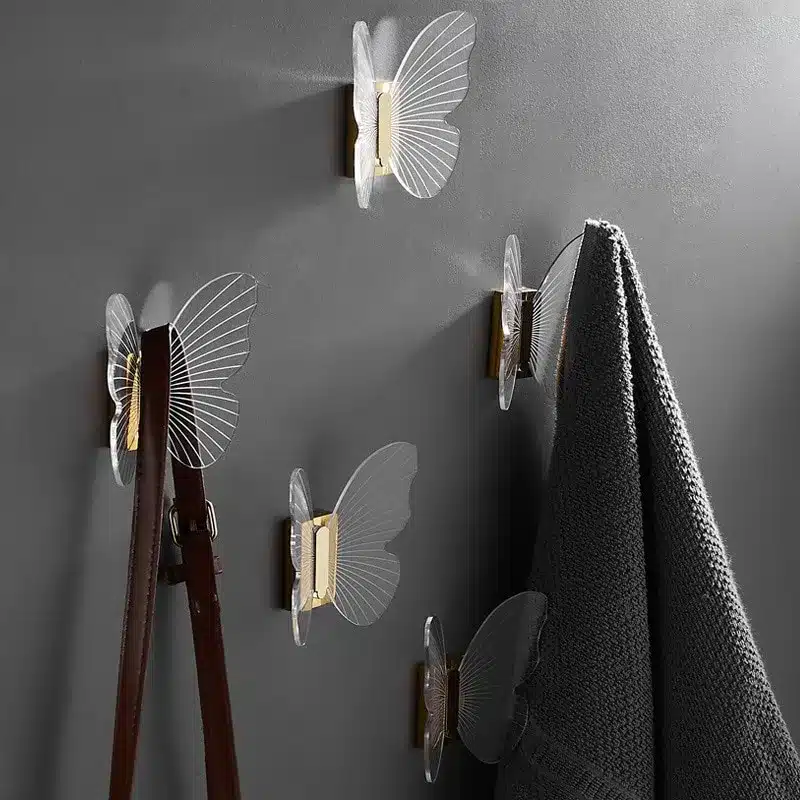
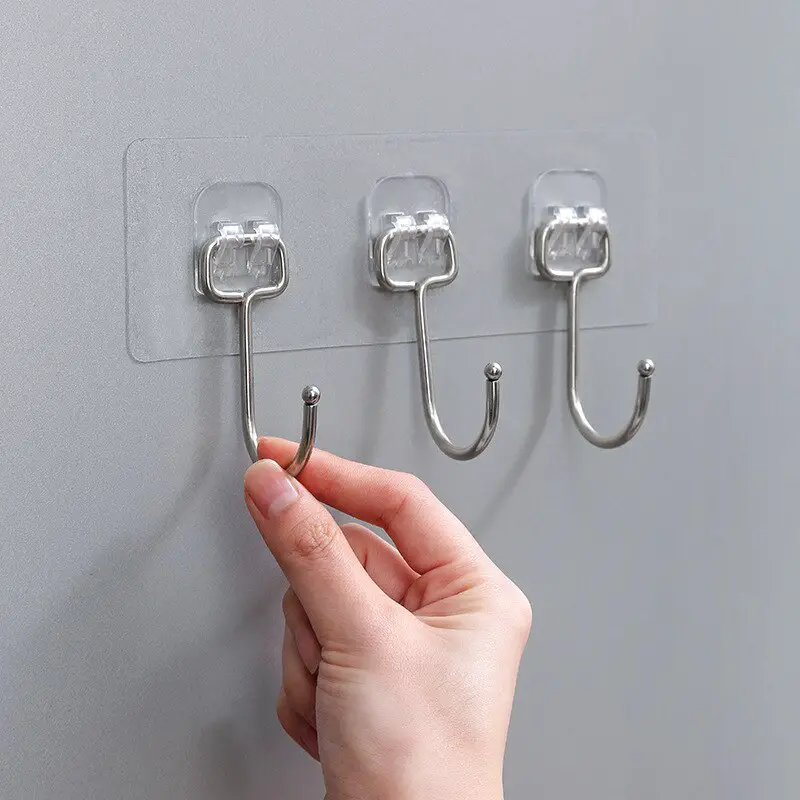
Another type of hook that is commonly used is the adhesive hook. These hooks are self-adhesive and do not require any drilling. They are ideal for lightweight items and can be easily removed without leaving any damage or residue on the wall. However, it is important to note that adhesive hooks may not be suitable for all wall surfaces.
How do you determine the appropriate size and weight capacity of hooks for a specific wall?
When determining the appropriate size and weight capacity of hooks for a specific wall, there are a few factors to consider. Firstly, you need to assess the type of wall you are working with. Different walls have different strengths and capabilities to hold weight. For example, drywall is generally less sturdy than concrete or brick walls. It is crucial to understand the limitations of your wall to ensure the hooks can support the desired weight without causing any damage.
Next, you should consider the weight of the item you intend to hang on the hook. It is essential to choose hooks with weight capacities that exceed the weight of the object you plan to hang. This ensures that the hooks can safely support the load without any risk of failure. Be sure to check the weight capacity specified by the manufacturer for each hook you are considering.
Additionally, it is advisable to distribute the weight across multiple hooks if you are hanging a heavy item. This helps to evenly distribute the load and reduces the strain on individual hooks. By using multiple hooks, you can increase the overall weight capacity and minimize the risk of damage to your wall.
What tools and materials are needed to successfully drill hooks into a wall?
When it comes to drilling hooks into a wall, there are a few essential tools and materials that you will need to ensure a successful installation. Firstly, you will need a power drill with a drill bit that is appropriate for the type of wall you are working with. For example, if you are drilling into drywall, a regular drill bit will suffice, but if you are drilling into concrete or masonry, you will need a masonry drill bit.
In addition to the drill and drill bit, you will also need a stud finder to locate the studs in the wall. This is important because drilling into a stud will provide a much stronger and more secure anchor point for your hooks. A level is another essential tool that will help you ensure that your hooks are installed straight and level.
When it comes to materials, you will need the appropriate hooks for your specific needs. There are various types of hooks available, such as picture hooks, coat hooks, or utility hooks, each designed for different purposes and weight capacities. It is important to choose hooks that are suitable for the items you plan to hang and that have a weight capacity that exceeds the weight of the items.
Are there any specific techniques or precautions to follow when drilling hooks into different types of walls (e.g., drywall, concrete)?
When drilling hooks into different types of walls, it is important to follow specific techniques and take necessary precautions to ensure a successful and secure installation. The approach may vary depending on the type of wall, such as drywall or concrete.
For drywall: It is crucial to locate the wall studs before drilling. Using a stud finder or tapping the wall to listen for a solid sound can help identify the studs. Once the studs are located, it is recommended to drill the hooks directly into the studs for maximum strength and stability. If drilling into the drywall itself, it is essential to use anchors to provide additional support. Anchors can be inserted into pre-drilled holes and expand behind the drywall, creating a secure attachment point for the hooks.
For concrete: Drilling into concrete requires more power and specialized tools. It is important to use a hammer drill with a masonry bit specifically designed for concrete. Before drilling, it is advisable to mark the desired location and ensure there are no electrical wires or pipes behind the wall. To prevent the concrete from cracking, it is recommended to start with a smaller drill bit and gradually increase the size. After drilling the hole, it is crucial to clean out any debris before inserting the appropriate anchor, such as a concrete screw or expansion anchor, to provide a secure attachment point for the hooks.
Are there any specific techniques or precautions to follow when drilling hooks into different types of walls (e.g., drywall, concrete)?
When drilling hooks into different types of walls, it is important to follow specific techniques and take necessary precautions to ensure a secure and successful installation. The approach may vary depending on the type of wall you are working with, such as drywall or concrete.
For drywall: It is crucial to locate the wall studs before drilling. Using a stud finder or tapping the wall to listen for a solid sound can help identify the studs. Once the studs are located, it is recommended to drill the hooks directly into the studs for maximum strength and stability. If you cannot find a stud in the desired location, you can use wall anchors or toggle bolts to provide additional support. These anchors should be properly sized and installed according to the manufacturer’s instructions.
For concrete: Drilling into concrete requires a different approach. It is essential to use a masonry drill bit specifically designed for concrete. Before drilling, ensure that you are wearing safety goggles and a dust mask to protect yourself from flying debris. Mark the desired location for the hook and start drilling slowly, applying steady pressure. It is advisable to periodically remove the drill bit to clear out any dust or debris. Once the hole is drilled, insert a plastic or metal anchor into the hole and then screw the hook into the anchor for a secure attachment.
Conclusion
After thoroughly researching the topic of “”how to drill hooks into a wall,”” it is clear that this process requires careful planning and execution. By following the instructions provided, individuals can successfully hang hooks on their walls without causing any damage or compromising the structural integrity of the wall. This conclusion aims to summarize the key points discussed throughout the research and highlight the importance of following the instructions to ensure a successful outcome.
First and foremost, it is crucial to select the appropriate tools and materials for the task. This includes choosing the right type of hook for the intended purpose and ensuring that the wall can support the weight of the item to be hung. By using the correct tools and materials, individuals can minimize the risk of damaging the wall or experiencing any accidents during the drilling process.
Secondly, it is essential to locate the studs or anchors in the wall before drilling. This step is crucial as it provides a secure and stable base for the hooks. By using a stud finder or tapping the wall to listen for a solid sound, individuals can identify the best spots for drilling. This precautionary measure ensures that the hooks will be firmly attached to the wall and capable of supporting the desired weight.
Lastly, following the correct drilling technique is vital to avoid any mishaps. It is recommended to start with a small pilot hole before gradually increasing the size to accommodate the hook. This gradual approach helps prevent the wall from cracking or splintering. Additionally, it is important to drill straight and avoid applying excessive force, as this can lead to damage or misalignment of the hook.
Successfully drilling hooks into a install wall requires careful planning, the use of appropriate tools and materials, locating studs or anchors, and following the correct drilling technique. By adhering to these instructions, individuals can hang hooks securely and confidently, knowing that they have taken the necessary precautions to protect their walls and ensure the longevity of the hooks. Whether it is for organizing purposes or adding decorative elements to a space, drilling hooks into a wall can be a straightforward and rewarding task when done correctly