How To Remove Old Kitchen Cabinets
Introduction
How To Remove Old Kitchen Cabinets: To replace outdated cabinetry, knowing how to effectively remove the old cabinets is essential. This process can seem daunting at first, but with the right tools, preparation, and step-by-step approach, you’ll be able to handle it like a pro. The process of removing old kitchen cabinets! By following the steps outlined in this guide, you have taken an important step towards revamping your kitchen space. If the cabinets are still in good condition, think about repurposing them in other areas of your home, such as the garage, laundry room, or basement.
Removing old kitchen cabinets requires careful planning and consideration to ensure that the process is smooth and doesn’t cause unnecessary damage to your kitchen walls or floors. Throughout this guide, we’ll walk you through the necessary steps, provide useful tips, and offer essential safety precautions to make the entire process efficient and stress-free. You can also give them a fresh coat of paint or refinish them for a new look.
Before you start, it’s crucial to gather the right tools and materials, as well as enlist a helping hand if needed. Also, be prepared to encounter hidden surprises, such as old plumbing or electrical work behind the cabinets. But fear not, as we’ll equip you with the knowledge to handle these situations as they arise. We hope this experience has been both rewarding and enlightening for you.
Can I remove kitchen cabinets myself?
While you might hire a professional to install new cabinets, removing them yourself is a simple task if you have the time to knock it out. All it takes is a little finesse with your pry bar and a few precautions to avoid damage to your countertops and floor.
Remove Cabinet Doors and Drawers
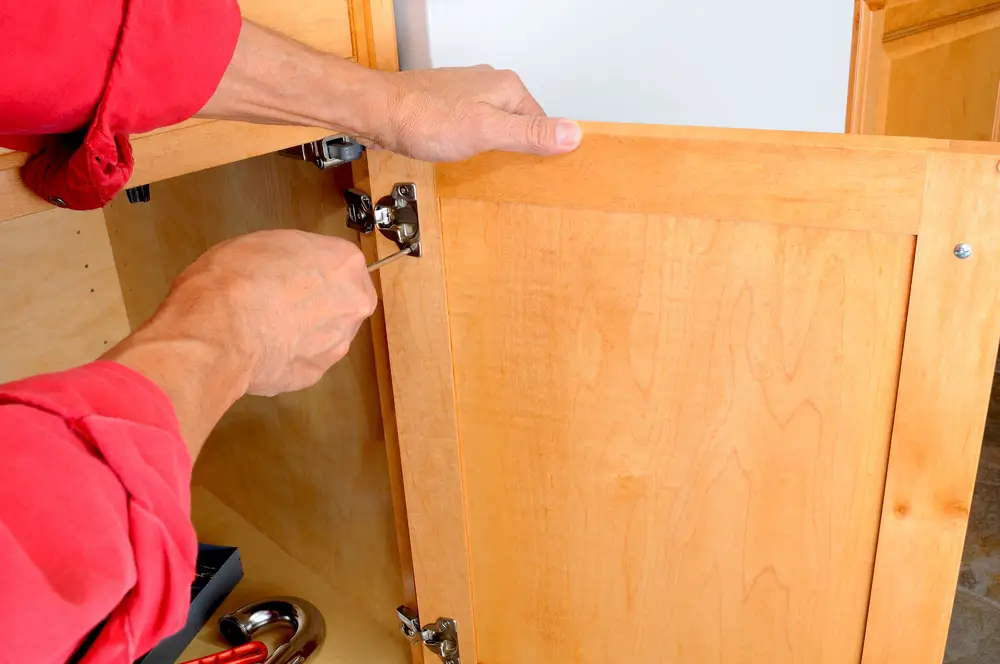
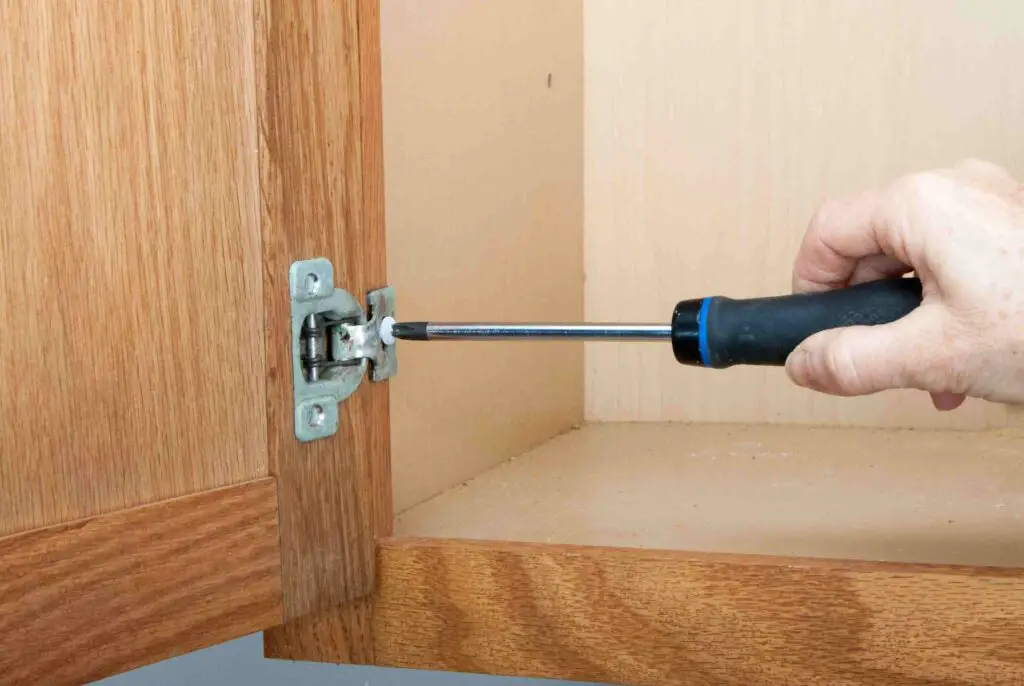
- Use a screwdriver or drill to remove all cabinet doors and drawers.
- Place the hardware in labeled bags for safekeeping.
Detach Cabinets from Walls
- Starting from the top cabinets, locate the screws securing them to the wall.
- Unscrew them carefully, making sure the cabinets are adequately supported.
- Use a pry bar to gently loosen the cabinets from the wall.
Remove Base Cabinets
- Remove any countertop that might be covering the base cabinets.
- Follow a similar process as with the upper cabinets to detach them from the wall.
- If the base cabinets are screwed together, separate them first before removing individually.
Patch and Repair
- Inspect the walls for any damage caused during the removal process.
- Patch any holes or gouges with spackling compound and sand the surfaces.
Dispose or Repurpose
- Properly dispose of the old cabinets and debris.
- Consider repurposing the cabinets in other areas of your home or donating them to someone in need.
How do you remove glued kitchen cabinets?
To Remove Glued Kitchen Cabinets:
Start on the sides of the cabinet, using the hammer to wedge the pry bar or crowbar between cabinet and wall. Pry directly over a stud where possible to limit the damage to the drywall.
Using a pry bar or putty knife, begin prying the cabinets away from the wall. Start from the top and work your way down. Apply even pressure to avoid damaging the cabinets or walls.
Once you have created a small gap between the cabinet and the wall, insert a wooden shim to keep the gap open. This will prevent the cabinets from re-adhering to the wall as you continue to work on other areas.
Move along the edges of the cabinets, prying and inserting shims as you go. Take your time to ensure a gradual and controlled removal process.
Check for any nails or screws that may be securing the cabinets to the wall in addition to the glue. Carefully remove them to completely detach the cabinets.
Once the cabinets are fully removed, clean up any residual glue or debris from both the wall and the cabinets. Patch any holes or damage on the wall using spackling compound.
Dispose of the old cabinets responsibly, or consider repurposing them in other areas of your home if they are still in good condition.
Can cabinets be removed without damage?
Removing kitchen cabinets is an essential part of a kitchen renovation. The good thing is that cabinets fastened to the wall can usually be taken off without any damage, meaning you can reuse the cabinets if you want to. First, prepare the room by removing all your dishes, pots, and pans from the cabinets.
If the cabinets are secured to the wall with screws, carefully remove them using a screwdriver. Have someone help you hold the cabinet in place as you remove the screws to avoid accidental drops.
For glued cabinets, use a utility knife to gently score along the seams where the cabinets meet the walls. This will help break the initial bond between the cabinets and the wall.
Insert a pry bar or putty knife between the cabinet and the wall, and gently apply pressure to create a gap. Work your way around the edges, gradually increasing the gap.
As you create gaps, insert wooden shims to keep the space open. This prevents the cabinets from re-adhering to the wall as you continue removing them.
Carefully continue prying the cabinets away from the wall, ensuring even pressure distribution. Use shims as needed to maintain a gap. Avoid any sudden jerks or forceful movements that could cause damage.
While removing glued cabinets, check for any nails or screws that may have been used in addition to the glue. Remove them carefully to fully detach the cabinets.
What tools do I need to remove a kitchen?
To remove your kitchen, start by getting the right tools for the job; a hammer, screw gun, scrapper and crowbar are essential. Then do your prep-work.
A power drill or screw gun will speed up the process of removing screws from cabinets, countertops, and other fixtures.
A pry bar or crowbar will be handy for gently separating cabinets from the walls and countertops.
A regular hammer will help with removing nails and other fixtures, as well as general demolition tasks.
A utility knife is essential for cutting sealants, caulk, and other materials around cabinets and countertops.
A putty knife is useful for prying open gaps and removing adhesive without damaging surfaces.
Safety should be a priority during kitchen removal. Invest in safety goggles, gloves, and a dust mask to protect your eyes, hands, and lungs.
Depending on the height of your cabinets, you may need a ladder or step stool to reach higher areas safely. An adjustable wrench will help with disconnecting plumbing fixtures and water lines.
Covering nearby surfaces with plastic sheeting or drop cloths will protect them from debris and potential damage during removal.
Are kitchen cabinets glued to the wall?
Kitchen cabinets are not glued to the wall. Instead, they use either cabinet hanging rail systems or cabinet screws that firmly connect the wall to the studs or wall structure.
While the combination of screws and glue ensures the cabinets’ stability, it can make removing them a more challenging task. Glued cabinets require careful and patient removal to prevent damage to the cabinets themselves and the walls.
When removing glued kitchen cabinets, it’s essential to use the right tools and techniques to gently pry the cabinets away from the wall without causing any harm. Additionally, you may need to use heat to soften the glue, making the removal process more manageable.
Removing glued kitchen cabinets can be labor-intensive and require expertise in handling delicate removals. If you lack experience or encounter difficulties during the process, seeking professional assistance from a contractor or handyman with experience in cabinet removal is a wise choice. Professionals will have the necessary tools and skills to safely remove the cabinets without causing damage to your kitchen or the cabinets themselves.
Kitchen cabinets are often both screwed and glued to the wall for maximum stability and strength. The combination of these methods ensures that the cabinets remain securely attached and can withstand the weight of kitchen items. While removing glued cabinets can present challenges, careful planning, the right tools, and professional assistance if needed will help you successfully undertake this task without causing any damage.
In addition to the screws, installers often use adhesive or glue to reinforce the bond between the cabinets and the wall. The glue is typically applied along the edges and seams of the cabinets, creating a strong adhesive bond that further enhances the cabinets’ stability and prevents any movement or shifting over time.
Do I need to remove kitchen cabinets before painting?
Use a screwdriver to remove all old cabinet hardware, handles, knobs and closures. You don’t have to remove the cabinet doors to repaint them, so leave them on their hinges if you’re not going to replace them.
Painting kitchen cabinets in place is a more convenient option, especially if you want to refresh the look of your kitchen without a full renovation. It is also a quicker process since you don’t have to remove and re-install the cabinets.
- Painting in place is faster since you skip the removal and re-installation process.
- There’s minimal disruption to your kitchen routine as you can continue to use the space during painting.
- Painting in place may be easier for those with limited DIY experience.
- Painting in place can be more challenging to achieve a smooth, professional finish, especially in tight spaces or around hardware.
- It requires thorough masking and protection of surrounding surfaces, including countertops and appliances.
- It can be difficult to paint all surfaces, including the back and sides of the cabinet doors.
Taking the extra step to remove kitchen cabinets before painting allows for more thorough and precise work. You can paint both the cabinet doors and frames separately, achieving a higher-quality finish.
- Removing the cabinets allows for better access to all surfaces, resulting in a smoother and more professional finish.
- You can paint the cabinets in a more controlled environment, avoiding dust and debris.
- Removing the cabinet doors makes it easier to paint hardware separately.
- Removing, painting, and reinstalling the cabinets is a time-consuming process that may disrupt your kitchen for an extended period.
- Removing and re-installing cabinets requires some DIY skills, and you’ll need to be careful not to damage the cabinets or surrounding walls.
- You’ll need space to store the cabinet doors while painting them separately.
What removes glue from cabinets?
- Use a plastic card or a spoon and scrape off the hardened glue.
- Soak the glue residue in rubbing alcohol, acetone, or vinegar.
- If the glue still proves too stubborn, try heating it up with a hair dryer.
- A product that can help is a few sprays of WD-40.
For water-based glues or mild adhesives, start by mixing warm water with a few drops of mild dish soap. Apply the soapy solution to the glue using a soft cloth or sponge. Allow it to soak for a few minutes, then gently scrub the glue off. Rinse the area with clean water and dry it thoroughly.
Vinegar is a natural adhesive remover and can work well for water-based glues. Apply white vinegar to the glue, let it sit for a few minutes, and then scrub the glue off with a cloth or sponge. Rinse the area with water and dry it.
For stronger glues, such as super glue or adhesive residue from stickers, rubbing alcohol can be effective. Apply rubbing alcohol to a cloth or cotton ball and gently rub the glue until it dissolves. Rinse the area with water and dry it.
Acetone or nail polish remover containing acetone can remove strong glues like super glue. Apply a small amount of acetone to a cloth and gently rub the glue until it dissolves. Be cautious when using acetone on wood surfaces, as it can damage the finish. Test a small, hidden area first.
For glue that has hardened or dried, using a heat gun or hairdryer on low heat can soften the glue, making it easier to remove. Hold the heat source a few inches away from the glue and gradually heat it until it becomes pliable. Use a putty knife or plastic scraper to lift the softened glue gently.
There are commercial adhesive removers available in hardware stores that can effectively dissolve different types of glues. Follow the manufacturer’s instructions and test the product on a small area first to ensure it won’t damage the cabinet surface.
Can you move kitchen cabinets?
Moving cabinets is a task you can attempt to DIY yourself with the right tools and an extra set of hands. If your light kitchen remodel includes replacing some cabinet boxes or faces at any point, it’s time to call in a local cabinetmaker.
Take off all hardware, such as cabinet doors, handles, and hinges. Label them for easy reassembly later.
If the cabinets are screwed to the wall, carefully unscrew them to detach from the wall. Use a screwdriver or power drill for this step.
Gently lift the cabinets and move them to the desired location. Having a helping hand will make the process easier and reduce the risk of damage.
Once in the new location, use a level to ensure the cabinets are straight and aligned properly. Make any necessary adjustments to ensure a level and secure installation.
If the cabinets were originally attached to the wall, reattach them in their new position. Ensure they are securely anchored to the wall and level.
Reinstall all cabinet hardware, including doors, handles, and hinges, according to the labels you made during removal.
If there are holes or marks from the previous installation, fill them with spackling compound and sand them smooth. This will leave a clean and finished appearance.
Depending on the condition of the cabinets and the surrounding area, you may need to touch up the cabinets with paint or stain to match the new surroundings.
Conclusion
Remember, safety should always be a top priority throughout the removal process. Take your time, use appropriate tools, and wear protective gear to prevent accidents or injuries. If you encountered any unexpected challenges, such as stubborn screws or unexpected wiring, you’ve learned valuable problem-solving skills that will serve you well in future DIY projects.
Before moving on to the next phase of your remove kitchen renovation, take a moment to inspect the walls and floors to ensure they are in good condition. If you find any damages, repair them promptly before installing new cabinets to avoid any issues later on. If the cabinets are large or heavy, having an extra set of hands can be invaluable. Enlist a friend or family member to assist you with the removal, especially when dealing with upper cabinets.
Now that your old cabinets are out of the way, you have a blank canvas to work with. Consider how you’d like your new kitchen layout to be and choose cabinets that match your vision and needs. With careful planning and attention to detail, your kitchen will soon be transformed into a beautiful and functional space that you can enjoy for years to come.
Lastly, don’t forget to properly dispose of the old cabinets and any other debris from the removal process. If the cabinets are in good condition, consider donating or selling them to someone in need or a local charity. Before you start removing cabinets, ensure you’ve shut off the power and water supply to any nearby electrical outlets, switches, or plumbing fixtures. This precaution will prevent accidents and potential damage during the removal.