How To Install Kitchen Handles On Cabinets
Introduction
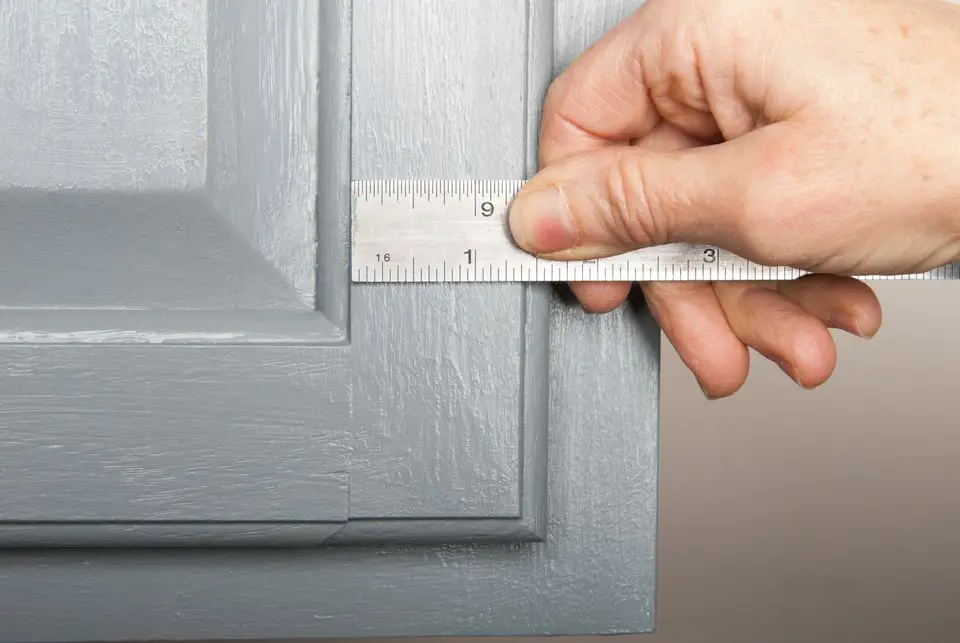
How To Install Kitchen Handles On Cabinets: Before you begin, decide on the placement of your handles. You can place them horizontally or vertically, depending on your preference and the style of your cabinets. Use a measuring tape to ensure consistency, and mark the spots where the screws will go on each cabinet door. To make sure the handles are aligned correctly, you may want to use a level or create a template from cardboard. Choose a drill bit that matches the diameter of your screws.
You can use masking tape on the drill bit to indicate the depth you want to drill, preventing you from drilling too far into the cabinet door. Carefully drill holes at the marked spots on each cabinet door. Use steady pressure and be cautious not to damage the kitchen cabinet surface or drill through to the other side. If your cabinets are made of delicate material, consider using a piece of scrap wood as backing while drilling.
Now it’s time to attach the handles. Place the handle over the holes you drilled and insert the screws through the back of the cabinet door into the handle’s screw holes. Tighten the screws using a screwdriver, ensuring they are snug but not over-tightened, as it could damage the handle or cabinet. Follow the same steps for each cabinet door you want to install handles on, making sure to maintain consistent placement and alignment throughout.

Where do you put handles on kitchen cabinets?
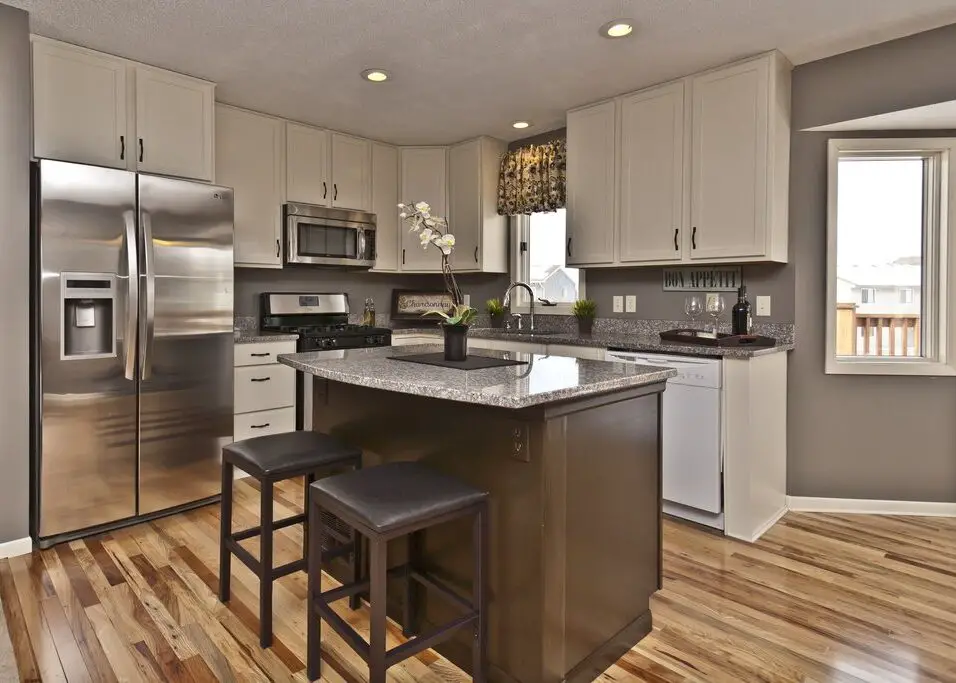
When it comes to installing cabinet door handles (either knobs or pulls), they are always placed on the opposite side from the door hinges. You’ll specifically want to place them anywhere between 1” and 4” from the top or bottom edge of the door.
Before diving into specific handle placement, consider the orientation – horizontal or vertical. Horizontal handles are the traditional choice and are commonly positioned in the center of the cabinet door. They provide a sleek and classic look. On the other hand, vertical handles can add a modern and unique flair to your kitchen. They are usually placed on the upper or lower corner of the cabinet door. Ultimately, the choice between horizontal and vertical handles comes down to personal preference and the overall style of your kitchen.
The handle at the top or bottom of the door
Aligning it with the rail for a more contemporary look. This style works well with handleless doors, as it creates a seamless appearance while still providing a functional grip.
For drawers, handle placement is more straightforward. Handles are typically centered horizontally on the drawer front, both for practicality and balanced aesthetics. Like cabinet doors, you can also opt for vertical handles on drawer fronts, especially for taller drawers. Just ensure that the handle is conveniently positioned for easy access.
To maintain a cohesive and visually appealing kitchen design, strive for consistency in handle placement. Aim for the same height and positioning on all cabinet doors and drawers throughout the kitchen. Consistent handle placement creates a sense of harmony and order in the space.
Practicality and comfort are crucial factors when deciding handle placement. Ensure that the handles are positioned where they feel most natural and ergonomic for your hands. Test different placements before drilling holes to find the most comfortable option for you and other users of the kitchen.
How do you layout cabinet handles?
Measure and Mark Locations for New Handles
They should be centered on the width of the stile. If your cabinets have slab doors without stiles, cabinet pulls are usually 2 to 3 inches up from the bottom edge of the door. They will be the same distance in from the side edge. Measure and mark this location with a pencil.
Before you begin, gather your materials, including the handles of your choice, a measuring tape, a pencil, and masking tape (optional). Measure the width of each cabinet door and drawer front where you intend to install handles. Divide the width in half to find the center point and mark it with a pencil. For taller cabinet doors, consider placing the handle slightly above the center to maintain balance.
To ensure consistent handle placement, consider creating a template out of cardboard or paper. Cut a piece of cardboard to the size of your cabinet door or drawer front and mark the center point. Use this template to mark the handle placement on each cabinet door, ensuring uniformity across all units.
The style and design of the handles will influence their placement
For horizontal handles, align them with the center point you marked earlier. If you’ve chosen vertical handles, position them at the top or bottom corner of the cabinet door, also aligned with the center point.
If your handles are long or oversized, consider how they fit within the space. Ensure there’s enough clearance around the handle to open the door or drawer comfortably. Shorter handles may not require as much clearance.
Before drilling any holes, perform a mock installation. Hold the handle against the cabinet door or drawer front to ensure you’re satisfied with the placement. Open and close the door or drawer to check if the handle feels comfortable and natural in your hand. Make adjustments as needed until you find the optimal placement.
What is the proper placement of drawer handles?
For standard pulls, follow all of the same rules for installing knobs on drawers. Center the pull both horizontally and vertically on the panel, or in the top third of the drawer. Pulls can also be centered on the top rail. For long drawers, use two pulls installed in the right and left thirds of the drawer.
The size and type of the drawer will influence the handle placement. For smaller drawers, a centered handle provides a balanced and functional grip. On larger drawers or those carrying heavier items, consider using longer handles or placing two handles symmetrically for better weight distribution.
Ergonomics play a significant role in determining handle placement. Ensure that the handles are positioned at a height that feels natural and comfortable for your hand to grasp. Test the handle placement by mimicking the process of opening and closing the drawer to find the most comfortable position.
Consistency is key to achieving a visually harmonious design. Aim for uniformity in handle placement throughout your furniture or kitchen cabinetry. Whether you have a single drawer or a row of them, maintaining consistent handle placement creates a sense of order and elegance in the space.
The style and design of the handles will also impact their placement. Consider whether your handles are horizontal or vertical in orientation and how they complement the overall aesthetic of the furniture or kitchen.
How to arrange kitchen with cabinets?
First, edit down your dishware collection to avoid overcrowding the cabinets. Arrange pretty plates and bowls into stacks and line up mugs in neat rows. Consider storing bulky or unattractive items you’d rather not display, such as large stock pots, in a different location.
Next, plan the layout of your kitchen with cabinets. Think about the work triangle – the area between the stove, sink, and refrigerator – to ensure a smooth workflow. Optimize the positioning of your cabinets, keeping frequently used items easily accessible and less frequently used ones in more remote locations.
Group similar items together and allocate dedicated cabinet spaces for them. For instance, designate specific cabinets for dishes, glassware, pots, pans, baking supplies, and cleaning products. This will make it easier to find what you need when cooking or cleaning up.
Maximize storage by utilizing vertical space. Install cabinets that extend to the ceiling, providing additional storage for less frequently used items or seasonal cookware. Consider adding open shelves or hanging racks to keep frequently used items within reach.
Pull-out drawers and organizers are essential for efficient kitchen organization. They allow you to access items at the back of the cabinets without rummaging through the entire contents. Install pull-out spice racks, tray dividers, and utensil organizers for a clutter-free and accessible kitchen.
Organize your kitchen into functional zones. Have a cooking zone near the stove, a prep zone near the sink, and a storage zone for dry goods and dishes. This arrangement streamlines the cooking process and reduces unnecessary movement while working in the kitchen.

Do modern kitchens have handles?
A kitchen with no handles on the cabinetry gives a modern, timeless look. If sleek, modern kitchen cabinets are your thing, you will love the handleless look!
In handle-less kitchens, the handles are often integrated into the cabinet doors and drawers, creating a seamless and hidden design. This can be achieved through the use of edge pulls, where a recessed groove or channel is carved into the top or bottom of the door, allowing users to grip and open the cabinets effortlessly. The handles become discreet, allowing the focus to remain on the beauty of the cabinetry and overall kitchen design.
Another popular handle-less option is the push-to-open mechanism. In this design, the doors and drawers are equipped with a mechanism that allows users to open them by gently pushing on the surface. The push-to-open feature is often combined with soft-closing technology, ensuring a smooth and gentle closing action.
The tip-on system is a handle-less solution that utilizes a touch-sensitive mechanism. A slight push or tap on the cabinet door activates the mechanism, allowing the door to spring open slightly, enabling users to grip and open it fully. When the cabinet is pushed back in, it automatically closes with a soft-closing motion.
The primary benefit of handle-less kitchens is the clean and modern aesthetics they provide. The absence of visible handles contributes to a sleek and uninterrupted visual appeal, making the kitchen look more spacious and inviting.
Handle-less kitchen cabinets are easy to clean since there are no protruding handles or knobs to collect dust or grime. A simple wipe down of the smooth surfaces keeps the kitchen looking pristine.
Which way should cabinet doors open?
Set up Cabinet Doors in Pairs
The doors open in opposite directions like the pages of a book. If you have a mounted microwave above your stove, the cabinets directly above the microwave would be a pair. Then the two surrounding the microwave would also act as a pair.
The layout of your kitchen is a crucial factor in determining the direction of cabinet door openings. Take into account the location of other kitchen elements, such as appliances, countertops, and workspaces. The doors should open in a way that allows for easy access to these areas and ensures smooth traffic flow in the kitchen.
Consider the ease of access when deciding the direction of cabinet doors. Ideally, you want the doors to open in a way that allows you to reach the contents without obstructions. For instance, avoid having cabinet doors that open directly into a walkway or impede movement in the kitchen.
The positioning of adjacent cabinets and appliances can influence the door opening direction. If there are cabinets or appliances in close proximity to the cabinet you’re considering, ensure that their doors and drawers can open without interference.
Think about the specific purpose of the cabinet and how you intend to use it. For instance, if you have a corner cabinet, consider installing doors that swing outwards, allowing easy access to the contents inside.
Should cabinet handles be in middle or top?
You may find it better for your needs to only center your knob horizontally on the top rail instead of in the middle of the panel. If you have a drawer larger than 24 inches, divide the top rail into thirds and place the knobs in the left and right thirds.
The style of your cabinets plays a significant role in determining handle placement. For traditional cabinet designs, centered handles in the middle of the door are often favored, as they provide a classic and balanced look. In modern and contemporary designs, handles at the top or bottom corners are more common, creating a sleek and minimalist appearance.
Consider the ergonomic aspect of handle placement. Handles in the middle of the door are generally easier to grip and provide a natural hand position for opening the cabinet. However, handles at the top or bottom corners can also be comfortable to use, especially when equipped with a finger pull or a rounded edge.
The function of the cabinet can influence handle placement. If you have large cabinets or pantry doors, centered handles can offer a wide grip for easier access. On the other hand, smaller drawers may benefit from handles at the top corners, allowing a comfortable grip for quick opening and closing.
The placement of cabinet handles can impact the visual balance and appeal of your kitchen or furniture. Centered handles can create a symmetrical look, while handles at the top or bottom corners can add a contemporary and asymmetric touch.
How many screws does a kitchen cabinet need?
Attach the cabinets to the studs with at least two screws in each mounting rail, while attaching the cabinets to each other with at least four drywall screws.
Larger and heavier cabinets require more screws to provide sufficient support and stability. Wall cabinets, especially those that will hold heavy items like dishes or kitchen appliances, may require additional screws to distribute the weight evenly and prevent sagging.
Mounting cabinets to wall studs provides a secure and durable installation. The number of screws needed will depend on the distance between the wall studs and the length of the cabinet. Generally, at least two screws per wall stud are used to attach the cabinet securely.
The cabinet’s construction and design influence the number of screws needed. Cabinets with a sturdy frame and back panel may require fewer screws than those with a lighter construction.
There are different methods of installing kitchen cabinets, such as hanging them on a rail or directly screwing them to the wall. The chosen installation method will impact the number of screws required. For rail-mounted cabinets, multiple screws may be used to secure the cabinet to the rail, and additional screws may be used for further reinforcement.
Always refer to the manufacturer’s installation guidelines and recommendations. Manufacturers typically provide specific instructions regarding the number and placement of screws required for their cabinets to ensure proper installation and warranty compliance.
Conclusion
Remember, precise measurements, careful drilling, and attention to detail are crucial throughout the installation process. Taking the time to select handles that complement your kitchen’s style and are comfortable to use will add that extra touch of finesse to your project. Installing kitchen handles on cabinets is a fantastic way to personalize your kitchen and make it uniquely yours. It’s a small improvement that can have a big impact on the overall aesthetics and functionality of the space.
So, step back and admire your handiwork, knowing that you’ve not only saved money on professional installation but also added a personal touch to your kitchen. Now it’s time to attach the handles. Place the handle over the holes you drilled and insert the screws through the back of the cabinet hardware door into the handle’s screw holes.
Tighten the screws using a screwdriver, ensuring they are snug but not over-tightened, as it could damage the handle or cabinet. Follow the same steps for each cabinet door you want to install handles on, making sure to maintain consistent placement and alignment throughout.mAfter installing all the handles, test them to ensure they are secure and function properly. Adjust any handles that may feel loose or misaligned.