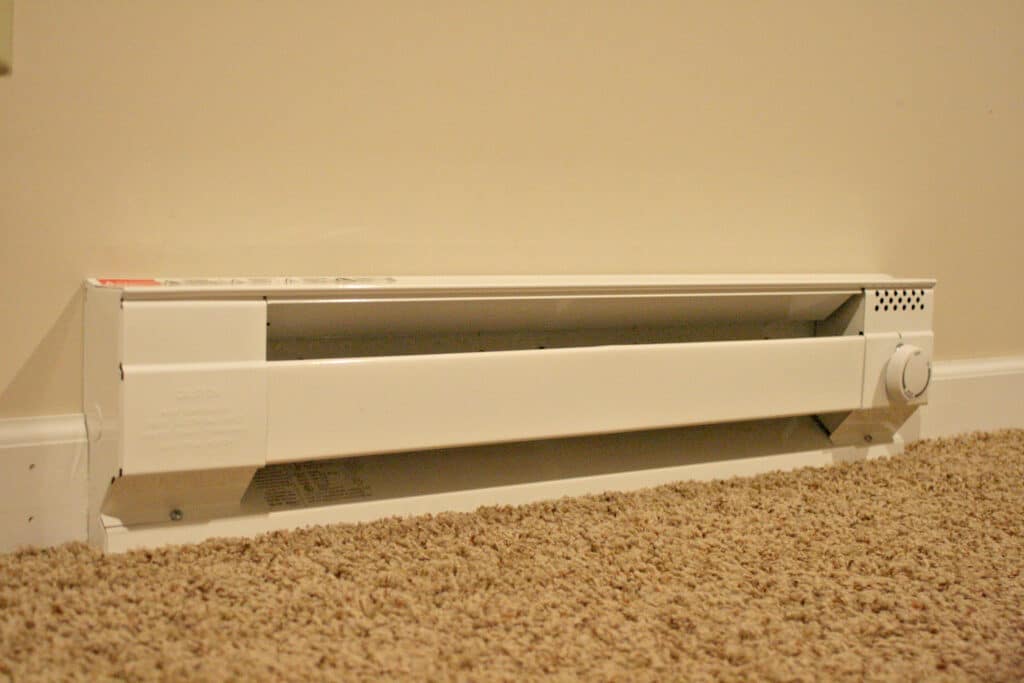
How To Install Electric Baseboard Heater
Introduction
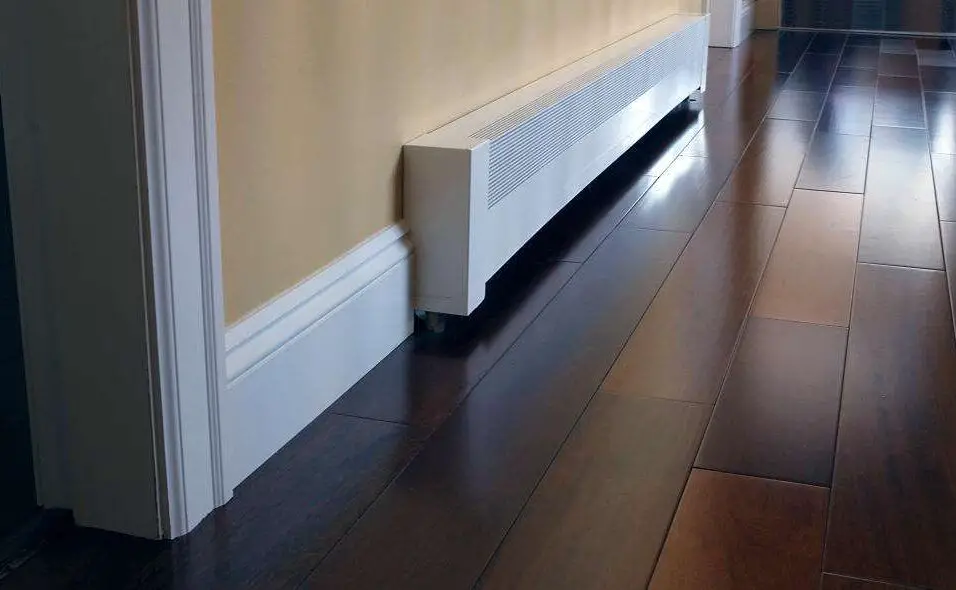
How To Install Electric Baseboard Heater: Do you want to find a cost-effective and efficient way to heat your home. Look no further than electric baseboard heaters. These heaters are a popular choice for homeowners looking to add supplemental heat to their living spaces or even heat an entire room. In this article, we will guide you through the process of installing an electric baseboard heater, so you can enjoy a warm and cozy home all winter long.
Electric clean baseboard heaters are a great option for homeowners who want to heat their homes without the need for a central heating system. Whether you want to heat your bedroom, living room, or even your bathroom, electric baseboard heaters are a versatile and efficient choice. Before you begin the installation process, it is important to gather all the necessary tools and materials. You will need a screwdriver, wire strippers, a voltage tester, and a drill.
Additionally, you will need the baseboard heater itself, as well as the appropriate length of electrical wire and wire connectors. It is also important to ensure that you have the necessary permits and that you are familiar with your local building codes. Once you have gathered all the necessary tools and materials, you can begin the installation process. The first step is to turn off the power to the room where you will be installing the baseboard heater. It is important to double-check that the power is off before proceeding with the installation.
Can I install baseboard heater myself?
Yes, it is possible to install a baseboard heater yourself. However, it is important to note that electrical work can be dangerous if not done correctly, so it is recommended to have some knowledge and experience in electrical installations before attempting to install a baseboard heater on your own.
Before starting the installation process, it is crucial to ensure that you have all the necessary tools and materials. These may include a baseboard heater, a thermostat, electrical wire, wire connectors, a circuit breaker, and a screwdriver. It is also important to check the local building codes and regulations to ensure that you are following the proper guidelines for installation.
When installing a baseboard heater, it is important to turn off the power to the circuit that you will be working on. This can be done by turning off the corresponding circuit breaker in your electrical panel. It is also recommended to use a voltage tester to double-check that the power is indeed off before proceeding with the installation.
Once the power is turned off, you can begin the installation process. Start by measuring and marking the location where the baseboard heater will be installed. Make sure to leave enough space around the heater for proper airflow. Next, mount the baseboard heater to the wall using the provided brackets and screws.
After the heater is securely mounted, you can proceed with the electrical connections. This may involve connecting the electrical wire to the heater, thermostat, and circuit breaker. It is important to follow the manufacturer’s instructions and wiring diagrams carefully to ensure that the connections are made correctly.
Do electric baseboard heaters need their own circuit?
Yes, electric baseboard heaters do require their own circuit. This is because electric baseboard heaters draw a significant amount of power and can overload an existing circuit if they are not on their own dedicated circuit. By having their own circuit, electric baseboard heaters can operate safely and efficiently without causing any electrical issues.
When it comes to electrical circuits, each circuit has a specific capacity or amperage rating. This rating determines how much electrical current the circuit can handle. If a circuit is overloaded with too many devices drawing power, it can trip the circuit breaker or cause the wiring to overheat, potentially leading to a fire hazard.
Electric baseboard heaters typically draw a large amount of power, especially when they are operating at their maximum capacity. Therefore, it is recommended to have a dedicated circuit for each electric baseboard heater to ensure that the circuit is not overloaded and can handle the power demand of the heater.
Having a dedicated circuit for electric baseboard heaters also allows for better control and convenience. With a dedicated circuit, you can easily turn off or adjust the temperature of the heater without affecting other devices or appliances on the same circuit. This provides flexibility and ensures that the heater operates efficiently without any interference.
In addition, having a dedicated circuit for electric baseboard heaters can also help with energy efficiency. By having a separate circuit, you can easily monitor and control the energy usage of the heater, allowing you to optimize its performance and potentially save on energy costs.
How do you wire an electric baseboard?
Wiring an electric baseboard is a relatively simple process that can be done by anyone with basic electrical knowledge and the right tools. Electric baseboards are a popular choice for heating homes because they are easy to install and provide efficient heat distribution. Whether you are replacing an old baseboard or installing a new one, it is important to follow the proper wiring procedures to ensure safety and functionality.
The first step in wiring an electric baseboard is to turn off the power to the circuit you will be working on. It is crucial to always work with the power off to avoid the risk of electric shock.
Once the power is turned off, you can begin the wiring process. Start by removing the cover plate from the baseboard heater. This will expose the wiring connections inside. Take note of the existing wiring configuration, as you will need to replicate it with the new baseboard.
If you are replacing an old baseboard, you will need to disconnect the existing wiring. Make sure to label each wire with tape or a marker to keep track of which wire is which.
Next, you will need to prepare the new baseboard for installation. This may involve removing any packaging materials, attaching mounting brackets, or adjusting the length of the baseboard to fit your space. Refer to the manufacturer’s instructions for specific installation steps.
Once the baseboard is prepared, you can begin the wiring process. Start by connecting the ground wire from the electrical panel to the ground screw on the baseboard. This wire is typically green or bare copper. Use a wire nut to secure the connection.
How do you install an electric baseboard thermostat?
Whether you are replacing an old thermostat or installing a new one, the steps involved are generally the same.
Step 1: Turn off the power
Before beginning any electrical work, it is important to turn off the power to the area where you will be installing the thermostat. Double-check that the power is off by testing the wires with a voltage tester.
Step 2: Remove the old thermostat
If you are replacing an existing thermostat, start by removing the cover and disconnecting the wires from the terminals.
Step 3: Mount the new thermostat
Next, mount the new thermostat to the wall using the provided screws or adhesive. Make sure it is level and securely attached. If necessary, use a level to ensure accuracy.
Step 4: Connect the wires
Using the information you gathered in step 2, connect the wires to the corresponding terminals on the new thermostat. Make sure the connections are secure.
Step 5: Restore power and test
Test the thermostat by setting the desired temperature and ensuring that the baseboard heater turns on and off as expected. Make any necessary adjustments to the thermostat settings until you achieve the desired comfort level.
Installing an electric baseboard thermostat is a straightforward process that can greatly improve the efficiency and comfort of your home’s heating system. By following these steps and taking the necessary safety precautions, you can successfully install a thermostat and enjoy more precise temperature control in your living space.
How do electric baseboards work?
Electric baseboards work by using electricity to generate heat. Unlike traditional heating systems that rely on a central furnace or boiler, electric baseboards provide heat directly from the unit itself. As the element heats up, it radiates heat into the room, providing warmth.
One of the key components of an electric baseboard is the thermostat. The thermostat is responsible for controlling the temperature of the room. It senses the current temperature and compares it to the desired temperature set by the user. If the current temperature is lower than the desired temperature, the thermostat signals the baseboard to turn on and start heating. Once the room reaches the desired temperature, the thermostat signals the baseboard to turn off.
This positioning allows for efficient heat distribution throughout the room. The warm air rises from the baseboard and circulates throughout the space, providing even heating.
One advantage of electric baseboards is that they are relatively easy to install and require minimal maintenance. They do not require any ductwork or piping, making them a cost-effective option for heating individual rooms or small spaces.
Here is a step-by-step guide:
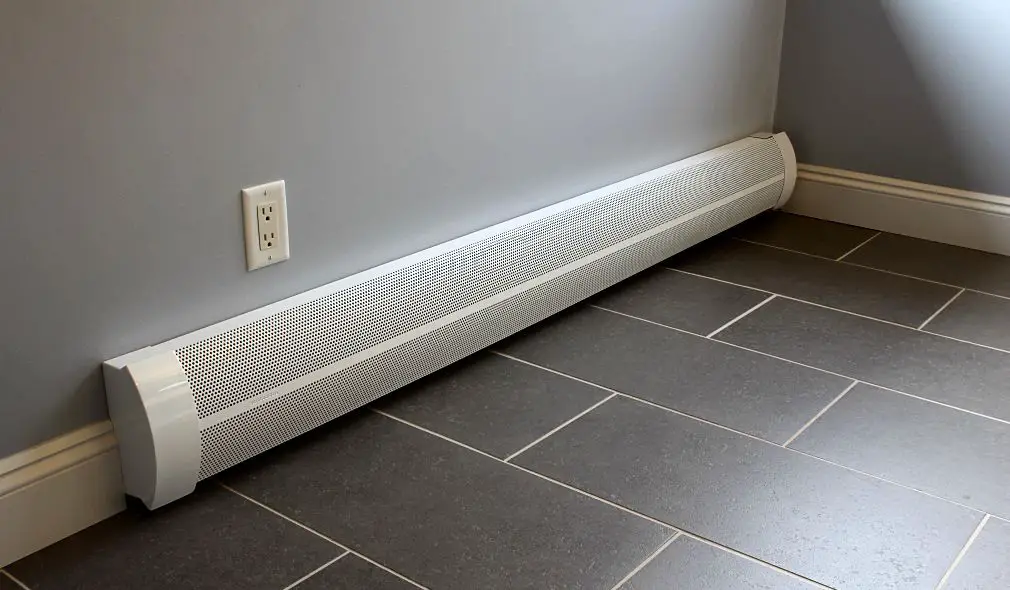
1. Planning and preparation: Before starting the installation, determine the appropriate location for the heater. Ensure there is enough clearance from furniture, curtains, and other combustible materials. Measure the length of the wall to determine the size of the heater needed.
2. Turn off the power: Safety is paramount when working with electricity. Use a voltage tester to confirm that the power is off.
3. Mount the heater: Securely mount the heater to the wall using the provided brackets. Ensure it is level and properly aligned.
4. Connect the wiring: Carefully connect the wiring according to the manufacturer’s instructions. Use wire nuts to secure the connections and ensure they are tight. Double-check the connections to ensure they are correct and secure.
5. Test the heater: Once the wiring is complete, turn the power back on at the circuit breaker. Test the heater to ensure it is functioning properly. Feel for heat and listen for any unusual noises. If everything is in order, the installation is complete.
Are there any specific tools or materials required for the installation process?
Electric baseboard heater installation requires particular tools and materials. Here are the most common:
- Screwdriver: Remove the baseboard heater cover and fasten it to the wall with a screwdriver.
- Wire cutters/strippers: Cut and strip the heater’s power supply wires.
- Voltage tester: Make sure the power is off before installing. A level is needed to install the baseboard heater straight and level on the wall. Baseboard heater mounting brackets secure it to the wall.
- Electrical tape: Electrical tape secures connections and hides wires. Wire nuts connect electrical wires.
These are some tools and materials needed to install an electric baseboard heater. Always check the manufacturer’s instructions for a complete list of tools and supplies for your model.
Are there any safety precautions that need to be taken while installing an electric baseboard heater?
Additionally, it is crucial to handle the heater with care and avoid any physical damage to the unit. This includes avoiding dropping the heater or causing any impact that could potentially damage the internal components. It is also important to follow the manufacturer’s instructions and guidelines for installation, as each heater may have specific safety requirements.
Are there any specific electrical requirements that need to be considered during the installation?
Yes, there are specific electrical requirements that need to be considered during the installation of an electric baseboard heater. These requirements ensure the safe and efficient operation of the heater. One important requirement is the need for a dedicated circuit for the heater. This means that the heater should have its own circuit breaker in the electrical panel, separate from other electrical devices in the room. This is necessary to prevent overloading the circuit and causing potential fire hazards.
Another electrical requirement is the need for proper wiring. The heater should be wired with the appropriate gauge of wire, typically 12 or 10 gauge, depending on the size and wattage of the heater. It is important to follow the manufacturer’s instructions and local electrical codes when determining the correct wire size.
Are there any recommended maintenance or troubleshooting tips for electric baseboard heaters after installation?
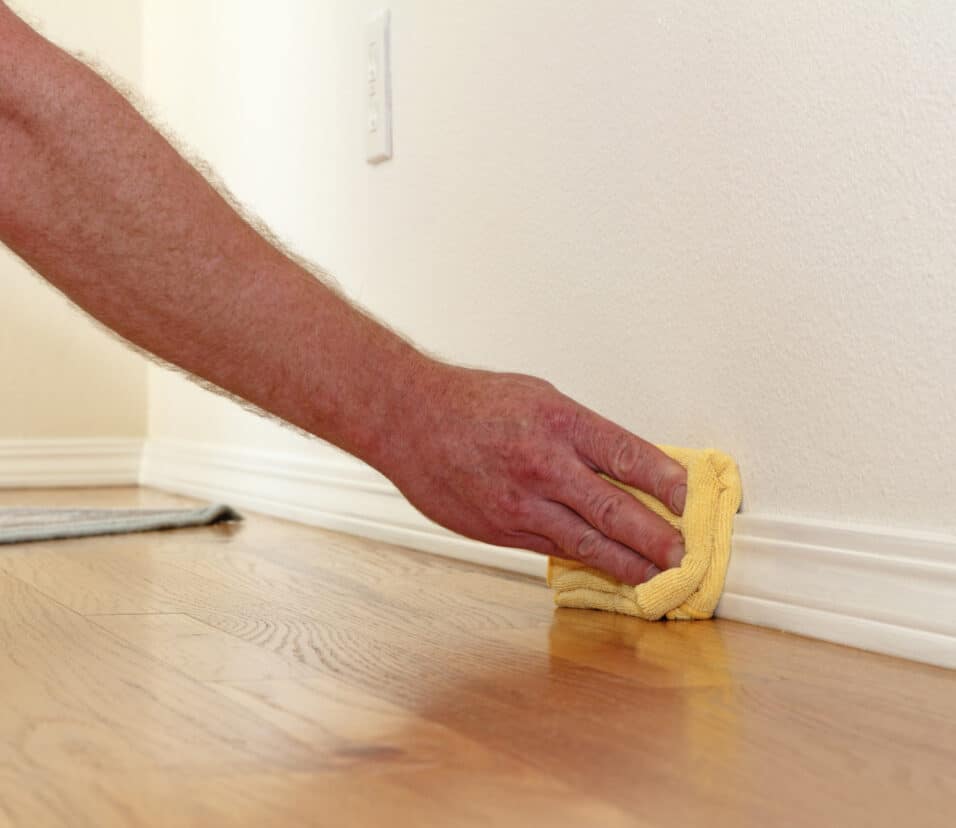
After installing an electric baseboard heater, it is important to perform regular maintenance to ensure its optimal performance and longevity. One of the key maintenance tasks is to keep the heater clean and free from dust or debris. It is important to turn off the power supply before cleaning to avoid any electrical hazards. If there is a significant difference, it may be necessary to recalibrate or replace the thermostat to maintain accurate temperature control.
In addition to regular maintenance, it is also important to be aware of common troubleshooting tips for electric baseboard heaters. If the heater is not producing enough heat, it is recommended to check the circuit breaker or fuse box to ensure there are no tripped breakers or blown fuses. It is also important to check the wiring connections to ensure they are secure and not damaged. If the issue persists, it may be necessary to consult a professional electrician for further troubleshooting and repairs.
Conclusion
Installing an electric baseboard heater is a relatively simple process that can provide efficient and effective heating for your home. By following the steps outlined in this guide, you can ensure a safe and successful installation. Remember to always consult the manufacturer’s instructions and local building codes before beginning any electrical work.
First, it is important to gather all the necessary tools and materials for the installation. This may include a baseboard heater, thermostat, wire connectors, electrical tape, a screwdriver, and a voltage tester. Once you have everything you need, you can begin the installation process.
Next, you will need to turn off the power to the circuit that you will be working on. This can usually be done by flipping the corresponding breaker in your electrical panel. It is crucial to double-check that the power is off by using a voltage tester before proceeding with any electrical work.
Once the power is off, you can begin installing the baseboard heater. Start by removing the cover and end caps from the heater. Then, position the heater against the wall where you want it to be installed. Use a level to ensure that it is straight and mark the location of the mounting holes.
Overall, installing an electric baseboard heater can be a straightforward process if you follow the proper steps and take the necessary precautions. By gathering the right tools and materials, turning off the power, and carefully positioning and securing the heater, you can enjoy the benefits of efficient and reliable heating in your home. Remember to always consult the manufacturer’s instructions and local building codes to ensure a safe and successful installation.