How To Apply Caulking To Baseboards
Introduction
How To Apply Caulking To Baseboards: Applying caulking to baseboards is an essential task for homeowners and DIY enthusiasts looking to improve the appearance and functionality of their homes. Whether you are renovating a room or simply want to seal gaps and cracks, caulking can provide a clean and professional finish to your baseboards. However, if you have never done this before, the process can seem daunting. This article will guide you through the steps of applying caulking to baseboards, ensuring that you achieve a seamless and long-lasting result.
Before diving into the application process, it is crucial to understand why caulking is necessary for fix baseboards. Over time, gaps and cracks can develop in this joint due to natural settling of the house or changes in temperature and humidity. These gaps not only compromise the aesthetic appeal of your baseboards but also allow drafts, dust, and insects to enter your home. By applying caulking, you can seal these gaps and create a barrier that prevents air and moisture from infiltrating your living space.
Moreover, caulking also helps to improve the overall insulation of your home, reducing energy loss and lowering your utility bills. It acts as a sealant, preventing heat or cool air from escaping through the gaps in your baseboards. Additionally, caulking can enhance the durability of your baseboards by preventing them from warping or rotting due to moisture exposure.
Are you supposed to caulk baseboards?
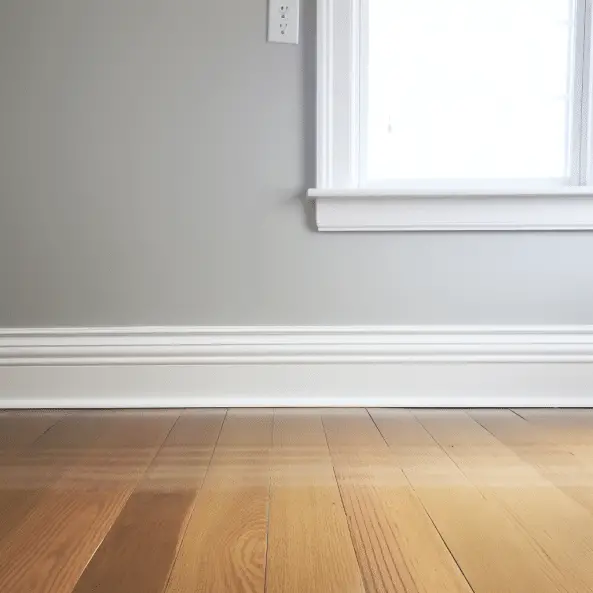
Yes, caulking baseboards is an important step in finishing the installation of baseboards. Baseboards are the trim that is installed along the bottom of walls, where they meet the floor. They serve both a functional and aesthetic purpose, covering the gap between the wall and the floor and providing a finished look to the room. Caulking baseboards helps to seal this gap and create a seamless appearance.
One of the main reasons why you should caulk baseboards is to prevent drafts and air leaks. Gaps between the baseboards and the wall can allow air to flow in and out of the room, leading to drafts and making it harder to maintain a comfortable temperature. By caulking the baseboards, you can create a tight seal that helps to prevent air leakage and improve energy efficiency.
Caulking baseboards also enhances the overall appearance of the room. It creates a clean and finished look by filling in any gaps or cracks between the baseboards and the wall. This can make a significant difference in the overall aesthetic of the room, giving it a more polished and professional appearance.
How do you caulk under baseboards?
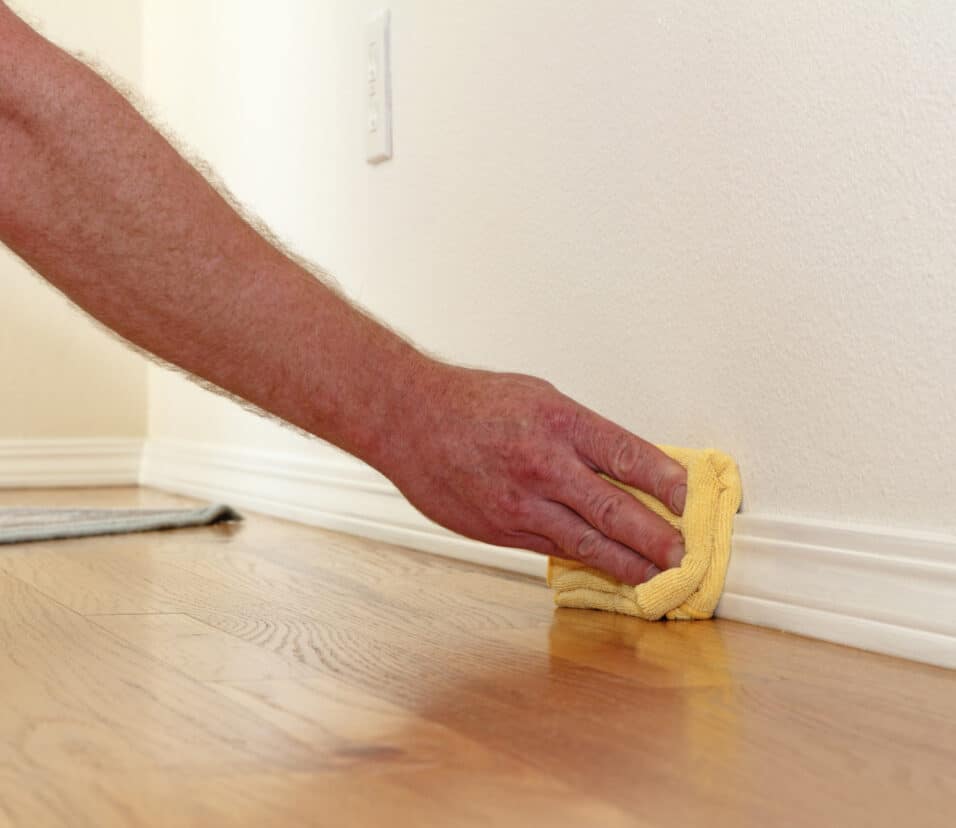
Firstly, it is important to prepare the area before applying caulk. This involves cleaning the baseboards thoroughly to remove any dirt, dust, or debris. Use a damp cloth or sponge to wipe down the surface, ensuring it is free from any loose particles. This will help the caulk adhere better and create a stronger bond.
Next, you will need to choose the right type of caulk for the job. There are various types available, such as silicone, acrylic, or latex caulk. Consider the specific needs of your project, such as the level of flexibility required or the presence of moisture. Read the labels carefully and select a caulk that is suitable for use on baseboards.
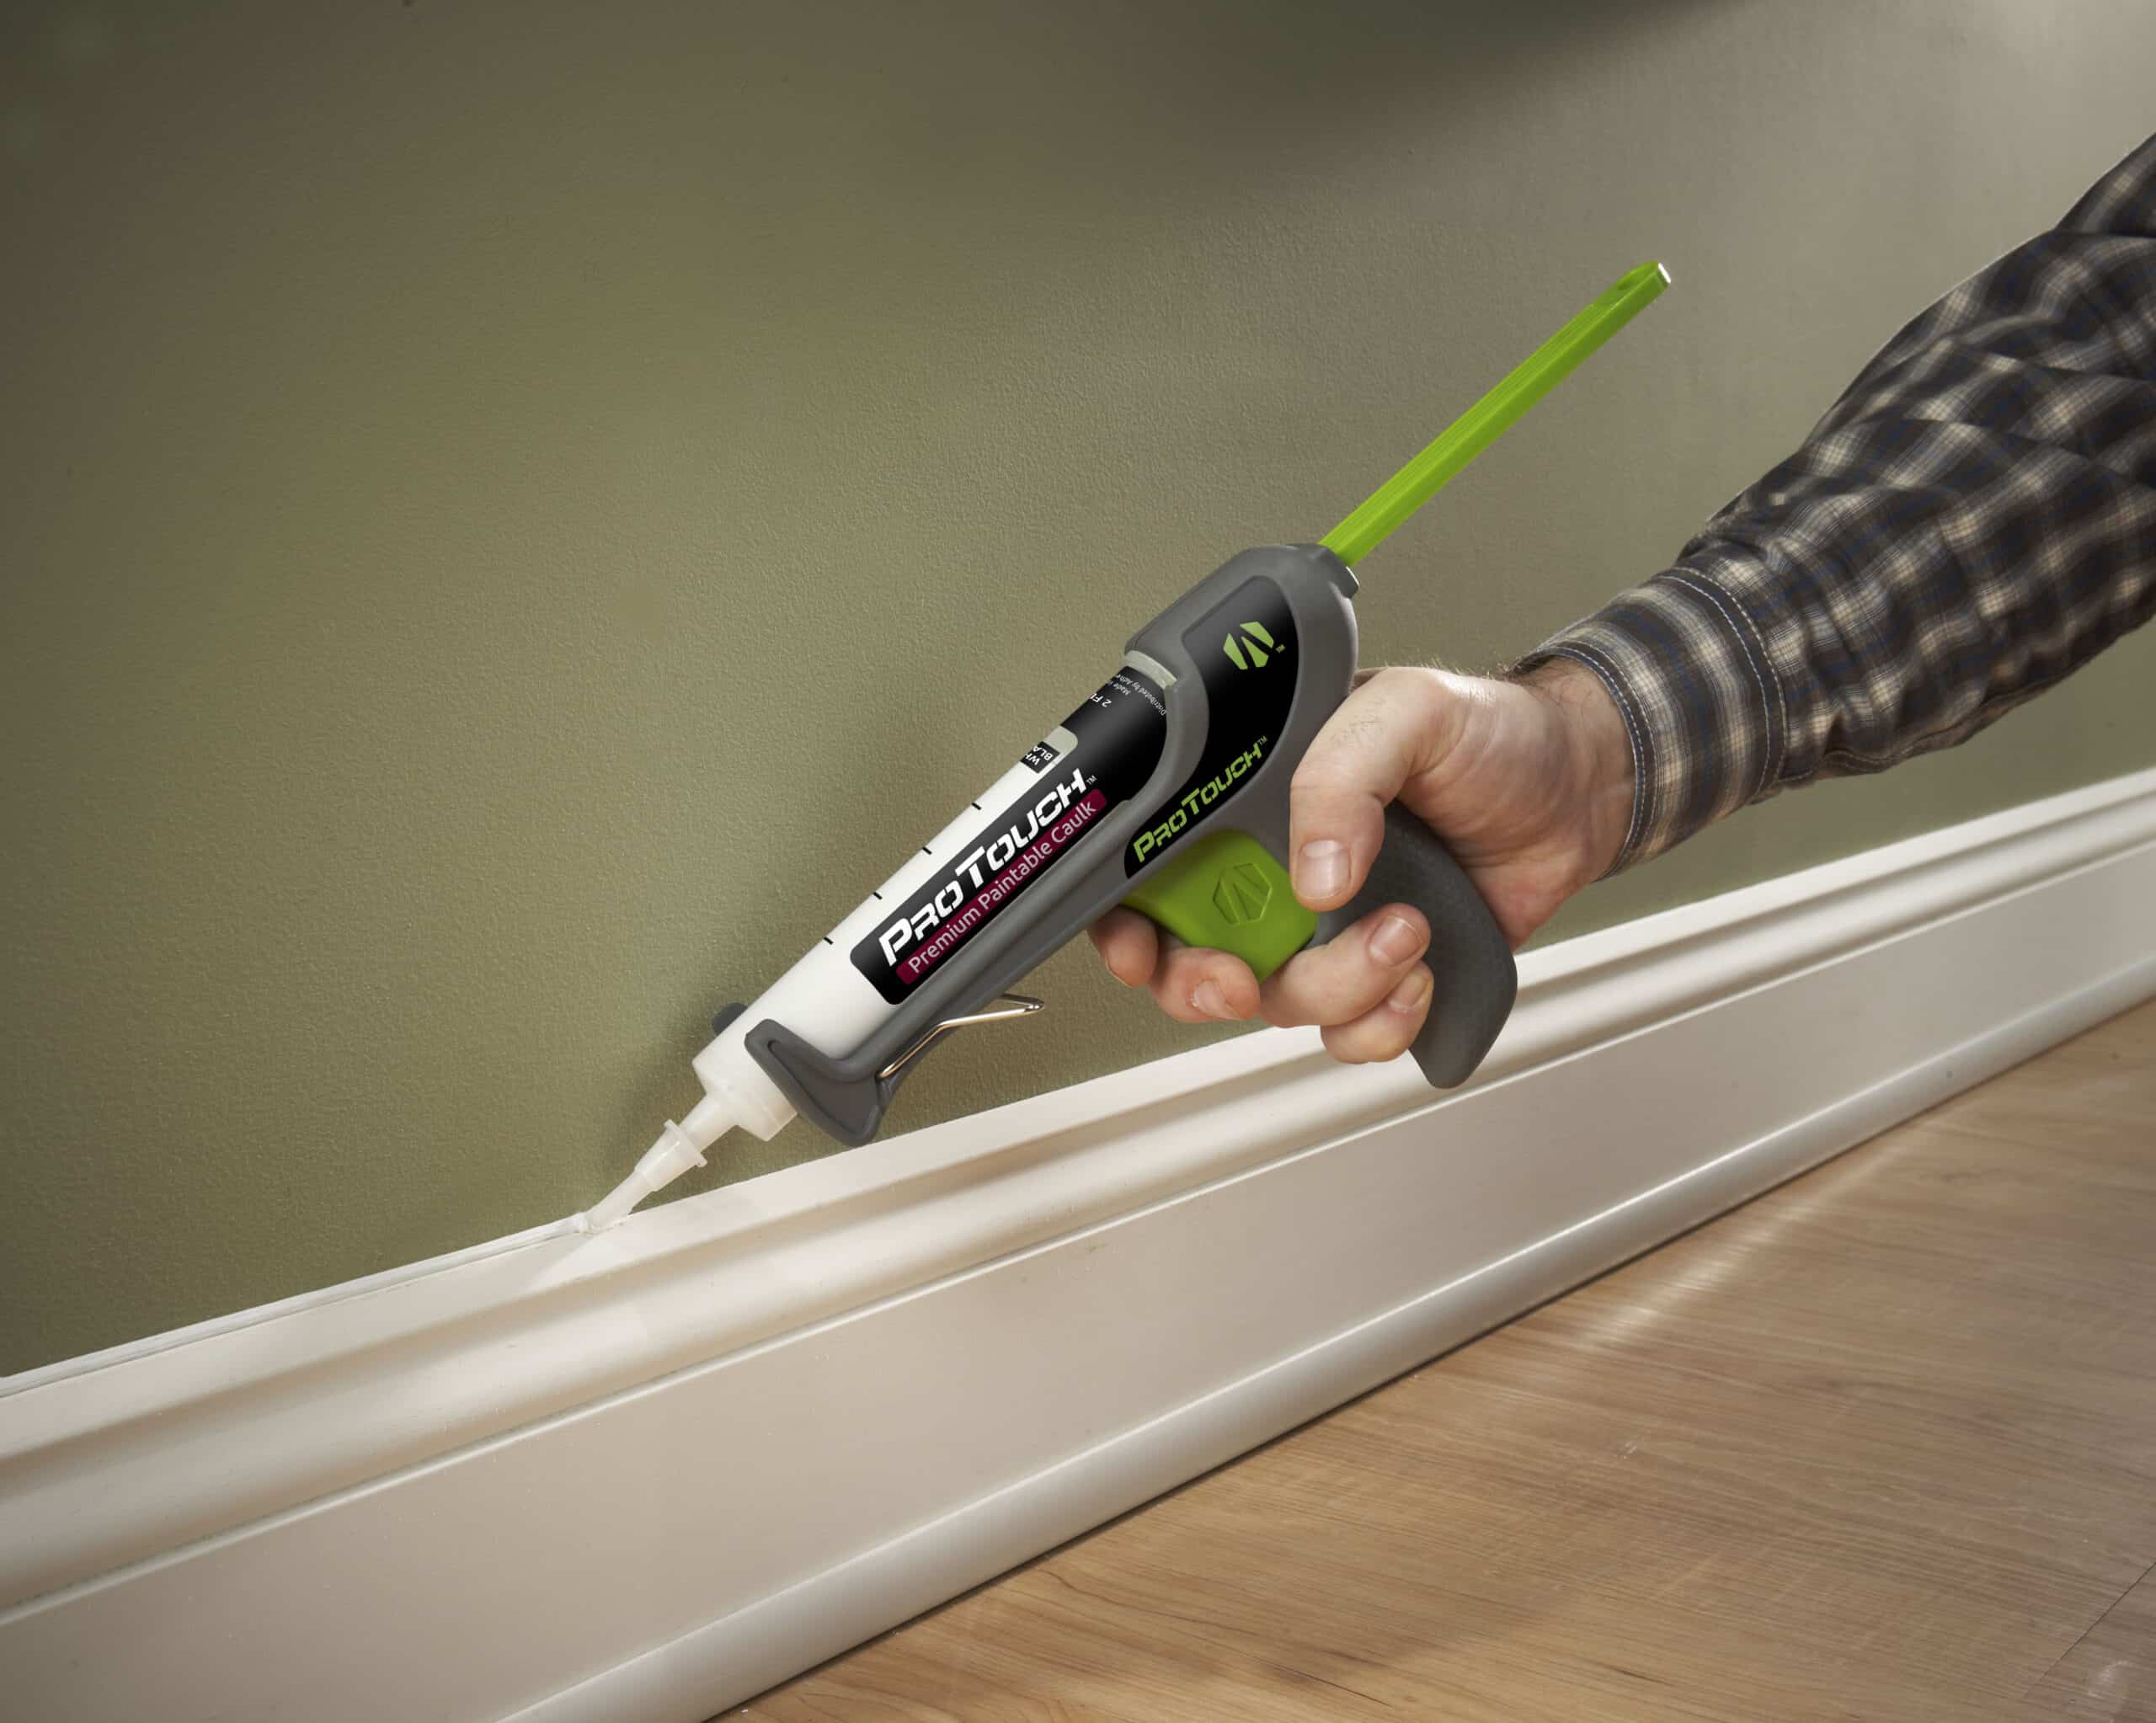
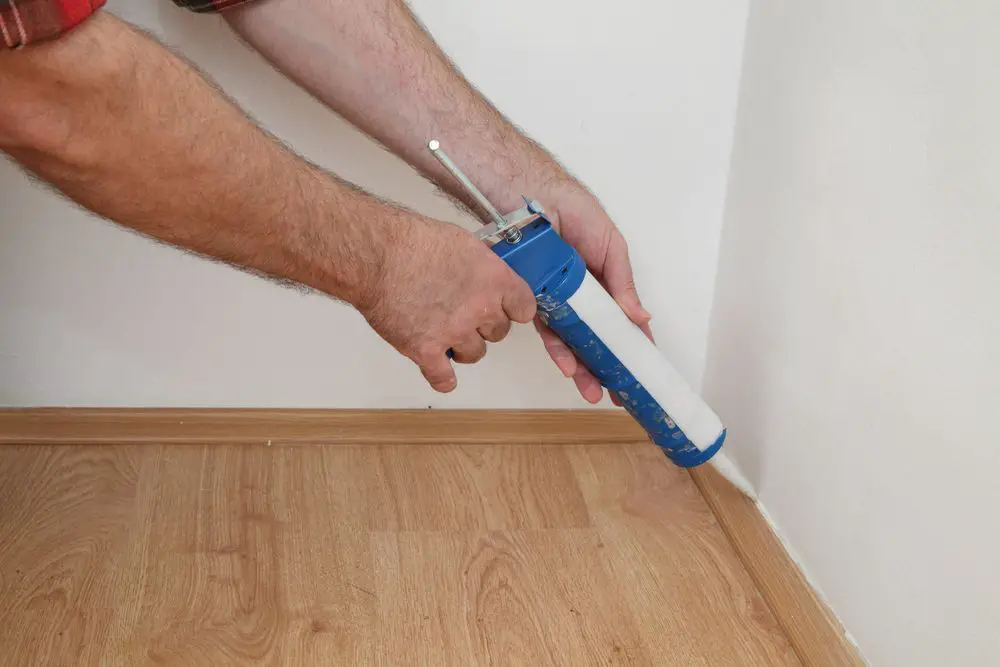
Before applying the caulk, it is recommended to use painter’s tape to mask off the area around the baseboards. This will create clean lines and prevent any excess caulk from spreading onto the walls or flooring. Load the caulk into a caulk gun and cut the tip of the tube at a 45-degree angle. Start at one end of the baseboard and slowly squeeze the trigger of the caulk gun, applying a steady and even bead of caulk along the gap between the baseboard and the floor. Use a caulk smoothing tool or your finger to smooth out the caulk, ensuring it fills in the gap completely.
What does caulking baseboards do?
Caulking baseboards is a common practice in home improvement and renovation projects. It involves applying a sealant or caulk along the edges of baseboards to fill in gaps and create a seamless finish. This process serves several important purposes and can greatly enhance the overall appearance and functionality of a room.
Firstly, caulking baseboards helps to create a clean and polished look. Over time, gaps can develop between the baseboards and the walls due to settling, temperature changes, or general wear and tear. These gaps can be unsightly and can also allow dust, dirt, and insects to enter the room. By applying caulk, these gaps are filled in, creating a smooth and seamless transition between the baseboards and the walls.
Secondly, caulking baseboards helps to improve energy efficiency. Gaps between baseboards and walls can create drafts, allowing cold air to enter in the winter and hot air to enter in the summer. This can result in increased energy consumption and higher utility bills. By sealing these gaps with caulk, the room becomes more airtight, reducing drafts and improving energy efficiency.
Additionally, caulking baseboards can help to reduce noise transmission. Gaps between baseboards and walls can allow sound to travel more easily between rooms, leading to a lack of privacy and increased noise levels. By filling in these gaps with caulk, the sound transmission is reduced, creating a quieter and more peaceful living environment.
What is the difference between silicone and caulk?
Silicone and caulk are both commonly used materials for sealing and filling gaps and cracks in various applications. While they may seem similar, there are some key differences between the two.
Caulking is a process that involves sealing gaps or joints in various surfaces to prevent the entry of air, water, or other substances. It is commonly used in construction, plumbing, and other industries to ensure the durability and integrity of structures. The process of caulking typically involves the use of a caulking gun and a tube of caulk, which is a flexible material that hardens when exposed to air.
Firstly, before starting the caulking process, it is important to prepare the surface by cleaning it thoroughly and removing any old caulk or debris. It is crucial to ensure that the surface is dry and free from any loose particles to ensure proper adhesion of the caulk.
Another important tool is a caulk smoothing tool or a putty knife. This tool is used to smooth out the applied caulking and create a neat finish. It helps to achieve a professional-looking result. Lastly, have a damp cloth or sponge handy to clean up any excess caulking or to wipe away any mistakes.
In summary, the tools needed to apply caulking to baseboards include a caulking gun, a utility knife or caulk removal tool, a caulk smoothing tool or putty knife, and a damp cloth or sponge for cleanup. These tools will ensure a smooth and professional caulking job on your baseboards.
What steps should be followed to prepare the baseboards for caulking?
- Clean the baseboards: Use a damp cloth or sponge to remove any dust, dirt, or debris from the baseboards. This will ensure that the caulking adheres properly to the surface.
- Remove old caulking: If there is any old caulking present, use a utility knife or a caulk removal tool to carefully scrape it away. Make sure to remove all traces of the old caulking to create a clean surface for the new caulking.
- Fill any gaps or cracks: Inspect the baseboards for any gaps or cracks that need to be filled. Use a suitable filler material, such as wood filler or spackling compound, to fill these gaps. Allow the filler to dry completely before proceeding.
What steps should be followed to prepare the baseboards for caulking?
Preparing the baseboards before applying caulking is crucial for achieving a professional-looking result. Here are the steps you should follow:
1. Clean the baseboards: Start by thoroughly cleaning the baseboards to remove any dust, dirt, or debris. Use a damp cloth or sponge and a mild detergent to wipe down the surface. Make sure to dry the baseboards completely before moving on to the next step.
2. Remove old caulking: If there is old caulking present, it is important to remove it before applying new caulking. Use a caulk remover tool or a putty knife to carefully scrape off the old caulking. Be gentle to avoid damaging the baseboards.
3. Fill any gaps or cracks: Inspect the baseboards for any gaps or cracks that need to be filled. Use a wood filler or a caulk specifically designed for filling gaps to fill in any imperfections. Smooth out the filler with a putty knife and let it dry completely before proceeding.
By following these steps, you will ensure that the baseboards are properly prepared for caulking, resulting in a clean and professional finish.
How should the caulking be applied to the baseboards?
When applying caulking to baseboards, it is important to follow a few key steps to ensure a professional-looking finish. First, gather the necessary tools, which include a caulking gun, a utility knife, and a damp cloth. These tools will help you apply the caulking smoothly and clean up any excess.
Before applying the caulking, it is important to prepare the baseboards properly. Start by cleaning the surface thoroughly to remove any dirt or debris. Use a mild detergent and water solution to wipe down the baseboards, and then dry them completely. Next, use a utility knife to remove any old caulking or paint that may be present. This will create a clean surface for the new caulking to adhere to.
How long does it take for the caulking to dry on the baseboards?
The drying time for caulking on baseboards can vary depending on several factors, including the type of caulking used and the environmental conditions. In general, most caulking products require at least 24 hours to fully dry and cure. However, it is important to read the manufacturer’s instructions for the specific product being used, as some may have different drying times.
During the drying process, it is crucial to avoid touching or disturbing the caulking to ensure a smooth and even finish. It is also important to note that the drying time may be longer in humid or cold conditions, so it is best to choose a day with moderate temperature and low humidity for caulking baseboards.
Are there any additional tips or tricks for achieving a professional-looking caulking job on baseboards?
Yes, there are several additional tips and tricks that can help you achieve a professional-looking caulking job on baseboards. Firstly, it is important to properly clean and prepare the baseboards before applying the caulking. This includes removing any old caulk or paint, as well as sanding down any rough or uneven areas. This will ensure that the caulk adheres properly and creates a smooth finish.
Another tip is to use a high-quality caulking gun and caulk. Investing in a good caulking gun will make the application process much easier and more precise. Additionally, using a high-quality caulk that is specifically designed for baseboards will result in a longer-lasting and more professional-looking finish.
When applying the caulk, it is important to use steady and even pressure to create a smooth and consistent bead. It is also helpful to use a small putty knife or your finger to smooth out the caulk and remove any excess. This will help to create a seamless and professional finish.
Conclusion
By properly caulking your baseboards, you can prevent drafts, improve energy efficiency, and enhance the overall appearance of your home. Whether you are a beginner or have some experience with home improvement projects, following the right steps and using the right tools will ensure a successful caulking job.
It is important to prepare the caulk baseboards before applying caulking. This involves cleaning the surface thoroughly to remove any dirt, dust, or old caulking. A clean surface will allow the new caulking to adhere properly and create a tight seal. Additionally, it is recommended to use a putty knife or scraper to remove any loose or peeling paint, as this can affect the quality of the caulking.
Once the baseboards are prepared, the next step is to choose the right type of caulking for the job. There are various types of caulking available, such as silicone, latex, and acrylic. Each type has its own advantages and disadvantages, so it is important to consider factors such as durability, flexibility, and ease of application. Reading product labels and seeking advice from professionals can help you make an informed decision.
To baseboards is a relatively simple and cost-effective way to improve the energy efficiency and appearance of your home. By following the proper steps and using the right tools, you can achieve a professional-looking caulking job that will last for years to come. So, don’t hesitate to tackle this DIY project and enjoy the benefits it brings to your home.