How To Scribe Baseboard
Introduction
How To Scribe Baseboard: Baseboards are an essential component of any interior design project. They not only provide a finished look to a room but also protect the walls from damage. Scribing baseboards is a technique used to ensure a perfect fit between the baseboard and the wall, especially in cases where the walls are not perfectly straight. This process involves tracing the contour of the wall onto the baseboard and then cutting it to match the shape. While it may seem like a daunting task, with the right tools and techniques, anyone can learn how to scribe baseboards.
Before you begin scribing baseboards, it is important to gather the necessary tools. You will need a pencil, a coping saw, sandpaper, a file, and a scribing tool. The scribing tool is a specialized tool designed specifically for this purpose and can be found at most hardware stores. Additionally, you may also need a miter saw or a miter box to make precise cuts. Once you have all the tools ready, the first step is to measure the length of the wall where the baseboard will be installed. It is important to measure accurately to ensure a proper fit. Next, cut the baseboard to the desired length using a miter saw or a miter box. If you are using a miter saw, be sure to set the correct angle for the corners.
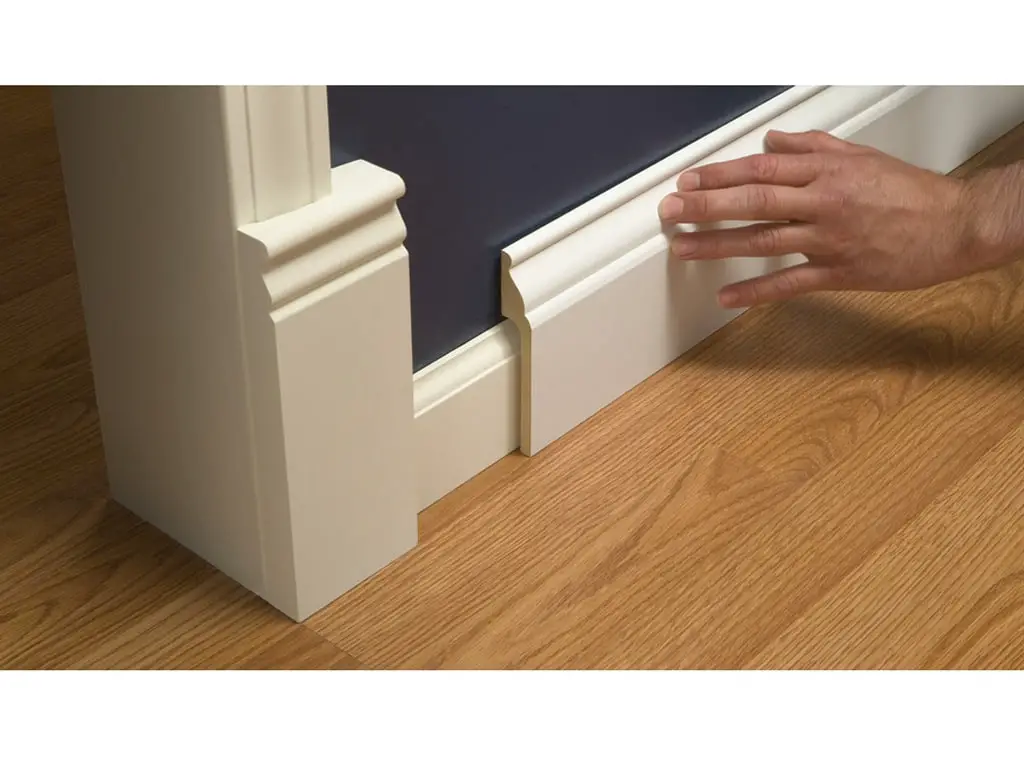
After cutting the baseboard to length, it is time to scribe it to the wall. Start by holding the baseboard against the wall, making sure it is level. Use a pencil to mark the areas where the wall protrudes or recedes. These marks will serve as a guide for scribing. Using the scribing tool, trace along the contour of the wall, following the marked areas. Take your time and be careful to maintain a steady hand. Once you have traced the entire length of the baseboard, remove it from the wall and use a coping saw to cut along the scribed line.
Should you scribe baseboards?
Mark the border on floors that aren’t level to get a level top. 1. Move the border to fix an uneven floor. Draw on the floor to level a border that isn’t level.
Remodelers often don’t pay attention to edges. Long, thin strips of wood or something else can be used to cover and decorate the sides of walls. People often wonder if they should scribe the floorboards before painting the walls or making changes to the furniture.
When you tighten baseboards against uneven floors or walls, you make a line around them. It looks professional to cut and shape borders to match wall features. Scribing is hard work that makes a room look better.
A lot of people polish their floorboards by writing on them. Unscribed borders have uneven spacing on the floor or wall. It can be hard to clean these gaps when they are full of dust and grime. Baseboards are scribed to get rid of gaps and make the shift from wall to baseboard smooth.
If the walls or floors of an older home aren’t level, the baseboards should be scribed. Baseboard-wall holes can appear when floors and walls move. Scribing hides things and makes the surroundings better.
It’s not always necessary or useful to write all baseboards. If your new house has straight walls, you might not need to scribe it. Time or money are tight, scribe baseboards might not be a top concern. If you don’t scribe, borders look smooth.
What does it mean to scribe baseboard?
Scribing is a practice where a carpenter fits a finish element to an irregular or uneven surface. One common scribe is fitting baseboard to a hardwood floor. A second common application for scribing is fitting a cabinet to a wall when the wall is not perfectly plumb.
Scribing baseboard refers to the process of fitting baseboard trim against an uneven or irregular surface. When installing baseboard trim, it is common to encounter walls that are not perfectly straight or corners that are not perfectly square. In these situations, scribing is necessary to create a seamless and professional-looking finish.
What does scribe trim look like?
Decorative scribe molding has been used for many years. The lines and designs on this molding are very fine and flow together. Scribe molding looks great in old homes, but it can also be used in other places.
Scribe trim is used as artistic molding by carpenters and woodworkers. The sides of cabinets, furniture, and other woodworking projects have this wood or synthetic finish. It’s easy to narrow pen trim. Most rectangles are smooth on the outside and have straight sides. Trim is generally flush with the surface it covers, which makes it look nice.
That’s why the pen trim is so useful. It can be used in a lot of different ways and fits a lot of different styles. You can paint or stain the trim to match the furniture, or you can leave it natural for a more rustic look.
Scribe trim looks good and works well. It hides flaws in the building and protects the ends of woodwork. Depending on the job and the materials, trim can be attached with nails, screws, or glue. Scribe trim can be used in many ways and looks good in crafts. Carpenters and woodworkers like its simple shape, narrow width, and ability to be used in many ways.
How do you trim a scribe without a tool?
Use a pencil for scribing small gaps
Another way I can do that is by using a small block, which sets the distance that I’m marking away. It’s a little more foolproof. I can set it like so, and just trace that profile out on my piece. It’s a nice, easy way to do it without any kind of special tools.
Trimming a scribe without a tool can be a challenging task, but it is not impossible. These methods may require a bit more time and effort, but with the right technique, you can still achieve a clean and precise trim.
One method to trim a scribe without a tool is to use a utility knife or a sharp blade. Start by marking the desired trim line on the material using a pencil or a marker. Then, carefully score along the marked line using the utility knife or blade. Make sure to apply even pressure and make multiple passes if necessary. As wood or plastic. Start by marking the desired trim line on the material. Then, use the sandpaper or file to gradually remove material along the marked line. This method requires patience and precision, as you will need to constantly check the progress and make adjustments as needed.
If you don’t have access to a scribe tool and need to trim a scribe in a tight space, you can also try using a rotary tool with a cutting disc attachment. This method allows for more flexibility and precision in tight areas. However, it is important to exercise caution and wear appropriate safety gear when using a rotary tool.
Overall, while having a scribe tool can make the trimming process easier and more efficient, it is still possible to achieve a clean and precise trim without one. By using alternative methods such as a utility knife, sandpaper, or a rotary tool, you can still achieve the desired result. Just remember to take your time, be patient, and prioritize safety when using any tools or methods.
Should all baseboards in house match?
Painting all window and door trim, crown molding and baseboards the same colour provides consistency, but is not a rule. For example, only black baseboards will anchor a room while having only black crown moulding will frame the ceiling and draw your eye up.
When it comes to interior design, one of the common questions that homeowners often ask is whether all baseboards in a house should match. Baseboards are an essential element of any home as they provide a finished look to the walls and floors. They also serve the practical purpose of protecting the walls from scuffs and damage. While some people prefer to have matching baseboards throughout their house, others opt for a more eclectic approach. Ultimately, the decision to match baseboards or not depends on personal preference and the overall design aesthetic of the home.
On the other hand, not all baseboards need to match in order to achieve a visually appealing look. Mixing and matching baseboards can add character and interest to a space. It allows for creativity and customization, giving homeowners the opportunity to showcase their personal style. For instance, using different baseboard styles or materials in different rooms can help define each space and create a unique atmosphere. This approach works particularly well in homes with eclectic or modern design themes.
It is worth noting that even if homeowners choose to have matching baseboards throughout their house, there can still be variations in height, width, or profile to accommodate different room sizes and architectural features. These subtle differences can add depth and dimension to the overall design. Ultimately, the decision to match baseboards or not should be based on the homeowner’s personal taste, the style of the home, and the desired visual effect.
What tools are needed to scribe baseboard?
Coping saw: This saw is specifically designed for cutting intricate shapes and is ideal for cutting the profile of the baseboard to fit against irregular surfaces.
Miter saw: A miter saw is used to make precise angled cuts on the baseboard. This tool is essential for achieving clean and accurate joints.
Tape measure: Accurate measurements are crucial when scribing baseboard. A tape measure will help you measure the length and width of the baseboard accurately.
Pencil: A pencil is used to mark the areas that need to be cut or trimmed on the baseboard. It is important to use a sharp pencil for precise markings.
Sandpaper: Sandpaper is used to smooth out any rough edges or imperfections on the baseboard after cutting or trimming.
Are there any specific techniques or tips for scribing baseboard effectively?
When it comes to scribing baseboard effectively, there are a few techniques and tips that can help you achieve professional-looking results. One important technique is to use a compass or a scribe tool to trace the contour of the wall onto the baseboard. This will allow you to create a precise cut that fits snugly against the wall. Make sure to hold the compass or scribe tool firmly against the wall while tracing the contour to ensure accuracy.
Another tip is to make multiple shallow cuts along the traced line instead of trying to make one deep cut. This will help prevent the baseboard from splintering or breaking. After making the shallow cuts, you can use a chisel or a coping saw to remove the excess material and refine the shape of the baseboard. Remember to take your time and work slowly to achieve the best results.
Can you provide a detailed explanation or tutorial on how to scribe baseboard?
Scribing baseboard is a technique used to create a seamless fit between the baseboard and an uneven wall or floor. It involves tracing the contours of the wall or floor onto the baseboard and then carefully cutting and shaping it to match. Here is a step-by-step tutorial on how to scribe baseboard:
Start by measuring the length of the wall where the baseboard will be installed. Cut the baseboard to the appropriate length, leaving a slight overhang at each end.
Hold the baseboard against the wall, making sure it is level. Use a pencil to mark any gaps or uneven areas between the baseboard and the wall. Remove the baseboard and place it on a work surface. Use a compass or a scribe tool to transfer the contours of the wall onto the baseboard. Adjust the scribe tool as needed to match the irregularities of the wall.
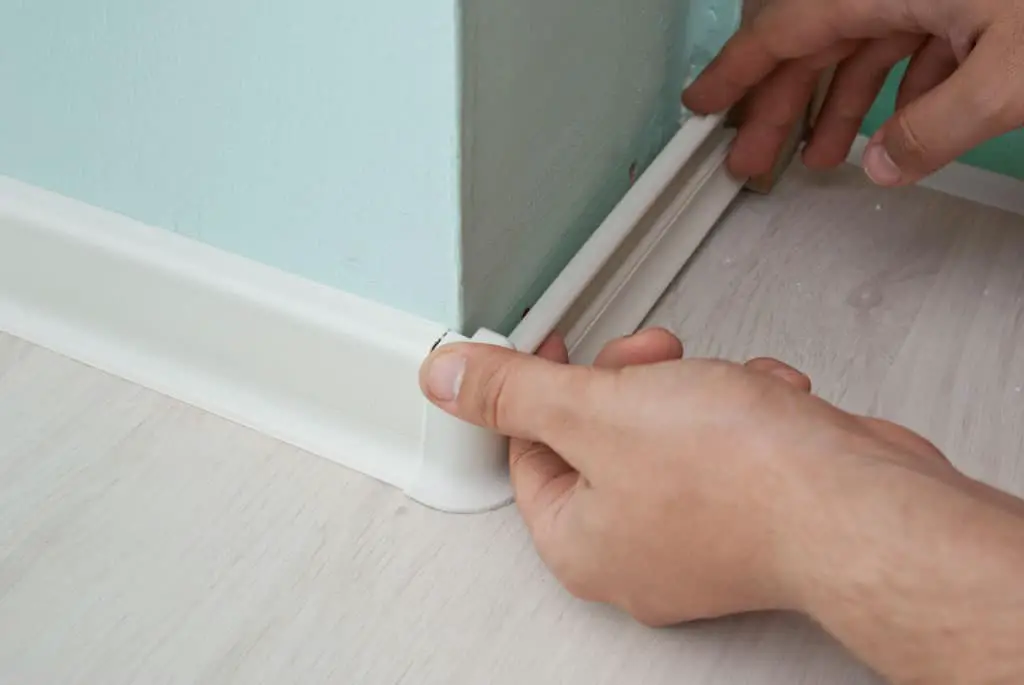
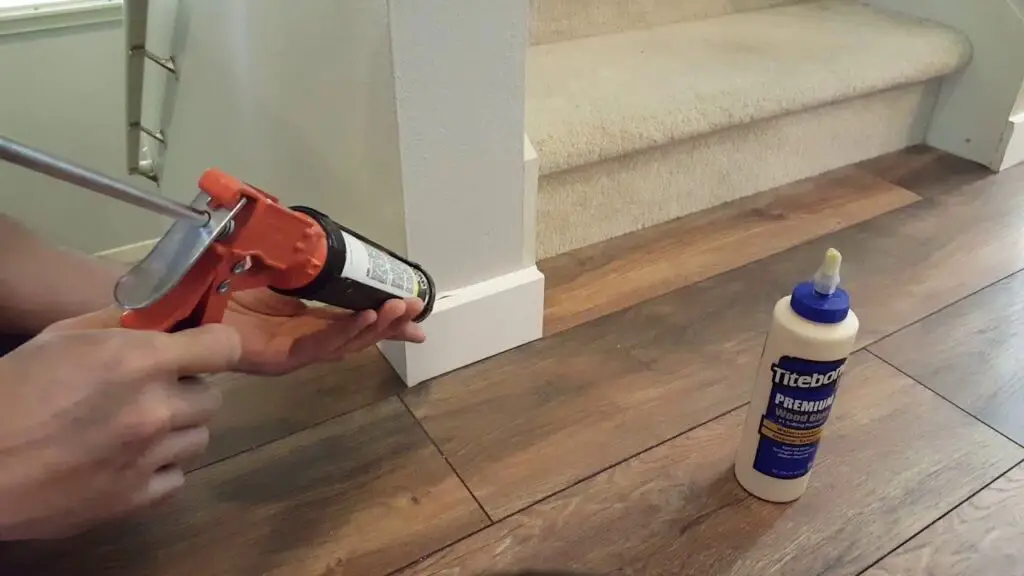
Carefully cut along the scribed line using a coping saw or a jigsaw. Take your time and make precise cuts to ensure a perfect fit. Once the baseboard is cut, test the fit against the wall. Make any necessary adjustments by sanding or trimming the baseboard until it fits snugly against the wall. Finally, attach the baseboard to the wall using nails or adhesive, making sure it is securely fastened.
Are there any common mistakes to avoid when scribing baseboard?
When scribing baseboard, there are a few common mistakes that you should try to avoid in order to achieve a professional and seamless finish. One common mistake is not properly measuring and marking the baseboard before scribing. It is important to take accurate measurements and mark the baseboard accordingly to ensure a precise fit. Additionally, failing to use a sharp scribing tool can result in jagged or uneven cuts, so it is crucial to use a sharp and precise tool for the job.
Another mistake to avoid is rushing the scribing process. Scribing baseboard requires patience and attention to detail, so it is important to take your time and carefully scribe the baseboard to achieve a clean and seamless fit. Additionally, not properly securing the baseboard during the scribing process can lead to movement and inaccurate cuts. Make sure to securely hold the baseboard in place while scribing to ensure accurate and precise cuts.
Conclusion
Overall, learning how to scribe baseboard is an essential skill for any homeowner or DIY enthusiast. It allows for a seamless and professional-looking installation of baseboards, even in the most challenging corners and uneven walls. By following the step-by-step process outlined in this guide, anyone can achieve a precise and accurate scribe, resulting in a clean and polished finish.
One of the key takeaways from this guide is the importance of measuring and marking accurately. Taking the time to measure and mark the baseboard correctly ensures a precise fit and eliminates any gaps or unevenness. Additionally, using the right tools, such as a coping saw or jigsaw, can make the scribing process much easier and more efficient.
Another crucial aspect to consider when scribing baseboard is the technique used. Whether it’s scribing to an uneven wall or fitting around a corner, understanding the proper technique is essential for achieving a seamless result. This guide has provided detailed instructions on how to scribe baseboard in various scenarios, giving readers the knowledge and confidence to tackle any scribing challenge.
Learning how to scribe baseboard is a valuable skill that can enhance the overall appearance of any room. It allows for a professional-looking installation, even in the most challenging corners and uneven walls. By following the step-by-step process outlined in this guide, measuring and marking accurately, using the right tools, and employing the proper technique, anyone can achieve a precise and seamless scribe. So, whether you’re a homeowner looking to upgrade your baseboards or a DIY enthusiast seeking to improve your skills, mastering the art of scribing baseboard is well worth the effort.