How To Screw Down Metal Roofing
Introduction
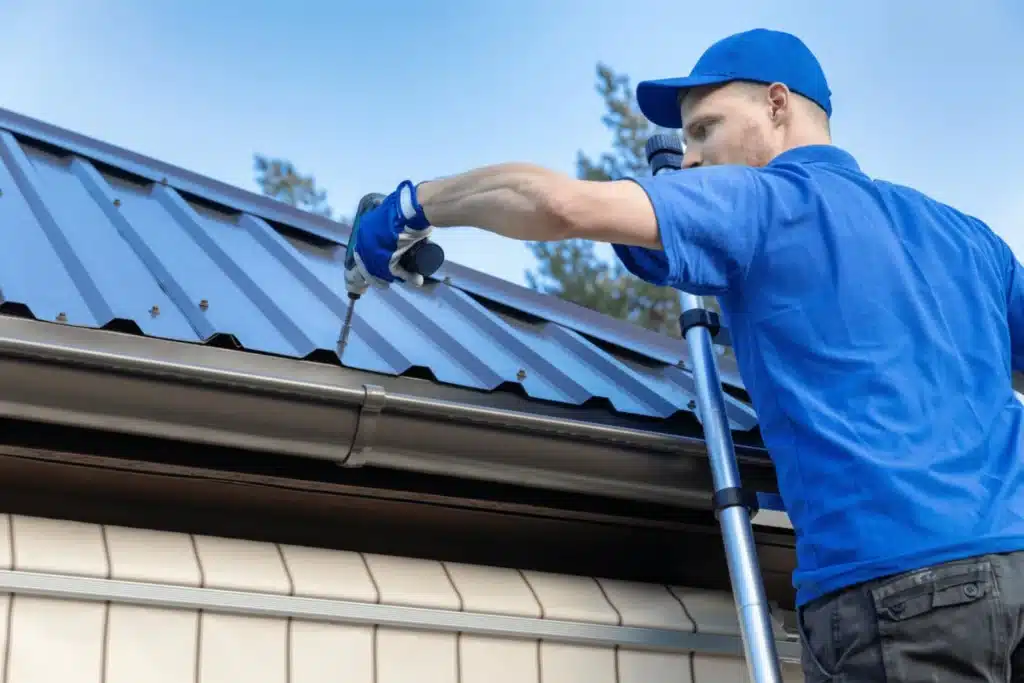
How To Screw Down Metal Roofing: Metal roofing is becoming increasingly popular among homeowners and builders due to its durability, longevity, and aesthetic appeal. Whether you are constructing a new roof or replacing an existing one, knowing how to properly screw down metal roofing is essential for a successful installation. This article will provide you with step-by-step instructions on how to securely fasten metal roofing to ensure a watertight and long-lasting roof.
Before you begin the installation process, it is important to gather all the necessary tools and materials. You will need a drill with a metal-cutting bit, self-tapping metal screws, a tape measure, a chalk line, and safety equipment such as gloves and goggles. Additionally, make sure you have the appropriate type and gauge of metal roofing that is suitable for your climate and roof pitch.
The first step in screwing down metal roofing is to prepare the roof surface. Ensure that the roof deck is clean, dry, and free from any debris or protruding nails. If necessary, repair any damaged areas and apply a layer of underlayment to provide additional protection against moisture. Next, use a chalk line to mark the starting point of your metal roofing installation, ensuring that it is aligned with the roof’s edge.
What screws are used to fasten metal roofing?
1-inch pancake heads are the most commonly used screw for standing seam metal roofing. For 1/2-inch corrugated panels, you’ll need 1.5-inch-long screws. If the corrugated panels are 7/8 inches in height, you’ll need 2-inch-long screws.
When it comes to fastening metal roofing, choosing the right screws is crucial for ensuring a secure and long-lasting installation. Metal roofing screws are specifically designed to provide the necessary strength and durability to hold metal panels in place, while also offering resistance against weather elements and potential damage. In this article, we will explore the different types of screws commonly used for fastening metal roofing and discuss their features and benefits.
Types of Screws for Metal Roofing:
There are several types of screws available for fastening metal roofing, each with its own unique characteristics and advantages. One commonly used type is the self-drilling screw, which eliminates the need for pre-drilling holes in the metal panels. These screws have a sharp, self-tapping point that allows them to penetrate the metal surface easily, making installation faster and more efficient.
Another popular option is the pancake head screw, which features a low-profile head that sits flush with the metal surface. This type of screw is ideal for applications where aesthetics are important, as it provides a clean and seamless look. Additionally, pancake head screws are resistant to corrosion, ensuring the longevity of the metal roofing system.
Benefits of Using Metal Roofing Screws:
Using the appropriate screws for metal roofing offers several benefits. Firstly, these screws are specifically designed to withstand the unique challenges posed by metal roofs, such as expansion and contraction due to temperature changes. They have high tensile strength and are resistant to corrosion, ensuring that the roof remains securely fastened even in harsh weather conditions.
Furthermore, metal roofing screws provide a watertight seal, preventing water leakage and potential damage to the underlying structure. This is particularly important in areas prone to heavy rainfall or snowfall. The self-drilling feature of some screws also helps to create a tight seal, reducing the risk of water infiltration.
Selecting the right screws for fastening metal roofing is essential for a successful and durable installation. Self-drilling screws and pancake head screws are two popular options, each offering unique advantages. These screws provide strength, resistance to corrosion, and a watertight seal, ensuring the longevity and performance of the metal roofing system. By choosing the appropriate screws, homeowners and contractors can have peace of mind knowing that their metal roofs are securely fastened and protected against the elements.
Do screw down metal roofs leak?
But like just about anything else, metal roofs are not indestructible and they definitely can spring leaks. Knowing where and how to identify leaks in a metal roof is the first step towards implementing the repairs that you will need to get your roof back into working order.
Introduction:
Metal roofs are a popular choice for homeowners due to their durability and longevity. However, one common concern that arises is whether screw-down metal roofs are prone to leaking. In this article, we will explore the factors that contribute to the potential for leaks in screw-down metal roofs and discuss how proper installation and maintenance can mitigate this issue.
Factors contributing to potential leaks:
Metal roofs that are screwed down are solid, but they can leak sometimes. Quality of placement is one. Screws or metal pieces that aren’t lined up right could let water leak through.
The type of metal on the roof is another thing to think about. Some metal roofs rust and leak, but most are waterproof. To avoid leaks, choose high-quality metal that won’t rust.
Importance of proper installation and maintenance:
Professionals must put screw-down metal roofs so that they don’t leak. Choosing the right nuts, panels, and sealant can cut down on leaks by a large amount.
To keep them from leaking, screw-down metal roofs need to be installed and cared for properly. Leaks can be avoided by checking the roof often for loose screws or broken panels. Take off the leaves and twigs that are on the roof to stop leaks.
If screw-down metal roofs aren’t installed or kept properly, they can leak. However, there are ways to lower this risk. If homeowners place and take care of their metal roofs properly, they won’t leak. Ask professionals about the best ways to build a metal roof.
How is metal roofing attached to the roof?
Metal roofs are attached to decks with screws or bolts that don’t rust. There are a lot of hidden or visible closures.
People who own homes like the look, sturdiness, and long life of metal roofing. How well a metal roof works depends on how it is attached to the roof. How stable and weatherproof a metal roof is depends on how it was installed.
Types of metal covering are attached to roofs. Screws or nails are often used. Fasteners made of stainless or coated steel don’t rust and stick together. From the frame to the metal roof panels.
Clips or clamps can be used to secure. The joining of standing seam metal roofs. Water can’t get through when you clip metal roof panels to bolts on the roof deck.
Metal covering is held in place with glue, screws, nails, clamps, and brackets. Put up metal roofing pieces that are glued to the substrate from the bottom up. This keeps roofs from leaking and makes them stronger.
Attaching a metal roof depends on its type, slope, and local building rules. Metal roofs should only be looked at and put on by professionals.
Do you use nails or screws on a metal roof?
In almost all cases, fasteners are the better choice than nails. Nails, rivets, screws, clips and cleats are the most common types of fasteners that are used for installing metal roofs. Most roofing installations require a variety of each of these fasteners.
When it comes to installing a metal roof, one of the common questions that arises is whether to use nails or screws. Both nails and screws have their own advantages and disadvantages, and the choice depends on various factors such as the type of metal roof, the climate conditions, and personal preferences. In this article, we will explore the pros and cons of using nails and screws on a metal roof to help you make an informed decision.
Advantages of using nails:
Nails have been traditionally used for installing metal roofs due to their ease of use and cost-effectiveness. They are readily available and can be driven into the metal panels quickly using a hammer or a nail gun. Nails also provide a certain level of flexibility, allowing the metal panels to expand and contract with temperature changes. This flexibility is particularly important in areas with extreme weather conditions.
However, it is important to note that nails may not be suitable for all types of metal roofs. For instance, if you have a standing seam metal roof, which consists of interlocking panels, nails may not be the best option as they can cause damage to the panels and compromise the roof’s integrity. In such cases, screws are often recommended.
Advantages of using screws:
Screws offer several advantages over nails when it comes to installing a metal roof. One of the main advantages is their superior holding power. Screws create a stronger connection between the metal panels and the roof deck, ensuring better resistance against wind uplift and preventing the panels from loosening over time. This is especially important in areas prone to high winds or severe weather conditions.
In addition to their holding power, screws also provide better leak resistance. The threaded design of screws creates a tighter seal, reducing the risk of water penetration and potential leaks. This is particularly crucial for metal roofs, as they are more susceptible to water damage compared to other roofing materials.
The choice between using nails or screws on a metal roof depends on various factors such as the type of metal roof, climate conditions, and personal preferences. While nails are cost-effective and easy to use, they may not be suitable for all types of metal roofs. On the other hand, screws offer superior holding power and leak resistance, making them a preferred choice for many metal roof installations. It is recommended to consult with a professional roofing contractor to determine the most appropriate fastening method for your specific metal roof
Can you put screws in a metal roof?
Roofing installation is a complex process that requires the utmost attention, especially where metal roofing is concerned. One of the most important things to ensure when installing a metal roof is to make sure that the screws are fastened properly. Screws should be tight enough, so they don’t work themselves loose.
When it comes to installing or repairing a metal roof, one common question that arises is whether it is possible to put screws in a metal roof. The answer to this question is yes, screws can be used to secure a metal roof. In fact, screws are the most commonly used fasteners for metal roofing installations. However, there are certain factors to consider and guidelines to follow to ensure a successful and long-lasting installation.
Choosing the right screws:
When installing a metal roof, it is crucial to choose the right type of screws. Regular screws may not be suitable for metal roofing applications as they can corrode over time due to exposure to the elements. It is recommended to use screws specifically designed for metal roofing, such as self-tapping screws or self-drilling screws. These screws are typically made of corrosion-resistant materials like stainless steel or galvanized steel, which can withstand the harsh conditions and prevent rusting.
Proper installation techniques:
Proper installation techniques are essential to ensure the screws hold the metal roof securely in place. It is important to follow the manufacturer’s instructions and guidelines for the specific type of metal roof being installed. This may include using a specific size and length of screws, as well as spacing them at the recommended intervals. Over-tightening the screws should be avoided, as it can damage the metal panels or cause them to warp. It is also crucial to ensure that the screws are driven straight into the metal without stripping the threads or damaging the roof surface.
Considerations for different metal roof types:
While screws can generally be used for most metal roof types, there are some considerations to keep in mind for specific materials. For example, when installing a standing seam metal roof, special clips or brackets may be required to secure the panels, and screws may be used in conjunction with these fasteners. Additionally, for corrugated metal roofs, it is important to choose screws with a wide washer head to provide proper sealing and prevent leaks.
Maintenance and inspections:
Once the metal roof is installed, regular maintenance and inspections are necessary to ensure the screws remain secure and the roof remains in good condition. Over time, screws may loosen due to thermal expansion and contraction or other factors. It is important to periodically check the screws and tighten them if necessary. Additionally, inspecting the roof for any signs of damage or corrosion can help identify any issues early on and prevent further damage.
Screws can indeed be used to secure a metal roof. However, it is crucial to choose the right screws, follow proper installation techniques, and consider the specific requirements of different metal roof types. Regular maintenance and inspections are also important to ensure the screws remain secure and the roof remains in optimal condition.
What tools are required for screwing down metal roofing?
When it comes to screwing down metal roofing, having the right tools is essential for a successful installation. Here are some of the tools you will need:
Power drill: A power drill with a screwdriver bit is necessary for driving the screws into the metal roofing. Make sure to choose a drill with enough power to handle the task and consider using a cordless drill for convenience.
Screws: Use self-drilling screws specifically designed for metal roofing. These screws have a sharp point and a drill-like tip, allowing them to penetrate the metal easily. Make sure to choose screws that are compatible with the type of metal roofing you are using.
Screw gun: A screw gun is a specialized tool that is designed to quickly and efficiently drive screws into metal roofing. It provides better control and speed compared to a regular power drill, making the installation process faster and more accurate.
Roofing snips: Roofing snips are essential for cutting and shaping the metal roofing panels to fit around corners, edges, and other obstacles. Choose snips with a serrated blade for clean and precise cuts.
Tape measure: Accurate measurements are crucial for ensuring proper alignment and spacing of screws. Use a tape measure to measure the dimensions of the roof and mark the positions where the screws will be installed.
Safety equipment: Don’t forget to prioritize safety when working with metal roofing. Wear gloves to protect your hands, safety glasses to shield your eyes from debris, and sturdy footwear to prevent slipping. Additionally, consider using a safety harness or fall protection system if working at heights.
By having these essential tools at your disposal, you can ensure a smooth and efficient installation process for your metal roofing project.
Are there any specific techniques or tips for securely fastening metal roofing?
When it comes to securely fastening metal roofing, there are a few techniques and tips that can ensure a strong and durable installation. Firstly, it is crucial to use the right type of screws specifically designed for metal roofing. These screws should have a neoprene washer to provide a watertight seal and prevent leaks. Additionally, using screws with a self-tapping feature can make the installation process easier and more efficient.
Another important technique is to properly align and space the screws. It is recommended to place screws in the flat areas of the metal panels rather than the ridges or valleys. This helps to prevent distortion of the panels and ensures a more secure attachment. The spacing between screws should follow the manufacturer’s guidelines, typically ranging from 12 to 24 inches apart along the panel’s length.
Furthermore, it is essential to avoid over-tightening the screws. Over-tightening can cause the metal to warp or create stress points, which can lead to leaks or damage over time. It is recommended to tighten the screws until they are snug, but not excessively tight. Regular inspections and maintenance are also important to identify any loose or damaged screws and promptly address them to maintain the integrity of the metal roofing system.
How do you ensure proper alignment and spacing of screws when installing metal roofing?
Installing metal roofing requires appropriate screw alignment and spacing to ensure structural integrity and lifespan. This requires a few essential actions.
Alignment: Before installing, set a straight reference line along the roof eave. This can be done with chalk or a straightedge. Matching the first row of metal panels to this reference line ensures appropriate alignment of the following rows. While installing each panel, check its alignment and make any required changes to maintain a straight roof.
Spacing: Screw spacing is crucial to avoid difficulties. Screws should be placed per rib or every other rib, depending on the metal roofing system. This uniformly distributes weight and supports it. varying roofing systems require varying screw spacing, so follow the manufacturer’s instructions. By following these instructions, you can position screws at the right intervals to avoid damaging metal panels.
Are there any safety precautions to consider when screwing down metal roofing?
When screwing down metal roofing, it is crucial to prioritize safety to prevent any accidents or injuries. Here are some important safety precautions to consider:
Use proper protective gear: Before starting the installation process, ensure that you are wearing the appropriate safety gear. This includes a hard hat to protect your head from falling debris, safety glasses to shield your eyes from flying particles, and sturdy work gloves to protect your hands from sharp edges and cuts.
Use a stable ladder: When working at heights, always use a stable and secure ladder. Make sure the ladder is placed on a level surface and that it is properly secured to prevent any wobbling or slipping. Additionally, consider using ladder stabilizers or stand-offs to provide extra stability and prevent damage to the roof.
Be cautious of weather conditions: Metal roofing installation should be avoided during adverse weather conditions such as high winds, rain, or snow. These conditions can make the roof surface slippery and increase the risk of accidents. It is important to wait for suitable weather conditions to ensure a safe working environment.
Practice proper lifting techniques: Metal roofing materials can be heavy and awkward to handle. When lifting and carrying them, use proper lifting techniques to avoid strain or injury. Bend your knees, keep your back straight, and lift with your legs rather than your back. If the roofing material is too heavy to handle alone, ask for assistance to prevent accidents.
Secure the work area: Before starting the installation, ensure that the work area is clear of any debris, tools, or other tripping hazards. Keep the area organized and tidy to minimize the risk of accidents. Additionally, use caution tape or warning signs to alert others to the presence of ongoing work and prevent unauthorized access to the area.
Conclusion
Screwing down metal roofing requires correct instructions to assure success. This ensures that your metal roofing is properly fastened and will safeguard your property for years. Whether you’re a contractor or a DIYer, you need the right tools and procedures.
Before installing, gather all materials and tools. Metal roofing panels, screws, a drill or screw gun, a ladder or scaffolding, and gloves and goggles are included. Preparation saves time and prevents installation delays.
Next, follow the manufacturer’s recommendations for your metal roofing type. Certain metal roofing types require varied screw placement, spacing, and fastening methods. By carefully reading and following these directions, you can install and use metal roofing properly.
Additionally, it is important to pay attention to the weather conditions during the roofing installation process. Metal roofing should ideally be installed on a dry and calm day to prevent any water damage or accidents. If the weather is unfavorable, it is best to postpone the installation until conditions improve. This will help to ensure a smooth and problem-free installation.