How To Paint Exterior Window Trim
Introduction
How To Paint Exterior Window Trim: Painting exterior window trim is crucial to maintaining the beauty and lifespan of your property. It adds curb appeal and protects windows from rain, snow, and UV radiation. If you want to freshen up the paint or change the color, knowing the right procedures and materials is essential for professional results.
First, prepare the window trim before painting. Clean the surface thoroughly to remove debris, dust, and loose paint. This can be done with mild detergent and water. To smooth the trim, fix any cracks or holes with a suitable filler and sand. Proper preparation ensures paint adhesion and durability.
Secondly, choosing the right type of paint is essential for achieving a durable and attractive finish. Exterior paints are specifically formulated to withstand the outdoor elements and come in various finishes, such as gloss, semi-gloss, and satin. It is important to consider the climate and the material of the window trim when selecting the paint.
Lastly, mastering the painting techniques is crucial for achieving a professional-looking result. It is advisable to start by applying a primer to the window trim, as it helps the paint adhere better and provides a smooth base for the topcoat. When painting, using a high-quality brush or roller is important to ensure even coverage and minimize brush marks.
What kind of paint do you use on exterior trim?
That said, oil-based paint is still ideal for certain exterior painting projects. Oil-based paints shrink less than latex and acrylic paints do, hold up in high-traffic areas and glide on smoothly. Oil-based paint dries to a smooth, hard surface and works well on porch floors, doors, trim and other small details.
One of the most commonly recommended types of paint for exterior trim is acrylic latex paint. This type of paint is known for its durability and flexibility, making it ideal for use on trim that is exposed to the elements. Acrylic latex paint is water-based, which means it dries quickly and is easy to clean up with soap and water. It also has excellent adhesion properties, so it will adhere well to the surface of the trim and provide a long-lasting finish.
Another option for painting exterior trim is oil-based paint.
Another option for painting exterior trim is oil-based paint. Oil-based paint is known for its durability and ability to provide a smooth and even finish.
It is important to note that the type of paint you choose for your exterior trim will also depend on the material of the trim. For example, if your trim is made of wood, you may want to consider using a paint that is specifically formulated for wood surfaces. This type of paint will provide additional protection against moisture and rot, ensuring the longevity of your trim.
When painting the exterior trim of your home, it is recommended to use acrylic latex paint or oil-based paint. These types of paint offer durability, adhesion, and a smooth finish, making them ideal for trim that is exposed to the elements. Additionally, consider the material of your trim and choose a paint that is specifically formulated for that material to ensure the best results.
Can you paint the outside window trim?
When painting window frames, look for a quality exterior trim paint. This type of paint is specially made for outdoor trim along windows and doors. It sticks to common trim materials and can last a long time.
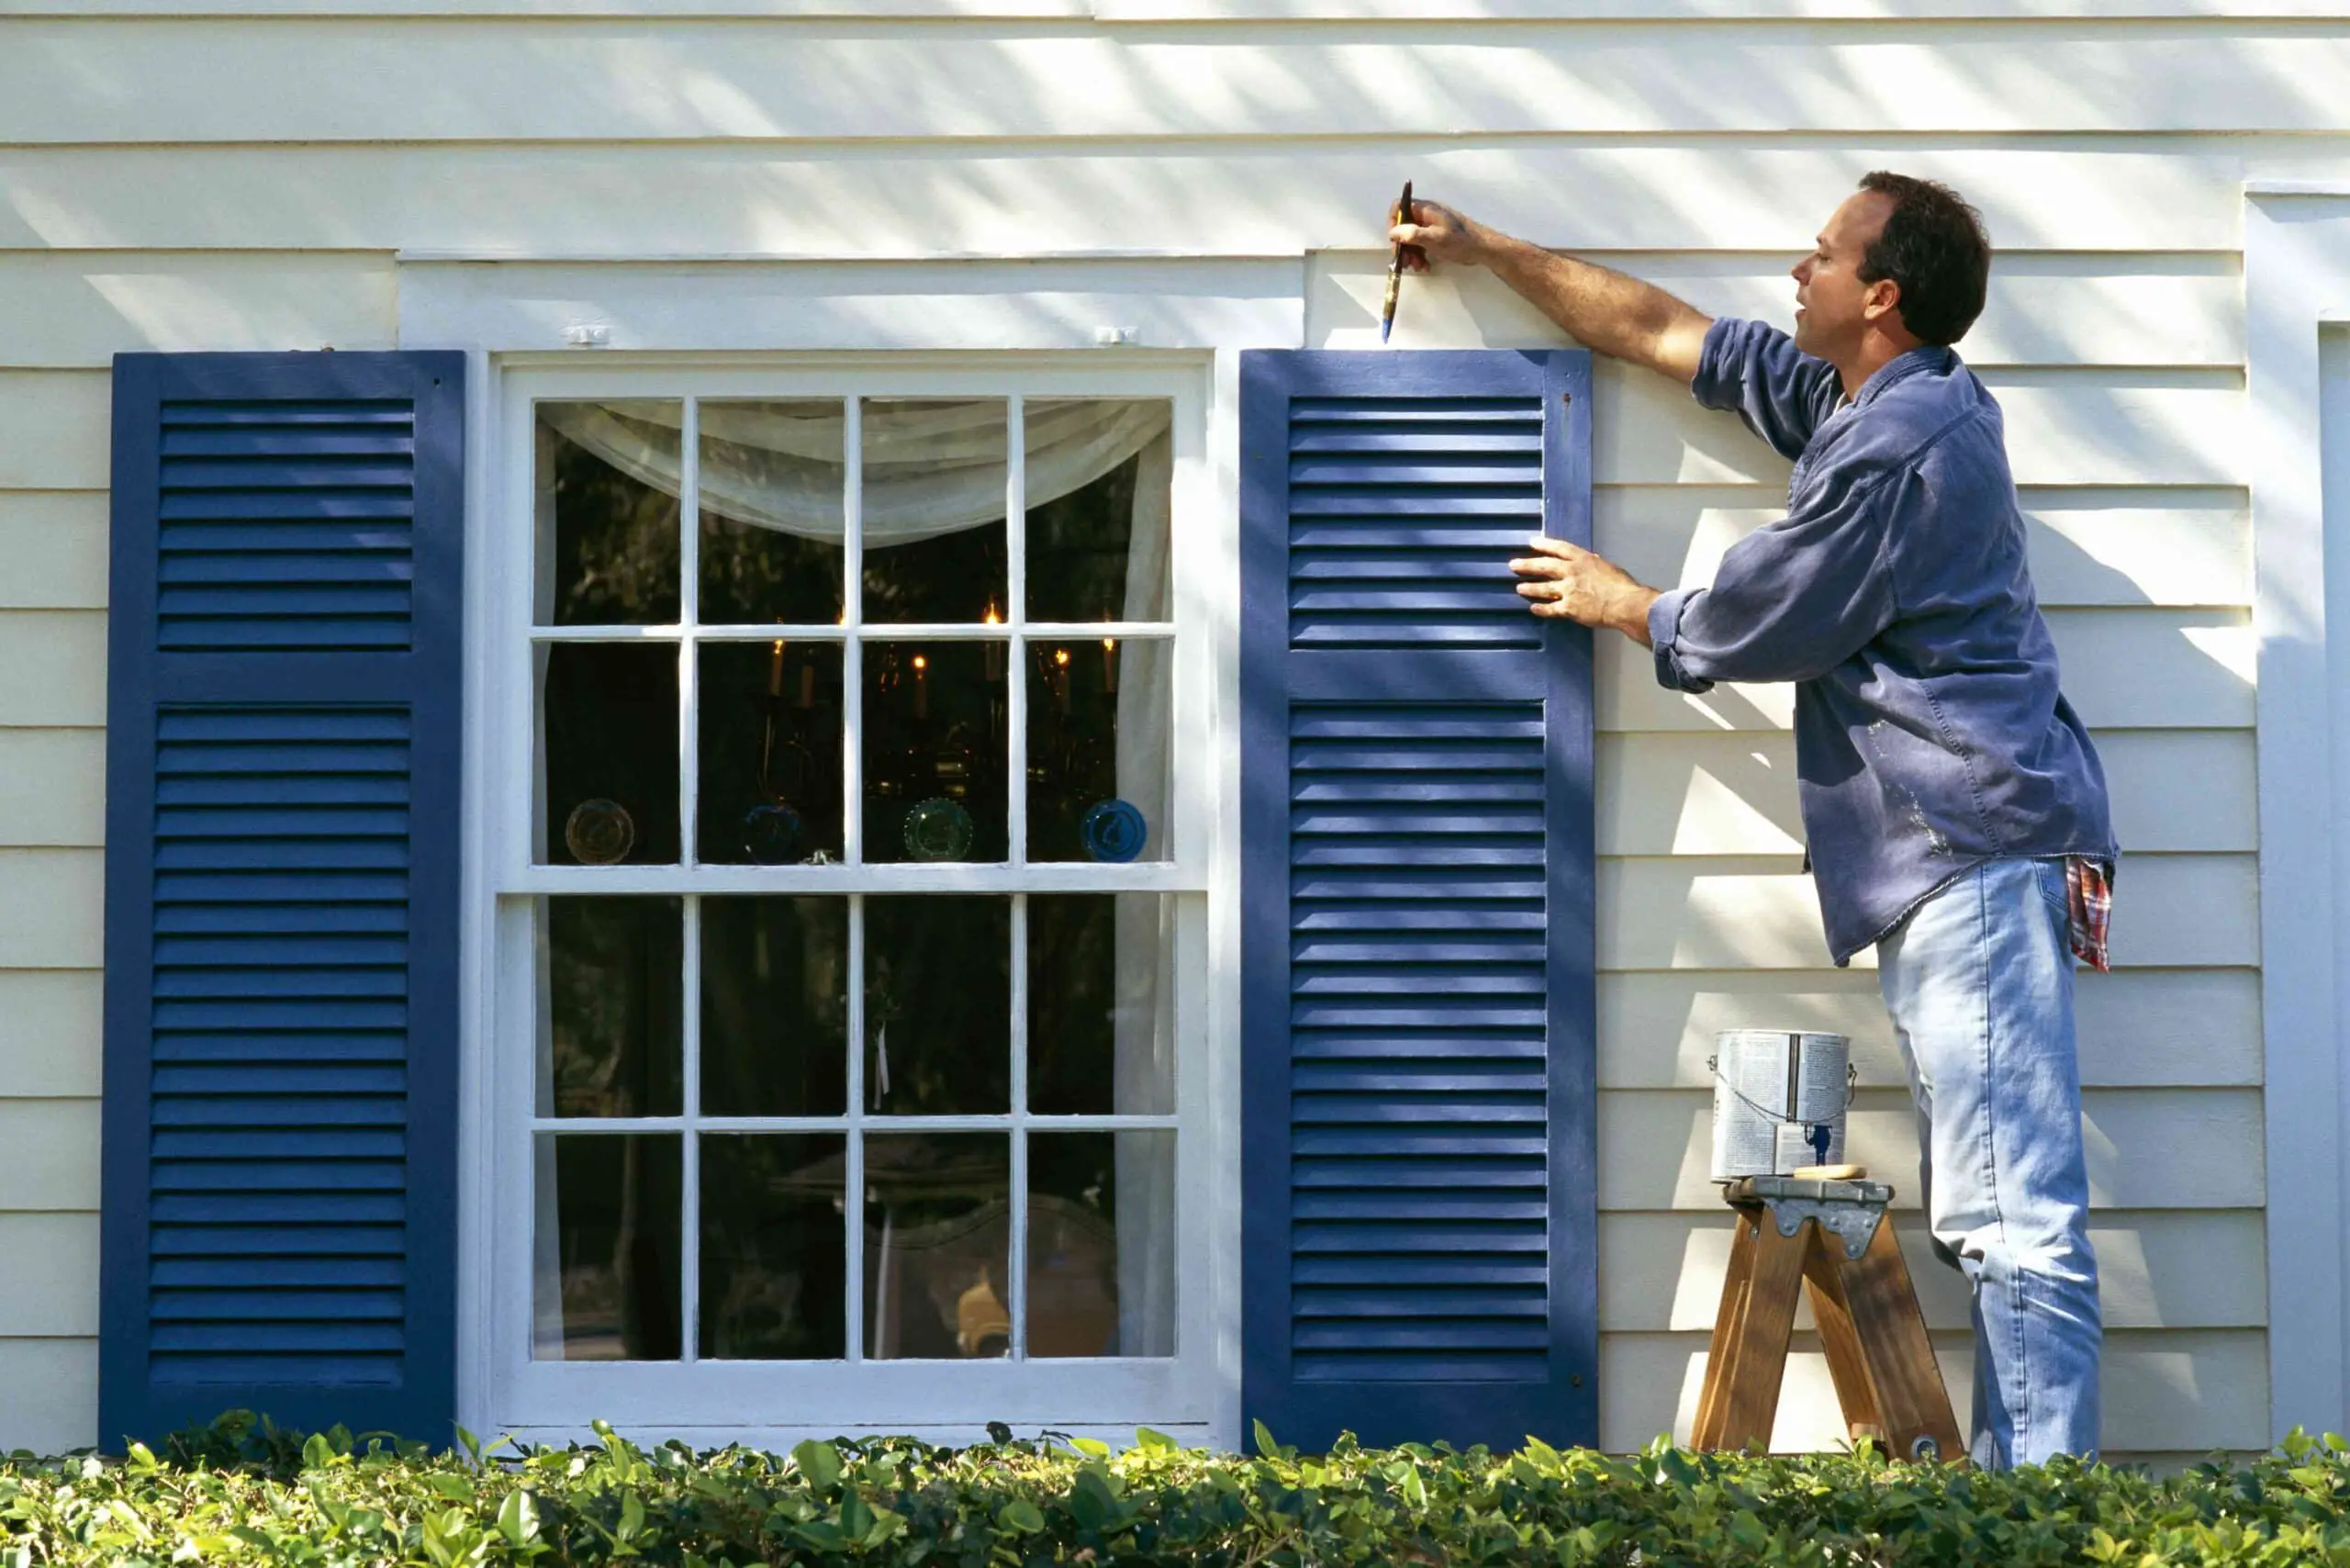
Yes, it is possible to paint the outside window trim. Painting the window trim can be a great way to freshen up the exterior of your home and enhance its curb appeal. Whether you want to change the color of the trim or simply give it a fresh coat of paint, painting the outside window trim can make a big difference in the overall appearance of your home.
Before you start painting the outside window trim
It is important to properly prepare the surface. This includes cleaning the trim to remove any dirt, dust, or debris. You may also need to scrape off any loose or peeling paint and sand the surface to create a smooth and even base for the new paint. It is also a good idea to apply a primer before painting to ensure better adhesion and a longer-lasting finish.
When choosing a paint for the outside window trim, it is important to consider the type of material the trim is made of. Different materials may require different types of paint. For example, if your window trim is made of wood, you will need to use a paint that is specifically formulated for wood surfaces. If your trim is made of vinyl or metal, there are paints available that are designed to adhere to these materials.
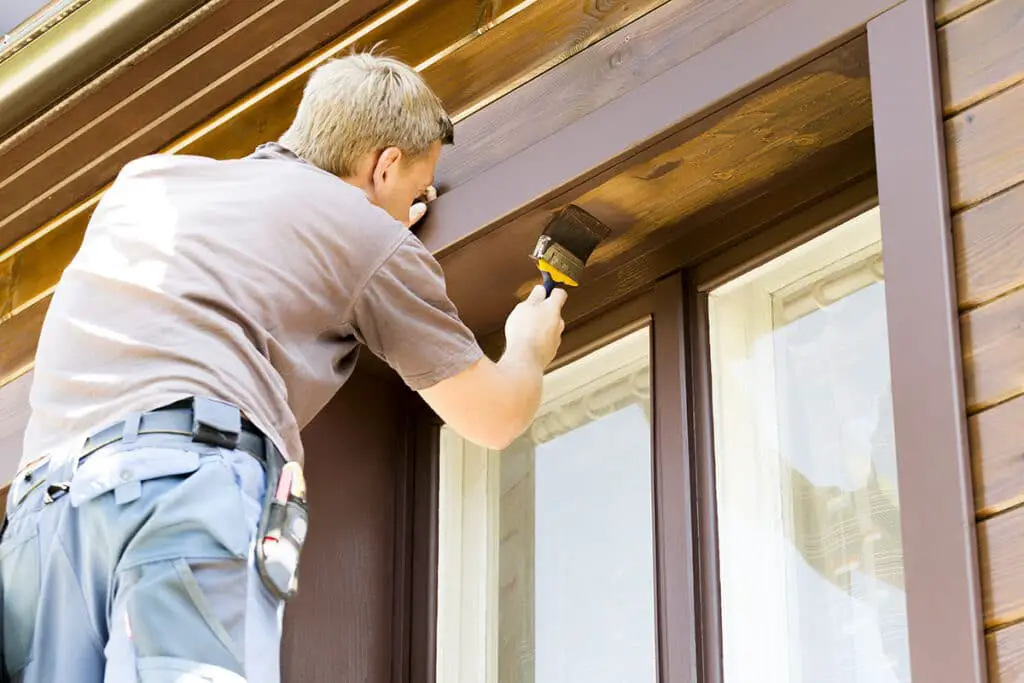
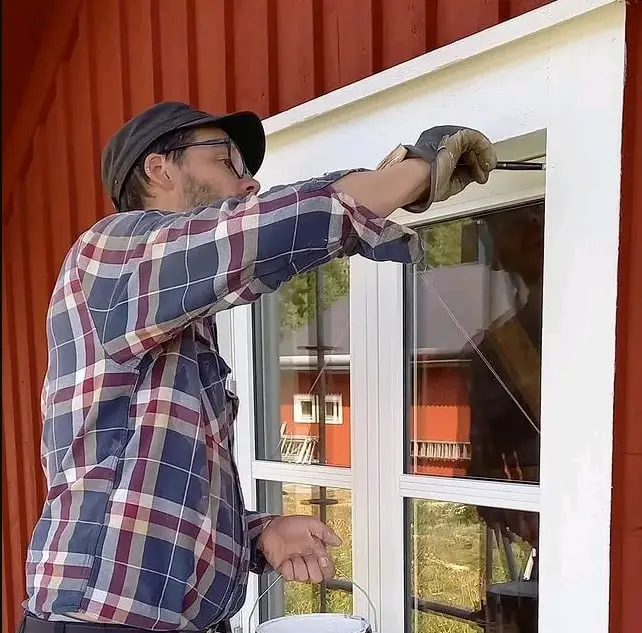
Once you have prepared the surface and chosen the appropriate paint, you can begin painting the outside window trim. It is recommended to use a brush rather than a roller for better control and precision. Start by painting the edges and corners of the trim, and then fill in the larger areas. Apply thin and even coats of paint, allowing each coat to dry before applying the next. This will help ensure a smooth and professional-looking finish.
What paint finish for exterior window trim?
But despite the shade you ultimately select to heighten your home’s curb appeal, there’s only one real option for the paint finish: It has to be semi-gloss. The same goes for exterior trim. Semi-gloss paint gives you a smoother surface than lower-sheen finishes and has a degree of shine, providing a visual contrast.
When it comes to choosing the right paint finish for your exterior window trim, there are several factors to consider. The finish you choose can have a significant impact on the overall appearance and durability of your windows.
One of the most popular paint finishes for exterior window trim is a satin finish. Satin finishes have a subtle sheen that adds a touch of elegance to your windows. They are also relatively easy to clean and maintain, making them a practical choice for homeowners. Satin finishes are versatile and can be used on a variety of window materials, including wood, vinyl, and aluminum.
exterior window trim
If you prefer a more traditional look, you may want to consider a semi-gloss finish for your exterior window trim. Semi-gloss finishes have a higher sheen than satin finishes, giving your windows a polished and sophisticated appearance.
If you’re looking for a more modern and sleek finish, you might consider a high-gloss finish for your exterior window trim. High-gloss finishes have an ultra-shiny appearance that can make your windows stand out. They are also extremely durable and resistant to fading, making them a great option for homes in sunny climates.
Regardless of the finish you choose, it’s important to select a paint that is specifically formulated for exterior use. Exterior paints are designed to withstand the harsh conditions of the outdoors, including UV rays, moisture, and temperature fluctuations. They also typically contain additives that help prevent mold and mildew growth, ensuring that your windows stay looking their best for years to come.
What kind of paint do you use on window trim?
Wood: The most common type of interior window trim. A high-quality latex semi-gloss paint like ben® Interior Paint is recommended for wood window trim. ADVANCE® Interior Paint is also a great option for its durable, furniture-like finish.
When it comes to painting window trim, it is important to choose the right type of paint that will not only enhance the appearance of your windows but also provide long-lasting protection against the elements. The type of paint you use on window trim can greatly impact its durability and overall aesthetic appeal. Therefore, it is crucial to select a paint that is specifically designed for this purpose.
One of the most commonly recommended types of paint for window trim is acrylic latex paint. This type of paint is known for its durability, flexibility, and resistance to cracking and peeling. Acrylic latex paint is water-based, which means it dries quickly and is easy to clean up with soap and water.
Types of Window Trim
Another popular option for painting window trim is oil-based paint. Oil-based paint provides a smooth and glossy finish that can enhance the overall appearance of your windows. It is known for its excellent durability and resistance to wear and tear. However, oil-based paint takes longer to dry and requires mineral spirits or paint thinner for cleanup, which can be more time-consuming and messy compared to acrylic latex paint.
When painting window trim, it is recommended to use acrylic latex paint or oil-based paint, depending on your preferences and the material of your window trim. Both types of paint offer their own advantages and can provide a beautiful and long-lasting finish to your windows.
How many coats of paint on exterior trim?
Trim or Baseboard Gets One to Three Coats of Paint
Best results: If you’re painting a fresh coat over the same color, one coat will be enough to liven it up. However, if you’re painting the trim a different color or painting unfinished trim, apply a primer coat and two to three coats of paint.
When it comes to painting the exterior trim of a house, the number of coats of paint required can vary depending on several factors. These factors include the condition of the trim, the type of paint being used, and the desired finish. In general, it is recommended to apply at least two coats of paint to ensure proper coverage and durability.
The first coat of paint serves as a base coat, providing a foundation for the subsequent coats. It helps to seal the surface and create a smooth and even finish. This coat also helps to enhance the adhesion of the paint to the trim, ensuring that it stays in place and resists peeling or chipping.
After the first coat has dried, it is important to assess the coverage and appearance. If the trim still shows signs of the previous color or if the finish is uneven, a second coat is necessary. The second coat helps to achieve a more uniform and vibrant color, as well as a smoother finish.
Trim or Baseboard Gets One to Three Coats of Paint
It is important to note that the number of coats required may also depend on the type of paint being used. Some paints have better coverage and opacity than others, allowing for fewer coats to be applied. Additionally, certain types of trim, such as those made of porous materials, may require more coats to achieve adequate coverage.
In conclusion, two coats of paint are advised for exterior trim painting. However, the amount of coatings depends on trim condition, paint type, and finish. The manufacturer’s directions for the paint should be followed for greatest coverage and longevity. For a durable, professional finish, external window trim must be prepared before painting. First, wash the trim with moderate detergent and water. This removes debris, filth, and loose paint that could affect new paint adherence.
After cleaning, check trim for damage or rot. Repair or replace damaged sections before painting. Sand the trim to make it paintable. To remove rough patches and flaking paint, use a coarse-grit sandpaper, then a finer one to smooth the surface. A tack cloth or moist cloth should remove dust and debris from trim after sanding. Lastly, prime the trim before painting. Priming improves paint adhesion and evenness. Choose an exterior primer that matches your paint. Before painting, let the primer dry.
What type of paint is recommended for painting exterior window trim?
When it comes to painting exterior window trim, it is important to choose a paint that is specifically formulated for outdoor use. Look for a high-quality exterior paint that is designed to withstand the elements and provide long-lasting protection. Acrylic latex paint is a popular choice for exterior trim as it offers excellent durability, flexibility, and resistance to cracking and peeling.
It is also important to consider the color of the paint. Lighter colors tend to reflect heat and sunlight, which can help prevent the trim from warping or fading over time. Additionally, using a paint with a satin or semi-gloss finish can provide added protection against moisture and make the trim easier to clean.
What type of paint is recommended for painting exterior window trim?
When it comes to painting exterior window trim, it is important to choose the right type of paint that can withstand the harsh outdoor elements. The recommended paint for this task is an exterior latex paint. Latex paint is known for its durability, flexibility, and resistance to cracking and peeling. It also dries quickly and is easy to clean up with soap and water.
Another important factor to consider is the sheen of the paint. For exterior window trim, a semi-gloss or high-gloss finish is typically recommended. These finishes not only provide a smooth and shiny appearance, but they also offer better protection against moisture, dirt, and UV rays. The glossy finish also makes it easier to clean the trim when necessary.
Are there any specific tools or materials required for painting exterior window trim?
When it comes to painting exterior window trim, there are a few specific tools and materials that are essential for achieving a professional and long-lasting finish. Here are some of the key items you will need:
1. Paintbrushes: It is important to invest in high-quality paintbrushes that are specifically designed for trim work. Look for brushes with synthetic bristles, as they tend to provide a smoother and more even application of paint.
2. Painter’s tape: This is an essential tool for achieving clean and crisp lines when painting window trim. Use painter’s tape to mask off any areas that you do not want to be painted, such as the glass or surrounding walls.
3. Sandpaper: Before painting, it is important to properly prepare the surface of the window trim. Use sandpaper to smooth out any rough or uneven areas, and to remove any old paint or debris. Start with a coarse grit sandpaper and gradually move to a finer grit for a smooth finish.
4. Primer: Applying a coat of primer before painting is crucial for ensuring that the paint adheres properly to the window trim. Choose a primer that is specifically formulated for exterior use and is compatible with the type of paint you will be using.
5. Exterior paint: Selecting the right type of paint is essential for achieving a durable and long-lasting finish on your exterior window trim. Look for a high-quality exterior paint that is specifically formulated for trim and is designed to withstand the elements.
By using the right tools and materials, you can ensure that your exterior window trim is properly prepared and painted, resulting in a beautiful and long-lasting finish.
How should the paint be applied to achieve a smooth and even finish on the exterior window trim?
When it comes to achieving a smooth and even finish on the exterior window trim, there are a few important steps to follow. First, it is crucial to properly prepare the surface before applying the paint. This includes cleaning the trim thoroughly to remove any dirt, dust, or debris. Additionally, any loose or peeling paint should be scraped off and the surface should be sanded to create a smooth and even base.
Once the surface is properly prepared, it is important to choose the right type of paint for the job. A high-quality exterior paint that is specifically designed for trim and wood surfaces is recommended. This type of paint is typically more durable and resistant to weathering, ensuring a long-lasting finish.
When applying the paint, it is best to use a high-quality brush or roller. A brush allows for more control and precision, especially when painting intricate details on the trim. It is important to apply the paint in thin, even coats, working in the direction of the wood grain. This helps to prevent drips and ensures a smooth and professional-looking finish.
Are there any additional tips or techniques for maintaining the painted exterior window trim in the long term?
Maintaining the painted exterior window trim in the long term is essential to ensure its longevity and aesthetic appeal. Here are some additional tips and techniques to help you achieve this:
1. Regular cleaning: It is important to regularly clean the painted exterior window trim to remove dirt, dust, and grime that can accumulate over time. Use a mild detergent and water solution to gently scrub the trim, and rinse thoroughly with clean water. Avoid using harsh chemicals or abrasive cleaners, as they can damage the paint.
2. Inspect for damage: Periodically inspect the painted exterior window trim for any signs of damage, such as peeling, cracking, or chipping. If you notice any issues, it is important to address them promptly to prevent further damage. Use a scraper to remove any loose or damaged paint, and then sand the area smooth before applying a fresh coat of paint.
3. Touch up as needed: Over time, the painted exterior window trim may experience wear and tear, especially in areas that are exposed to harsh weather conditions. To maintain its appearance, regularly inspect the trim and touch up any areas where the paint has worn off or become damaged. Use a small brush to carefully apply a thin coat of paint, blending it seamlessly with the surrounding area.
Conclusion
When it comes to choosing the right paint, it is important to select a high-quality exterior windows paint that is specifically designed for trim. This type of paint is formulated to withstand the elements and provide a durable finish. Additionally, consider the color of the paint and how it will complement the overall aesthetic of your home. By choosing a color that coordinates well with the existing exterior, you can create a cohesive and visually appealing look.
Finally, the application process is crucial for achieving a professional-looking finish. It is recommended to use a high-quality brush or roller to apply the paint in smooth, even strokes. Take your time and be sure to cover all areas of the trim, including any intricate details. Multiple coats may be necessary to achieve the desired coverage and finish. Once the paint has dried, be sure to clean up any drips or mistakes for a polished final result.
Painting exterior window trim is a task that can greatly enhance the appearance of a home. By properly preparing the surface, choosing the right paint, and applying it with care, homeowners can achieve a professional-looking finish that will last for years to come. So, grab your paintbrush and get ready to transform the look of your home.