How To Paint Exterior House With Roller
Introduction
How To Paint Exterior House With Roller: Painting the exterior of your house can be a transformative and rewarding DIY project that enhances curb appeal and protects your home from the elements. If you’re considering this task, you’re in the right place. In this comprehensive guide, we will delve into the art of painting the exterior of your house using a roller. It’s a versatile and efficient method that can yield professional results when done correctly.
We’ll take you through the essential steps, from preparation to choosing the right exterior paint, and guide you on how to use a roller effectively on different exterior surfaces. Whether you have wood, stucco, brick, or siding, our expert advice will ensure a smooth and visually appealing finish. We’ll also share tips on tackling common challenges such as weather conditions, surface repairs, and color selection.
This guide is designed to empower you with the knowledge and skills needed to take on this significant home improvement project with confidence. So, grab your roller, prepare your surfaces, and let’s transform your home’s exterior into a masterpiece that not only adds value but also makes a lasting impression on all who pass by.
Can you paint exterior with a roller?
Use rollers and extensions as much as possible.
Exterior siding tends to have more features and ornamentation that made paint rolling more difficult. But most homes do have a few large sections that can be rolled. Plus, when rolling high or remote sections of siding, be sure to use an extension pole with the roller.
Yes, you can paint the exterior of a house with a roller. In fact, using a roller for exterior painting is a common and efficient method. It’s particularly useful for covering large, flat surfaces like walls and siding. However, painting the exterior of a house with a roller requires careful preparation and technique to ensure a smooth and even finish.
Here are the basic steps for painting the exterior of a house with a roller:
- Preparation: Start by thoroughly cleaning the exterior surfaces to remove dirt, dust, mildew, and loose paint. Repair any cracks or damaged areas and allow them to dry.
- Priming (if needed): Apply a primer if your surfaces are new, unpainted, or if you’re making a significant color change. Primer helps the paint adhere better and provides a consistent base.
- Choose the Right Paint: Select a high-quality exterior paint suitable for your climate and the surface material (wood, stucco, brick, etc.). Consider using a paint with a satin or semi-gloss finish for durability.
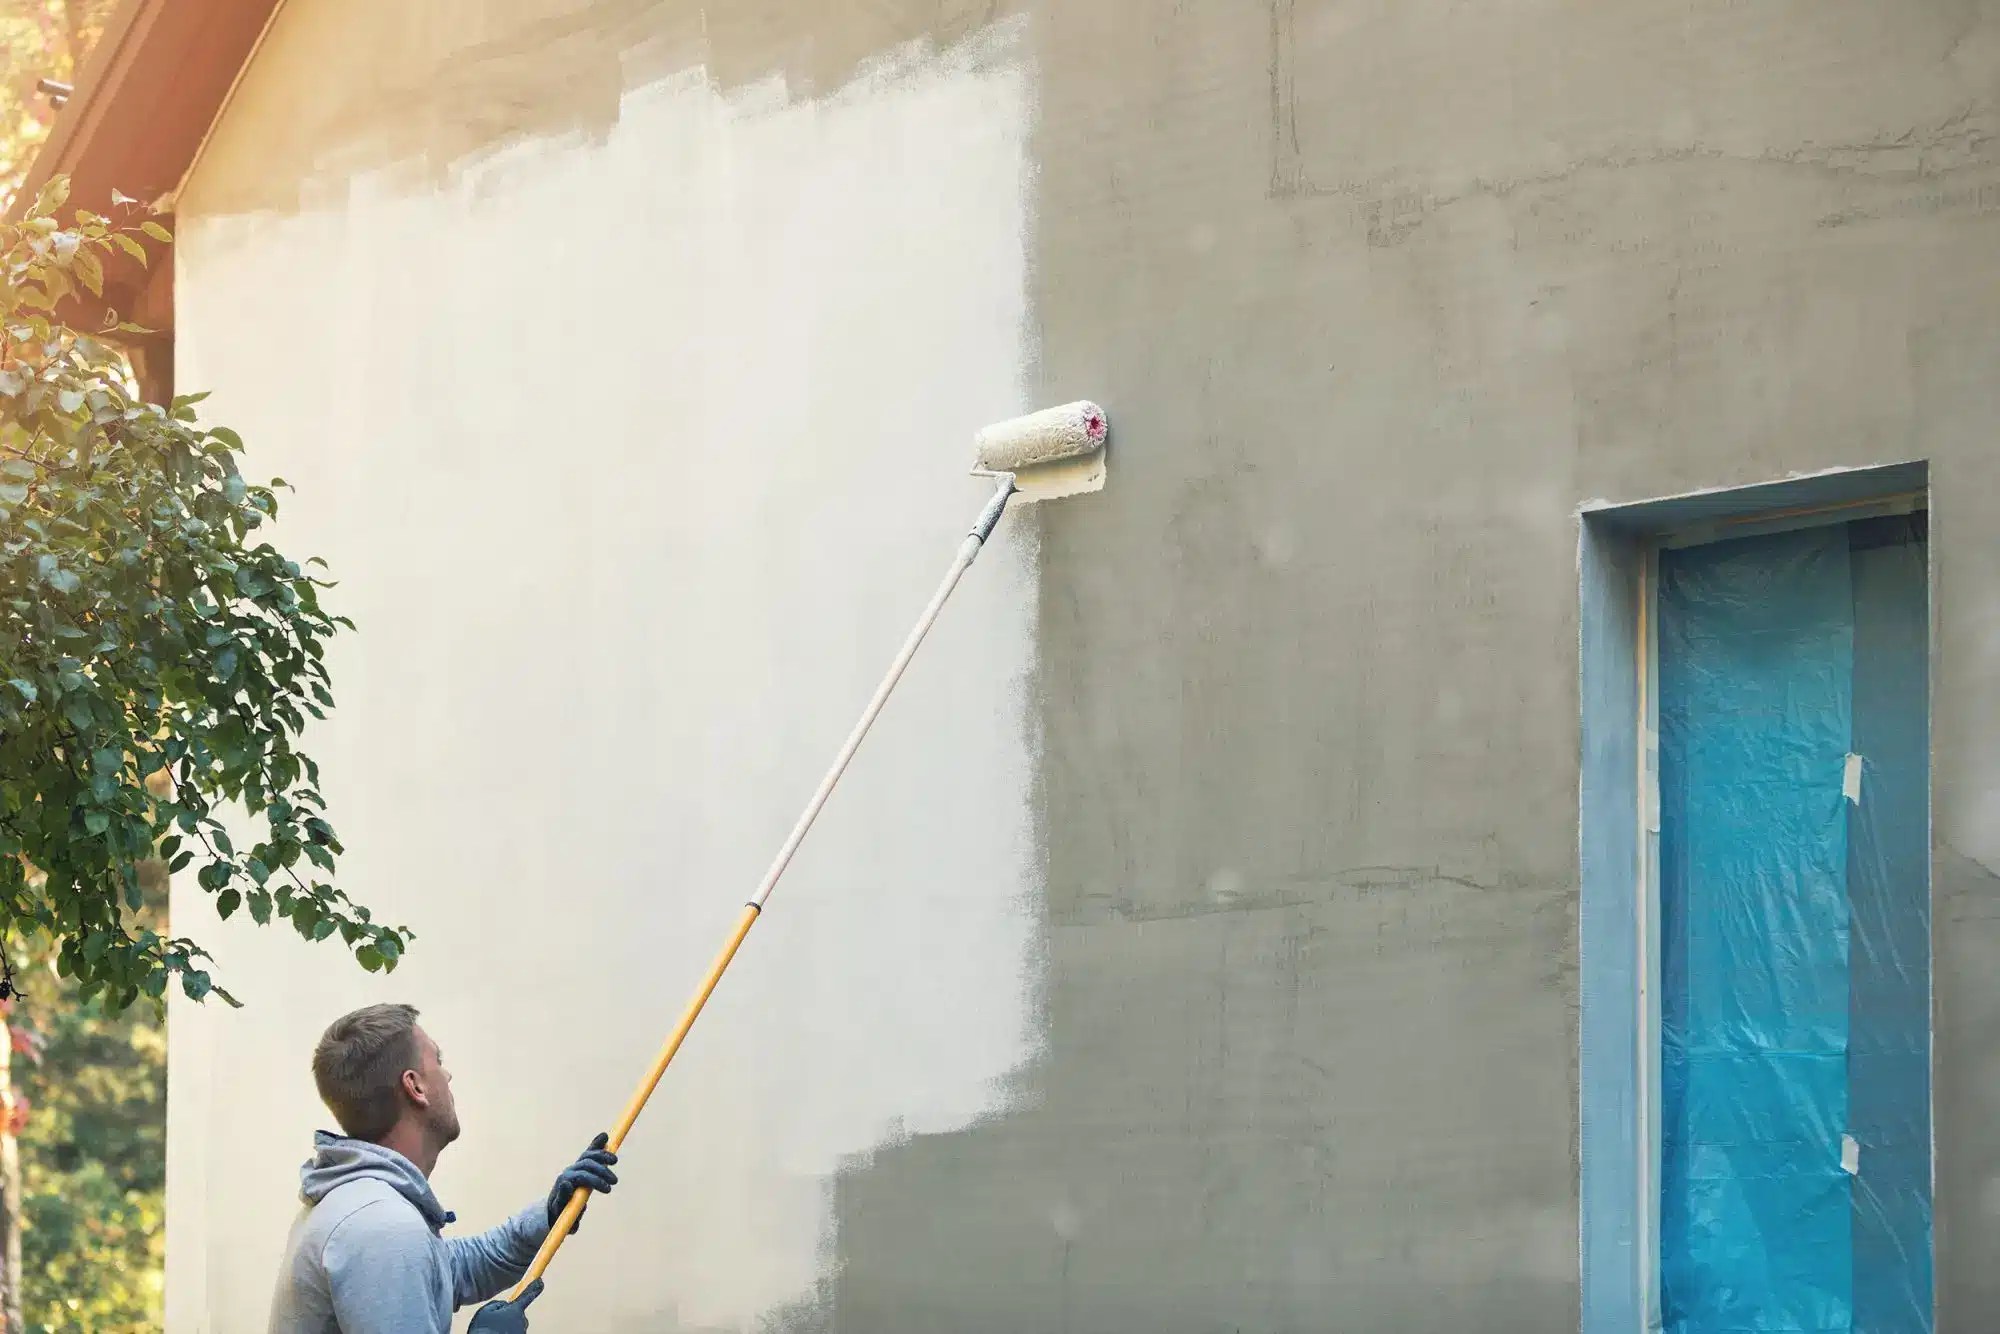
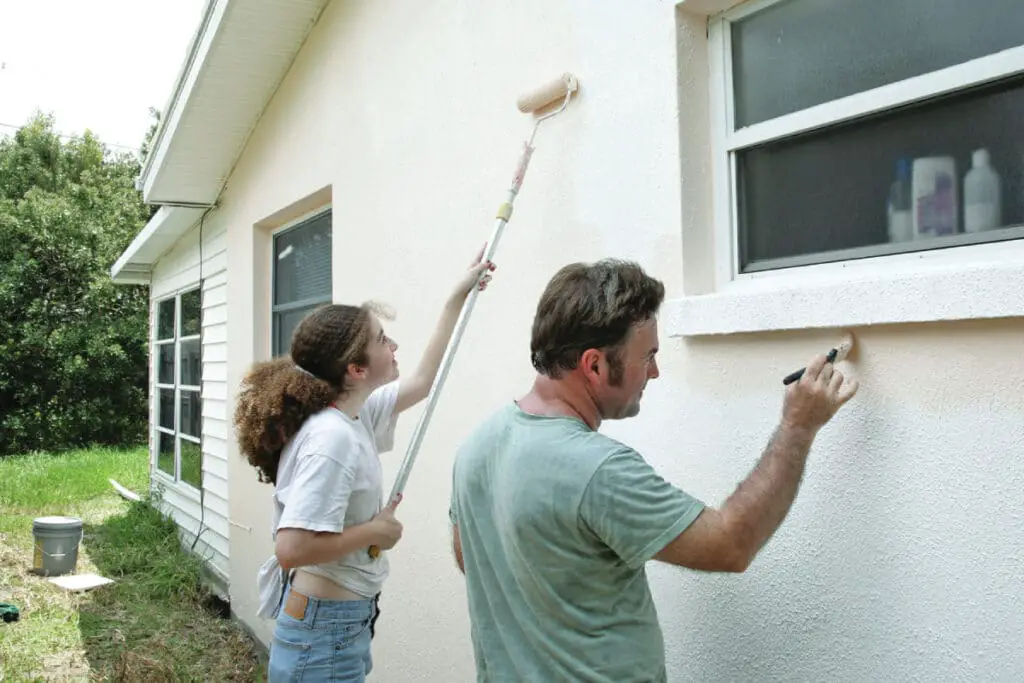
- Applying Paint: Use a long-nap roller cover (typically ¾ to 1¼ inches) for textured surfaces like stucco or a shorter nap for smoother surfaces like wood siding. Start at the top and work your way down, applying paint in even, overlapping strokes. Use a brush for corners, trim, and tight spaces.
- Maintain a Wet Edge: To prevent lap marks, always maintain a wet edge by keeping a wet roller. Roll vertically or horizontally, depending on the surface, to achieve an even finish.
- Work in Sections: Divide the exterior into manageable sections and complete each section before moving on to the next. This prevents paint from drying too quickly and causing visible seams.
- Drying and Cleanup: Allow the paint to dry according to the manufacturer’s instructions. Cleanup involves removing tape, cleaning brushes and rollers, and disposing of used materials properly.
What kind of roller do you use to paint an exterior house?
Here’s the roller/brush outfit I recommend for maximum speed and efficiency: A 5-gallon bucket with a metal roller ramp in it; a professional-grade roller handle with a roller cover on it (sizes include 3/8-inch, 1/2-inch, 3/4-inch, 1-inch, or 1 1/4-inch roller cover on it (the thickness of the roller cover “nap” will .
Choosing the right roller cover for painting the exterior of a house is crucial for achieving a smooth and efficient finish. The type of roller cover you should use depends on the surface texture and the type of paint you’re using.
For most exterior house painting projects, a synthetic roller cover with a long nap is recommended. Here are some guidelines:
- Nap Length: Use a roller cover with a nap length of ¾ to 1¼ inches for textured or rough surfaces like stucco, brick, or textured siding. This longer nap helps the roller cover get into crevices and ensure even paint distribution.
- Nap Type: Synthetic roller covers, made from materials like polyester or nylon, are ideal for exterior painting. They hold paint well, are durable, and can withstand outdoor conditions.
- Smooth Surfaces: If you’re painting a smooth surface like wood siding, you can use a roller cover with a shorter nap, typically around ⅜ to ½ inch. This will provide a smoother finish.
- Paint Type: Ensure that the roller cover is suitable for the type of paint you’re using (latex or oil-based). Some roller covers are versatile and can be used with both types of paint.
- Roller Frame: Make sure to use a roller frame that fits your roller cover. Most roller covers are compatible with standard 9-inch roller frames.
Choosing the right roller cover will make your exterior house painting project more efficient and help you achieve the desired finish, whether it’s smooth or textured.
When not to use a paint roller?
The roller can not be used for painting joints, corners and other small surfaces. You will need brushes. The surface of the roller has an extremely small resource of use.
While paint rollers are versatile tools, there are situations where they may not be the best choice:
- Small, Detailed Areas: Paint rollers are not suitable for painting small, intricate, or detailed areas like trim, molding, or window frames. In these cases, a paintbrush or smaller specialized brushes are more appropriate.
- Uneven or Rough Surfaces: Extremely uneven or heavily textured surfaces, such as heavily textured ceilings or brick walls with deep crevices, can be challenging for paint rollers. In such cases, a sprayer or a combination of brushes and rollers may be a better choice.
- Fine Finishes: If you’re aiming for an exceptionally smooth and fine finish, such as for high-end cabinetry or furniture, a paintbrush or spray gun may be preferred over a roller.
- Precision Work: When you require precise control over the application, like cutting in at edges or corners, a paintbrush is more precise than a roller.
- Quick Touch-Ups: For small touch-up jobs or minor repairs, using a paintbrush or even a paint pen can be more convenient than setting up a roller.
Remember that the choice of painting tool depends on the specific project and surface you’re working on. In many cases, a combination of tools, including rollers, brushes, and sprayers, may be used to achieve the best results.
What is better than a paint roller?
Best for exterior painting: It’s usually better to use a roller when painting interior walls because it requires less preparation and skill. But when painting exterior surfaces, sprayers are a superior choice.
While paint rollers are versatile and widely used for many painting projects, there are situations where other tools may be more suitable:
- Paint Sprayer: For large, smooth surfaces like walls, ceilings, or fences, a paint sprayer can provide a faster and more even application than a roller. It’s also an excellent choice for intricate details and hard-to-reach areas. However, it requires more careful masking and can be less precise.
- Paintbrushes: Paintbrushes are essential for precision work, such as cutting in at corners, edges, and trim. They offer control and detail that rollers cannot achieve.
- Texture Applicators: When you want to create specific textures, like stippling or sponge painting, texture applicators or specialty brushes may be better suited for the job.
- Foam Rollers: For very smooth surfaces like cabinet doors or furniture, foam rollers can provide an exceptionally fine finish compared to traditional nap rollers.
- Sponges and Rags: These are useful for techniques like faux finishing, glazing, or creating unique textures that rollers or brushes may not achieve.
The choice between a paint roller and these alternatives depends on the specific project, the desired finish, and your level of expertise. In many cases, a combination of tools may be used to achieve the best results. It’s essential to select the right tool for the job to ensure a successful and efficient painting experience.
Do I need to dilute paint for roller?
For roller and brush applications, add 8 ounces of Floetrol. Adding water to paint dilutes the paint and thus lightens its color, so additional coats may be necessary to improve the color quality. Also, keep this fact in mind when using multiple cans of the same-colored paint for a project.
Whether you need to dilute paint for a roller depends on several factors, including the type of paint you’re using, the roller’s nap length, and the manufacturer’s recommendations.
Here are some guidelines:
- Type of Paint: Latex or water-based paints typically require less thinning than oil-based paints. However, if the paint has thickened due to storage or other factors, you may need to add a small amount of water to achieve the desired consistency. Oil-based paints often require a paint thinner or mineral spirits for thinning.
- Roller Nap Length: If you’re using a roller with a longer nap (¾ inch or more), it may pick up and apply thicker paints more effectively without thinning. Shorter nap rollers (⅜ to ½ inch) might benefit from slight thinning, especially when working with dense or textured surfaces.
- Manufacturer’s Recommendations: Always check the paint can or manufacturer’s instructions for specific thinning recommendations. Some paints are formulated to be used directly from the can, while others may specify a certain amount of thinning if needed.
- Testing: It’s a good practice to perform a test roll on a small, inconspicuous area before starting your project. This helps you determine if the paint flows smoothly and covers evenly with your chosen roller and whether thinning is necessary.
If thinning is required, follow the manufacturer’s guidelines for the type and amount of thinning agent to use. Be cautious not to over-thin the paint, as this can affect its coverage and adhesion. Always stir the paint thoroughly after adding any thinning agent to ensure a consistent mixture.
What size roller for exterior paint?
3/4 to 1-inch thickness is suitable for stucco and other semi-rough surfaces. 1 1/4 to 1 1/2-inch is ideal for rough surface roller covers for painting brick and masonry, cinder blocks or chain link fences.
Choosing the right roller size for exterior paint depends on the surface texture and the area you’re painting. Here are some general guidelines:
- Smooth Surfaces: For smooth exterior surfaces like wood siding or metal, a roller with a shorter nap, typically ⅜ to ½ inch, is suitable. This size will provide a smoother finish and better paint distribution on even surfaces.
- Textured or Rough Surfaces: If you’re painting a textured or rough exterior surface, such as stucco, brick, or heavily textured siding, a longer nap roller, typically ¾ to 1¼ inches, is recommended. This size allows the roller to get into crevices and ensure even paint coverage.
- Large Areas: For larger exterior surfaces like walls and siding, consider using a wider roller, such as a 9-inch roller, to cover more area with each pass. This can speed up the painting process.
- Small Areas and Trim: When painting smaller areas, corners, and trim, you may use a narrower roller or switch to a paintbrush for precision.
Always consider the texture of the surface and the type of finish you want to achieve when selecting the roller size. Additionally, choose a roller cover made of a material suitable for your paint type (synthetic for latex paints, natural for oil-based paints).
Do professional painters use rollers?
Roller: Interior Walls
When a home is being built you will see professional painters using a paint sprayer. Most of the time this is because there is very little to mask off because there’s no furniture and typically no flooring in the space. But in addition to spraying professional painters will also back roll.
Yes, professional painters commonly use rollers as one of their primary tools for various painting projects, including exterior and interior work. Rollers are efficient tools for covering large, flat surfaces quickly and can provide a uniform finish when used correctly.
Professional painters often choose rollers based on the specific requirements of the project:
- Exterior Painting: For painting the exterior of houses or commercial buildings, professional painters frequently use rollers to cover large walls and siding efficiently. They select roller sizes and nap lengths based on the surface texture and the type of paint being used.
- Interior Painting: Rollers are also essential for interior painting projects. Professionals use them to paint walls and ceilings, particularly in rooms with expansive surfaces like living rooms, bedrooms, and hallways.
- Textured Surfaces: On textured surfaces such as stucco or popcorn ceilings, professional painters may use rollers with longer nap lengths to ensure even coverage in crevices and textured areas.
- Efficiency: Rollers are chosen for their ability to apply paint quickly, which is especially advantageous for large-scale projects where time efficiency is crucial.
While professional painters rely on rollers for many tasks, they also utilize other tools like brushes, sprayers, and specialty equipment to meet the specific needs of each job. The choice of tools depends on factors such as surface texture, project size, paint type, and desired finish.
What is the best roller for painting a house?
Ceilings and Drywall – Medium 3/8″ nap roller covers work best. Walls, Wood, and Metal – Small 1/4″ nap roller covers or foam rollers will produce the smoothest finish. Light to Medium Textured Surfaces – Microfiber rollers are best. Smooth Surfaces – Use a white woven short nap roller for an ultra fine finish.
The best roller for painting a house depends on the surface texture, the type of paint you’re using, and your personal preferences.
Here are some considerations:
- Surface Texture: If you’re painting a smooth surface like wood siding, a roller with a shorter nap (⅜ to ½ inch) will provide a smoother finish. For textured or rough surfaces like stucco or brick, opt for a longer nap roller (¾ to 1¼ inches) to ensure even coverage.
- Paint Type: Choose a roller cover that is suitable for the type of paint you’re using. Synthetic roller covers work well with latex or water-based paints, while natural-fiber roller covers are better for oil-based paints.
- Project Size: For large house-painting projects, consider using a wider roller, such as a 9-inch roller, to cover more area with each pass. This can save time and effort.
- Quality: Invest in high-quality roller covers to avoid lint or fibers shedding onto the painted surface. Quality roller covers also hold more paint and provide better coverage.
- Texture Preferences: Some painters prefer microfiber roller covers for their ability to create a fine finish, while others may opt for foam roller covers for ultra-smooth surfaces.
- Cleanup: Consider whether you want disposable roller covers for easy cleanup or reusable ones that you can wash and reuse for future projects.
Ultimately, the best roller for painting a house depends on the specific requirements of your project and your level of comfort with different roller types. It’s a good practice to test the roller on a small area before starting your project to ensure it meets your expectations for coverage and finish.

Conclusion
Painting the exterior of your house with a roller is a satisfying endeavor that can revitalize your home’s appearance, increase its value, and provide long-lasting protection. As you reach the end of this guide, you’ve gained valuable insights into the steps and techniques required for a successful exterior painting project.
Remember, thorough preparation is key. Properly clean, repair, and prime your surfaces before applying paint. Choose a high-quality exterior paint that suits your climate and desired finish. When it comes to applying the paint roller, maintain a steady and consistent technique, and be vigilant for drips or roller marks.
Throughout your project, consider safety precautions, especially when working at heights or with ladders. Protect windows, trim, and landscaping from paint splatter and drips by using drop cloths and masking tape.
Your beautifully painted exterior will not only protect your home from the elements but also leave a lasting impression on visitors and passersby. Regular maintenance and occasional touch-ups will ensure your home’s beauty endures for years. Congratulations on completing this significant home improvement task, and enjoy the newly refreshed look of your exterior space.