How To Paint An Interior Door With A Roller
Introduction
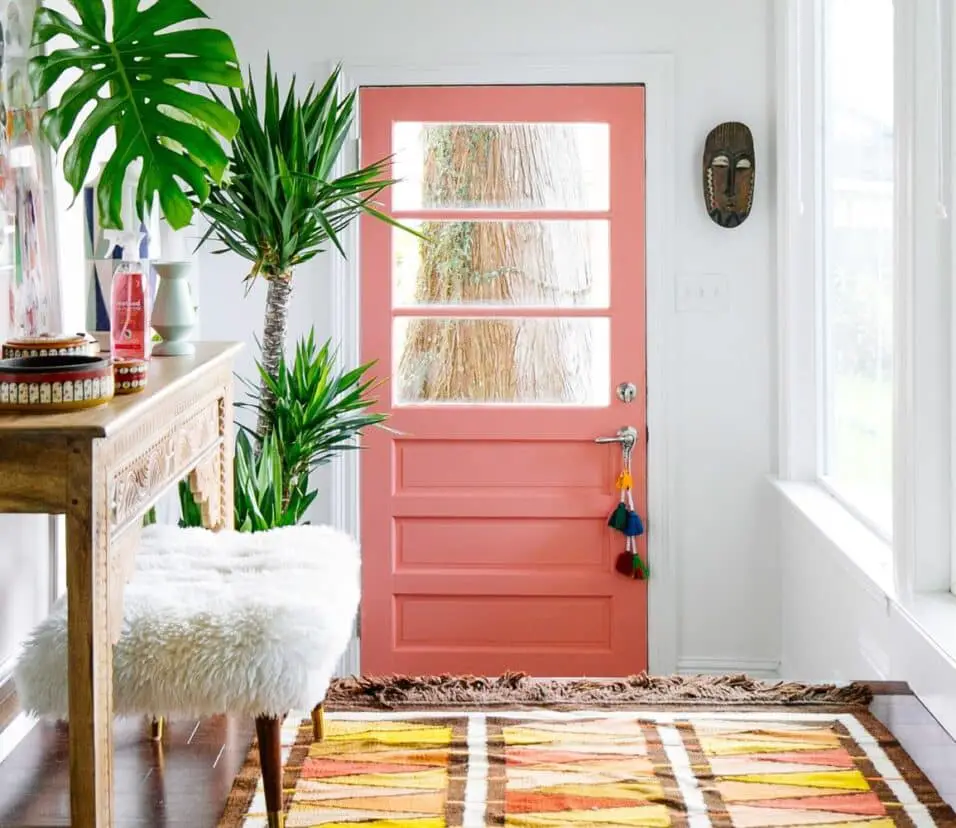
How To Paint An Interior Door With A Roller: Welcome to the world of DIY home enhancement! Transforming the interior of your abode can be a fulfilling endeavor, and one simple yet impactful project is painting an interior door with a roller. A door, often overlooked as merely functional, possesses the potential to become an artistic canvas that enhances the aesthetic charm of your living space. This guide will walk you through the step-by-step process of wielding a roller to metamorphose a mundane door into a statement piece that complements your interior decor.
Painting an door interior is more than just a routine chore; it’s an opportunity to express your creativity and inject a fresh sense of character into your home. Whether you’re seeking to revitalize a worn-out door or revamp the color scheme of a room, this undertaking can yield remarkable results with the right techniques and a dash of patience.
In this comprehensive guide, we will cover everything from the preparatory stages, including gathering the necessary materials and ensuring a smooth surface, to the intricacies of paint selection and roller techniques. Whether you’re a seasoned DIY enthusiast or a novice looking to embark on your first painting venture, these instructions will provide you with the confidence to tackle this project with finesse.
Get ready to unleash your artistic flair and witness the remarkable transformation of your living space, one roller stroke at a time. Let’s dive into the world of interior door painting and discover the joy of turning the ordinary into the extraordinary.

Is it better to paint interior doors with a brush or roller?
While you might think a brush would be easier, a roller is actually the best tool to use to paint a door for a smooth finish. ‘To avoid brush marks, it is better to use a roller as much as possible,’ says Will.
The choice between using a brush or a roller for painting interior doors depends on your preference and the desired finish. Both tools have their advantages and can yield excellent results when used correctly.
- Brush: Using a paintbrush allows for greater control and precision, especially when painting panel or detailed doors. It’s an excellent choice for getting into crevices and corners. Brushes are also ideal for achieving a brush-stroke finish if that’s the look you desire. However, brush application can be slower and may leave visible brush marks if not applied carefully.
- Roller: A paint roller can cover large, flat surfaces quickly and efficiently. It’s a good choice for solid, flat-surfaced doors. Foam rollers, in particular, can provide a smooth finish. However, rollers may not reach into recessed areas as effectively as brushes, and they may require more care to prevent drips and roller marks.
Ultimately, the best method depends on your door’s design, your painting experience, and your preference for the finish. Some painters even use both a brush and a roller: using a brush for detail work and a roller for flat sections.
What kind of paint do you use on interior doors?
acrylic paint
Interior doors typically are painted with latex-based or acrylic paint. You also need to choose the correct finish when painting interior doors: Semi-gloss is a popular finish for interior doors because it provides superior stain resistance and is easier to clean than flatter finishes.
The type of paint you use on interior doors depends on the material of the door and your desired finish. For wooden interior doors, latex or oil-based paints work well. For metal or fiberglass doors, choose a paint that’s designed for those surfaces. When selecting paint, consider the following:
- Latex Paint: Latex-based paint is a popular choice for interior doors. It has a lower odor, dries quickly, and is easy to clean up with water. It’s ideal for wooden doors and is available in various finishes, such as satin, semi-gloss, and gloss.
- Oil-Based Paint: Oil-based paint provides a durable and smooth finish. It’s excellent for wooden doors and can withstand wear and tear. However, it has a stronger odor, requires mineral spirits for cleanup, and may take longer to dry.
- Enamel Paint: Enamel paints, whether latex or oil-based, are known for their durability and high-gloss finish. They are often used for trim and doors.
What is the best method to paint interior doors?
Begin by applying paint to the inside of the top panels. Smooth out the paint, working with the grain. Coat the recessed areas first and then the faces of the panels. If the door has a vertical center stile, paint this next and then blend in the brush marks from the center stile when you paint the horizontal rails.
The best method to paint interior doors involves thorough preparation, quality materials, and careful application. Here’s a general outline of the steps:
- Remove the Door: If possible, take the door off its hinges to make painting easier and ensure even coverage.
- Clean and Sand: Clean the door to remove dust, dirt, and grease. Sand the surface lightly to create a slightly rough texture for better paint adhesion.
- Priming: Apply a suitable primer to create a stable base for the paint and promote adhesion. Allow the primer to dry according to the manufacturer’s instructions.
- Painting: Use a brush or roller to apply paint evenly, working in thin coats. Multiple thin coats are preferable to one thick coat for a smoother finish. Follow the grain of the wood for wooden doors.
- Drying and Curing: Allow each coat to dry completely before applying the next. Let the final coat cure fully, which may take a few days.
- Reinstallation: Reattach the door to its hinges once the paint is dry and cured.
What is the easiest way to paint interior doors?
The easiest way to paint a door is while it is in its frame on its hinges. If you remove the door from the frame, the frame may shift and the door may not fit or function properly when replaced. Another reason to leave it on its hinges is that you can paint both sides at the same time.
The easiest way to paint interior doors involves these simplified steps:
- Preparation: Clean the door’s surface and lightly sand it. Remove hardware or mask it off if you can’t remove the door.
- Primer: Use a paint and primer combo to save time and simplify the process. This eliminates the need for a separate primer coat.
- Painting: Use a high-quality paintbrush or roller to apply the paint in a smooth, even coat. You may only need one coat if using a paint and primer combo. Be sure to paint with the grain of the wood for wooden doors.
- Drying: Allow the paint to dry thoroughly before reattaching hardware or closing the door.
While this method simplifies the process, it’s important to note that using a separate primer coat can provide better adhesion and coverage, especially if the door is in poor condition or has a significant color change.
What part of a door do you not paint?
In general, you don’t have to paint the top and bottom edges of a door. However, if the top edge is overlooked (from a staircase, for example) paint it, so it does not stand out as bare wood.
When painting a door, it’s important to avoid painting certain parts to ensure the door functions properly and to maintain a clean, professional appearance. Here are the parts of a door that you should typically avoid painting:
- Hinges: Do not paint the hinges or the area around them. Painting the hinges can interfere with their movement and may cause the door to stick or not close properly. If you accidentally get paint on the hinges, it’s essential to remove it promptly with a cloth or paint thinner.
- Strike Plate: The strike plate is the metal plate on the door jamb where the latch engages when the door is closed. Painting the strike plate can affect the door’s ability to latch securely. To maintain proper function, leave the strike plate unpainted or remove it temporarily while painting.
- Doorstop: The doorstop is the wooden or metal strip on the frame that prevents the door from swinging too far and hitting the wall. Painting the doorstop can cause the door to bind or not close correctly. It’s best to leave the doorstop unpainted or remove it before painting and reattach it afterward.
- Weatherstripping: If your door has weatherstripping, which seals gaps to improve energy efficiency, avoid painting it. Painting the weatherstripping can reduce its effectiveness and create a mess.
- Hardware: Remove or mask off any door hardware, such as knobs, handles, locks, or decorative plates, before painting. Painting over hardware can affect its appearance and functionality.
To ensure that these critical parts of the door remain functional and unobstructed, take the time to mask them off or remove them before painting. It’s worth the effort to maintain the door’s proper operation and appearance while achieving a professional finish.
Why am I leaving roller marks when painting?
Roller marks are caused by the paint roller leaving behind streaks of paint on the wall. This can be due to several factors, such as using the wrong type of roller for the surface you’re painting, using too much paint or rolling in one direction instead of back and forth.
Leaving roller marks, often referred to as “stipple” or “orange peel” texture, when painting with a roller can be frustrating. Several factors can contribute to this issue. Here are some common reasons why roller marks may occur and how to prevent them:
- Roller Type: The type of roller cover you use can significantly impact the finish. To achieve a smoother finish, choose a high-quality roller cover with a low nap or one made of foam or microfiber. These roller covers tend to leave fewer texture marks on the painted surface compared to traditional nap rollers.
- Paint Consistency: The consistency of the paint matters. If the paint is too thick, it can create texture when applied with a roller. Before painting, make sure the paint is well-mixed and thinned to the appropriate consistency according to the manufacturer’s recommendations.
- Roller Quality: Low-quality or worn-out roller covers can lead to roller marks. Invest in good-quality roller covers to ensure even coverage and a smoother finish. Replace roller covers if they start to deteriorate during the painting process.
- Insufficient Paint: Rolling with too little paint on the roller can result in dry rolling, leaving streaks and roller marks. Make sure the roller is adequately loaded with paint before applying it to the surface.
- Rolling Technique: Proper rolling technique is essential to achieving a smooth finish. Avoid pressing too hard on the roller, which can create texture. Instead, use even, gentle pressure and maintain a consistent speed while rolling. Overlapping each pass slightly can help prevent visible edges and streaks.
- Paint Drying Too Quickly: In some cases, the paint may dry too quickly, especially in hot or dry conditions. This can make it challenging to maintain a wet edge, leading to roller marks. To prevent this, work in smaller sections and keep a wet edge by overlapping each pass while the paint is still wet.
- Surface Preparation: Ensure that the surface you are painting is clean, smooth, and free from imperfections. Any existing bumps, cracks, or unevenness can become more pronounced when painted over, leading to roller marks.
- Paint Roller Cover Condition: Make sure the roller cover is clean and free of lint or debris. Washing and drying it thoroughly before use can prevent unwanted texture on the painted surface.
- Environmental Factors: Extreme temperature and humidity can affect how paint behaves. It’s generally best to paint in moderate conditions, avoiding very hot, cold, or humid environments.
If you are experiencing roller marks despite addressing these factors, you may want to consider trying a different roller type, adjusting your technique, or consulting with a professional painter for further guidance. Achieving a smooth finish can be challenging, but with the right tools, materials, and techniques, it is achievable.
Which paint roller gives the smoothest finish?
foam rollers
Walls, Wood, and Metal – Small 1/4″ nap roller covers or foam rollers will produce the smoothest finish. Light to Medium Textured Surfaces – Microfiber rollers are best. Smooth Surfaces – Use a white woven short nap roller for an ultra fine finish.
To achieve the smoothest finish when using a roller, it’s generally recommended to use a high-density foam roller or a microfiber roller cover. These types of roller covers tend to leave fewer texture marks on the painted surface compared to traditional nap rollers. Foam rollers, in particular, are excellent for achieving a smooth, even finish on doors and other smooth surfaces.
What is the most common paint finish for interior doors?
satin
Hands down, satin is the most popular finish for any type of trims, doors and mouldings. Why is it so popular? It’s washable without being overly glossy.
The most common paint finish for interior doors is a semi-gloss or satin finish. These finishes offer a balance between durability and aesthetics. They provide a smooth, slightly shiny surface that is easy to clean, making them suitable for frequently touched surfaces like doors. Semi-gloss and satin finishes also enhance the visual appeal of doors by reflecting light and highlighting the door’s details without being overly glossy. However, the choice of finish can vary depending on personal preference and the overall design style of the space.

Conclusion
As the final brushstroke dries, you can step back with a sense of accomplishment, knowing that you’ve not only painted an interior door but also elevated the ambiance of your home. Embracing the journey from prepping the door to meticulously applying each layer of paint has not only revitalized the door itself but has infused new life into the entire room. The subtle texture left behind by the roller, the carefully chosen color that harmonizes with the surroundings, and the satisfaction of a job well done all culminate in a transformed space that reflects your taste and effort.
Remember, painting an interior door with a roller is not merely about aesthetics; it’s a reflection of your creativity and dedication to turning ordinary elements into extraordinary features. The skills you’ve acquired throughout this process can extend beyond paint doors, empowering you to embark on even more ambitious DIY projects. So, stand back and admire the harmonious blend of color, texture, and style you’ve achieved—an embodiment of your personal touch that leaves a lasting impression on anyone who crosses the threshold.