How To Install Flashing On A Metal Roof
Introduction
How To Install Flashing On A Metal Roof: Installing flashing on a metal roof is an essential step to ensure its durability and prevent water leakage. Flashing acts as a protective barrier, sealing the vulnerable areas where the roof meets other structures such as chimneys, skylights, or walls. It is crucial to install flashing correctly to maintain the integrity of the roof and avoid costly repairs in the future.
In this article, we will guide you through the process of installing flashing on a metal roof, providing step-by-step instructions and helpful tips to make the task easier and more efficient.
Before diving into the installation process, it is important to understand what flashing is and why it is necessary. It acts as a barrier, preventing water from seeping into the roof and causing damage to the underlying structure.
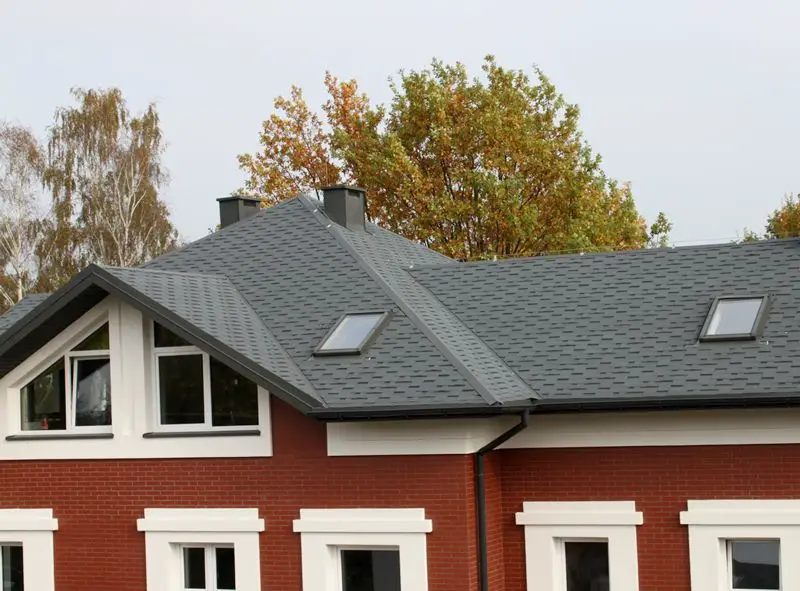
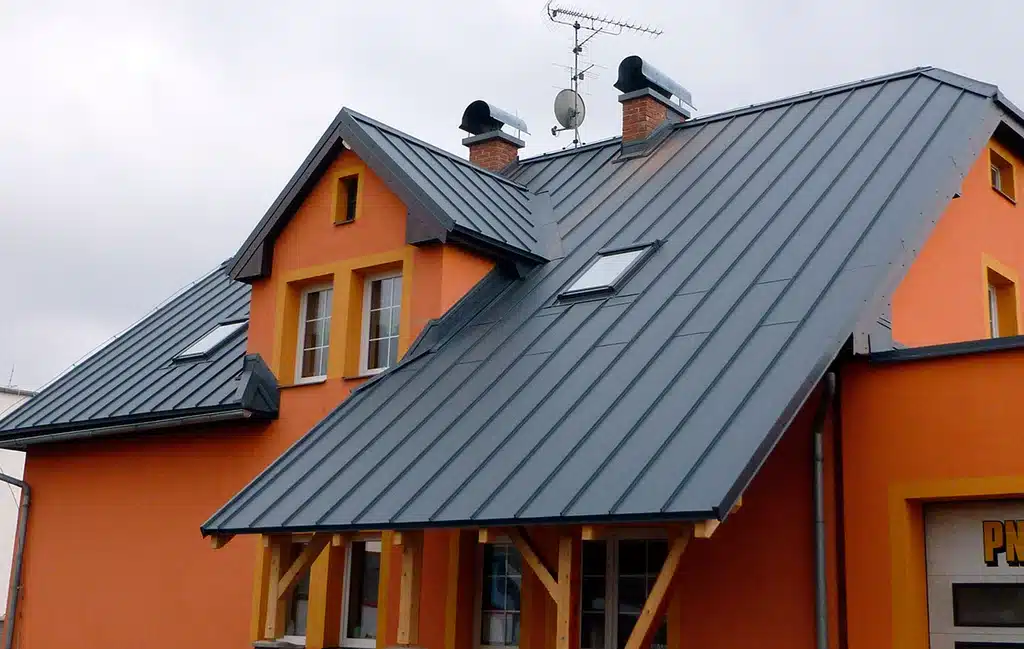
Flashing is installed in areas where the roof meets other structures, such as valleys, ridges, chimneys, or skylights.
Now that we understand the importance of flashing, let’s delve into the installation process.It is also crucial to prioritize safety by wearing appropriate protective gear, such as gloves and safety glasses. The first step is to measure and cut the flashing to the required length. Use tin snips to cut the flashing accurately, ensuring it fits snugly against the roof and the adjacent structure.
Once the flashing is in place, secure it by nailing it down using roofing nails. Space the nails approximately 6 inches apart along the edges of the flashing, ensuring a secure and tight fit. Finally, apply a generous amount of roofing sealant or caulk along the edges of the flashing to create a watertight seal.

Do you put flashing on a metal roof?
Metal roof flashing is both a method and a device for keeping water from entering a structure at a roof penetration or join Flashing is your last, best line of defense against the enemy of interiors, water.
Introduction:
A metal roof is a popular choice for homeowners due to its durability, longevity, and aesthetic appeal. However, when it comes to installing a metal roof, one common question that arises is whether flashing is necessary.
Importance of Flashing:
Flashing plays a vital role in preventing water leakage and ensuring the overall integrity of a metal roof. I
Installation Process:
When installing flashing on a metal roof, it is essential to follow the manufacturer’s guidelines and recommendations. The installation process typically involves cutting the flashing material to the required size and shape, then securing it in place using nails, screws, or adhesive
Maintenance and Inspection:
Once the flashing is installed, regular maintenance and inspection are necessary to ensure its continued functionality. Over time, flashing can deteriorate due to exposure to harsh weather conditions, temperature fluctuations, and general wear and tear. Therefore, it is essential to inspect the flashing periodically and address any signs of damage or deterioration promptly.
What is the best flashing for a metal roof?
The following are the three most commonly used metals for roof flashing:
- Aluminum: Aluminum is a lightweight metal that is easy to form.
- Copper: Copper is a heavy metal known for its durability and will typically last a very long time.
- Steel: Steel combines the best of both worlds.
Introduction:
When it comes to choosing the best flashing for a metal roof, there are several factors to consider. Flashing plays a crucial role in preventing water leaks and ensuring the long-term durability of the roof.
Factors to Consider:
One of the primary factors to consider when selecting flashing for a metal roof is the material. Common options include aluminum, copper, and galvanized steel. Each material has its own advantages and disadvantages. Aluminum flashing, for example, is lightweight, corrosion-resistant, and easy to work with. Copper flashing, on the other hand, offers excellent durability and an attractive appearance.
Another important consideration is the type of flashing:
1. Step flashing: This type of flashing is commonly used in areas where the roof intersects with vertical walls, such as chimneys or dormers. It consists of individual pieces that are layered and stepped up the roof slope, providing a watertight barrier.
2. Continuous flashing: This type of flashing is used along roof edges, valleys, and other areas where water runoff is concentrated. It is a continuous piece of flashing that provides seamless protection against water penetration.
Additionally, the installation method:
The installation method is also crucial in determining the effectiveness of the flashing. Proper installation ensures a tight seal and prevents water from seeping into the roof. It is recommended to hire a professional roofing contractor who has experience working with metal roofs and understands the specific requirements for flashing installation.
What are the different types of flashing for metal roofing?
Roof Flashing Types
- Continuous.
- Base.
- Counter.
- Step.
- Skylight.
- Valley.
- Drip Edges.
- Kickout.
Introduction:
Metal roofing is a popular choice for many homeowners due to its durability, longevity, and aesthetic appeal. One crucial aspect of metal roofing installation is flashing, which plays a vital role in preventing water leakage and ensuring the roof’s overall integrity. Flashing refers to the materials used to create a watertight seal around roof penetrations, such as chimneys, vents, skylights, and valleys. Different types of flashing are available for metal roofing, each designed to address specific areas of vulnerability and provide optimal protection against water infiltration.
Types of Flashing for Metal Roofing:
Vent Pipe Flashing:
Vent pipe flashing is used around pipes that protrude through the roof, such as plumbing vents or exhaust vents. It consists of a base that is secured to the roof and a flexible collar that fits tightly around the pipe. This type of flashing prevents water from entering around the vent pipe, ensuring a watertight seal and protecting against leaks.
Drip Edge Flashing:
Drip edge flashing is installed along the edges of the roof to direct water away from the fascia and into the gutters. It helps prevent water from seeping into the underlying structure and causing damage. Drip edge flashing is typically made of metal and is available in various profiles to accommodate different roof designs.
Skylight Flashing:
Skylight flashing is specifically designed for skylight installations. It ensures a watertight seal around the skylight frame, preventing water from entering the roof system. Skylight flashing is typically made of metal and is customized to fit the specific dimensions and shape of the skylight.
Metal roofing flashing is essential for maintaining the integrity and longevity of a metal roof.
What is the thickness of roof flashing?
Vivek Steels Skyline Pvt. Ltd. offers roofing gable flashing at the best price in Indore, with a thickness of 0.4 to 0.6 millimeters (mm).
The thickness of metal roof flashing is commonly expressed in gauges, where a lower gauge denotes a thicker material. The 26 gauge is thicker and more durable than the 30 gauge, which is the common range for metal flashing. It is crucial to remember that local building rules and the particular requirements of the roofing system might also have an impact on the proper thickness of metal flashing.
The thickness of plastic roof flashing is commonly expressed in millimeters or inches. Depending on the type of plastic used, such as polyethylene or PVC, the thickness can change. Generally speaking, plastic flashing is typically thinner than
What materials are required for installing flashing on a metal roof?
When it comes to installing flashing on a metal roof, there are several essential materials that you will need to ensure a successful and durable installation.
1. Flashing: The primary material required for installing flashing on a metal roof is the flashing itself. It helps to prevent water from seeping underneath the flashing and causing leaks. Make sure to use a high-quality roofing cement or sealant that is compatible with both the flashing material and the metal roof.
3. Roofing Nails or Screws: To secure the flashing in place, you will need roofing nails or screws.The size and length of the nails or screws will depend on the thickness of the flashing and the roof substrate.
4. Roofing Underlayment: In some cases, it may be necessary to use roofing underlayment beneath the flashing for added protection against moisture. The underlayment acts as an extra barrier, preventing water from penetrating the roof deck and causing damage. Choose a high-quality underlayment that is compatible with both the flashing material and the metal roof.
Are there any specific tools or equipment needed for the installation process?
1. Tin Snips: These specialized cutting tools are necessary for trimming and shaping the flashing material to fit the specific dimensions of the roof. They allow for precise cuts and clean edges, ensuring a proper fit and a professional finish.
2. Roofing Nails: Roofing nails are used to secure the flashing in place. It is important to use nails specifically designed for roofing applications, as they are resistant to corrosion and have a larger head for better holding power.
3. Caulking Gun: A caulking gun is used to apply the roofing cement accurately and efficiently. It allows for controlled dispensing of the cement, ensuring proper coverage and adhesion.
4. Ladder or Scaffolding: Since the installation process involves working at heights, a sturdy ladder or scaffolding is necessary to provide safe access to the roof. It is important to ensure that the ladder or scaffolding is stable and properly secured before starting the installation.
Are there any safety precautions that need to be taken while installing flashing on a metal roof?
When it comes to installing flashing on a metal roof, it is crucial to prioritize safety to prevent any accidents or injuries.
1. Use proper safety equipment: Before starting the installation, ensure that you have the necessary safety equipment, such as gloves, safety glasses, and a hard hat. These items will protect you from potential hazards like sharp edges, falling debris, or accidental slips.
2. Secure your footing: Metal roofs can be slippery, especially when wet or covered in debris. To maintain stability and prevent falls, use a sturdy ladder with rubber feet and consider using a safety harness or ropes for added security. Always position the ladder on a stable and level surface.
3. Be cautious of electrical hazards: Metal roofs can conduct electricity, so it is essential to be aware of any nearby power lines or electrical equipment. Ensure that you maintain a safe distance from these sources and take necessary precautions to avoid accidental contact.
4. Work in favorable weather conditions: Avoid installing flashing during adverse weather conditions, such as high winds, heavy rain, or extreme temperatures. These conditions can increase the risk of accidents and compromise the quality of the installation. Choose a calm and dry day to ensure optimal safety and effectiveness.
By following these safety precautions, you can minimize the risk of accidents and create a secure working environment while installing flashing on a metal roof.
Are there any recommended techniques or best practices for ensuring a secure and durable installation of flashing on a metal roof?
Another recommended technique is to use high-quality flashing materials that are specifically designed for metal roofs. This includes using corrosion-resistant materials such as stainless steel or aluminum, which can withstand the harsh weather conditions and prevent premature deterioration. It is also important to choose flashing that is the appropriate size and shape for the specific roof design, as this will ensure a proper fit and optimal performance.
Proper installation techniques are also essential for a secure and durable flashing installation. This includes carefully following the manufacturer’s instructions and guidelines, as well as using the appropriate tools and equipment. Additionally, applying a high-quality sealant or caulk around the edges of the flashing can help enhance its waterproofing capabilities and provide added protection against leaks.

Conclusion
Installing flashing on a metal roof is a crucial step in ensuring its longevity and preventing water damage. By following the right instructions, you can successfully install flashing and protect your roof from leaks and other potential issues. This conclusion will provide a comprehensive overview of the key steps involved in installing flashing on a metal roof.
The first step in installing flashing on a metal roof is to gather all the necessary materials and tools. These typically include flashing strips, roofing nails, a hammer, a tape measure, and a chalk line. Once you have everything you need, you can proceed with the installation process.
Next, you need to measure and cut the flashing strips to the appropriate length. It’s important to ensure that the installing flashing extends at least 8 inches up the roof and overlaps with adjacent strips by at least 4 inches. This will create a watertight seal and prevent any water from seeping through.


