How To Install Drip Edge On Metal Roof
Introduction
How To Install Drip Edge On Metal Roof: Installing a drip edge on a metal roof is an essential step in ensuring the longevity and effectiveness of your roofing system. A drip edge is a metal flashing that is installed along the edges of the roof to prevent water from seeping into the underlying structure. It directs water away from the fascia and into the gutters, protecting your roof and preventing potential damage to your home.
A drip edge plays a crucial role in maintaining the integrity of your metal roof. Without a properly installed drip edge, water can infiltrate the roof’s edges, leading to rot, mold, and other structural issues. Additionally, a drip edge helps to prevent water from flowing back under the roof, which can cause leaks and damage to the interior of your home. By directing water away from the fascia and into the gutters, a drip edge ensures that your roof remains watertight and protects your home from potential water damage.
Before you begin the installation process, it is important to gather all the necessary materials. You will need a drip edge, which can be made of aluminum, galvanized steel, or other corrosion-resistant metals. Additionally, you will need roofing nails, a hammer, a tape measure, tin snips, and a chalk line. It is also recommended to have safety equipment such as gloves and safety glasses to protect yourself during the installation process.
Now that you have gathered all the necessary materials, it’s time to start the installation process. The following steps will guide you through the process of installing a drip edge on your metal roof:
Measure and cut the drip edge: Using a tape measure and tin snips, measure the length of each edge of your roof and cut the drip edge accordingly. Make sure to leave a 1-inch overhang on each end to ensure proper water drainage.
Position the drip edge: Starting at one corner of the roof, position the drip edge along the edge of the roof, ensuring that it extends over the fascia. Use a chalk line to create a straight guideline for the drip edge.
Secure the drip edge: Using roofing nails, secure the drip edge to the roof, placing nails approximately every 12 inches. Make sure to drive the nails through the top edge of the drip edge, avoiding any penetration into the roof itself.
By following these steps, you can successfully install a drip edge on your metal roof, providing essential protection against water damage and ensuring the longevity of your roofing system.

Do I need a drip edge on tin roof?
Without drip edges, water can seep into seams between metal roof panels leading to leaking or even structural damage if not addressed promptly. Finally, drip edges are essential to any aesthetically pleasing metal roof installation and will add value to any property.
Introduction:
A drip edge is an essential component of any roofing system, including tin roofs. It plays a crucial role in protecting the roof and the underlying structure from water damage. In this article, we will discuss the importance of a drip edge on a tin roof and why it should not be overlooked.
A drip edge is a metal flashing that is installed along the edges of a roof to prevent water from seeping into the underlying structure. It is typically made of aluminum or galvanized steel and is designed to direct water away from the roof and into the gutters or eaves. Without a drip edge, water can easily penetrate the roof, leading to a host of problems such as rotting wood, mold growth, and even structural damage.
Protecting the fascia and soffit:
One of the primary functions of a drip edge is to protect the fascia and soffit of a roof. The fascia is the vertical board that runs along the edge of the roof, while the soffit is the horizontal board underneath the eaves. These components are particularly vulnerable to water damage, as they are constantly exposed to rain, snow, and other weather elements. A properly installed drip edge ensures that water is directed away from the fascia and soffit, preventing moisture-related issues such as rotting and decay.
Preventing ice dams:
In colder climates, ice dams can form on the edges of roofs during winter. An ice dam is a ridge of ice that prevents melting snow from draining off the roof. This can lead to water pooling on the roof, which can seep into the shingles and cause leaks. A drip edge helps prevent the formation of ice dams by providing a barrier between the roof edge and the snow or ice. It helps to create a smooth transition from the roof to the gutters, allowing water to flow freely and preventing the buildup of ice.
A drip edge is a vital component of a tin roof. It protects the roof, fascia, and soffit from water damage, prevents the formation of ice dams, and ensures proper drainage. When installing or replacing a tin roof, it is crucial to include a drip edge to maintain the integrity and longevity of the roofing system. By investing in a drip edge, homeowners can safeguard their property from costly repairs and extend the lifespan of their tin roof.
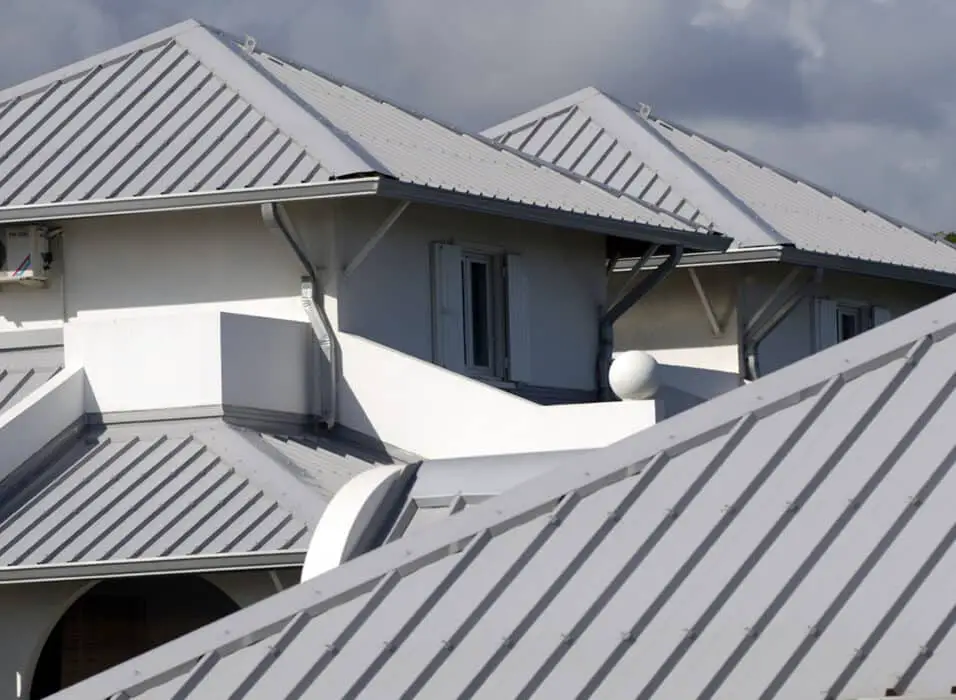
What does a drip edge look like on a metal roof?
A drip edge is an essential component of a metal roof system that plays a crucial role in protecting the roof and the underlying structure from water damage. It is a metal strip that is installed along the edges of the roof, providing a barrier against water infiltration and directing it away from the roof and into the gutters or eaves. The drip edge is designed to prevent water from seeping into the roof deck, fascia, or soffit, which can lead to rot, mold, and other structural issues.
Visually, a drip edge on a metal roof typically appears as a thin, L-shaped metal strip that is installed along the eaves and rakes of the roof. It is usually made of galvanized steel, aluminum, or other corrosion-resistant metals to ensure durability and longevity. The drip edge is installed under the roofing material, such as metal panels or shingles, and extends slightly over the edge of the roof to create a protective barrier.
The top edge of the drip edge is angled downward to direct water away from the roof and into the gutters or eaves. This angled portion is known as the “”drip leg”” or “”drip edge,”” which gives the component its name. The drip leg prevents water from flowing back onto the roof or seeping underneath the roofing material, ensuring that water is effectively channeled away from the roof system.
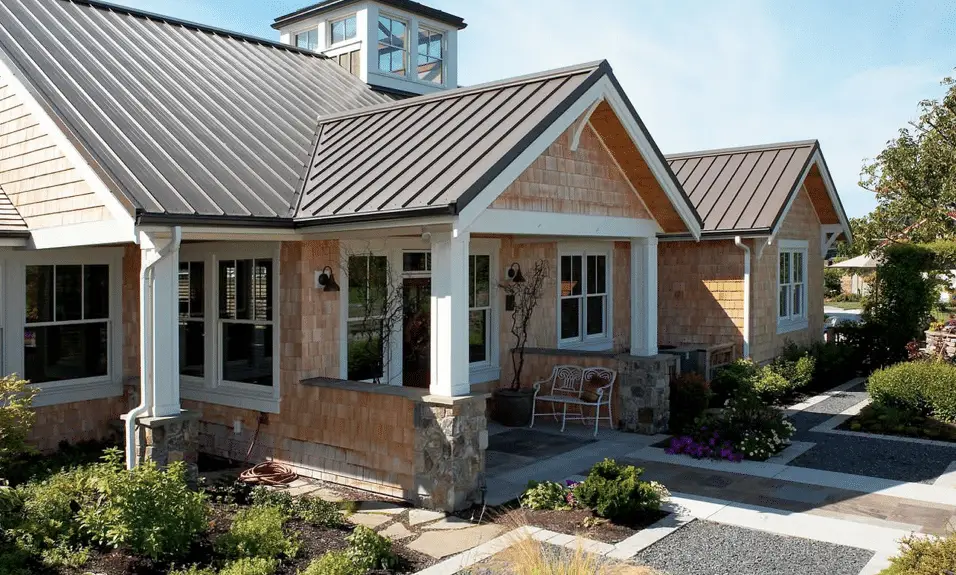
In addition to its functional purpose, a drip edge also has aesthetic benefits. It provides a clean, finished look to the roof edges, enhancing the overall appearance of the metal roof. The drip edge can be color-coordinated with the roofing material or painted to match the roof’s color scheme, further enhancing its visual appeal.
It is important to note that the specific design and appearance of a drip edge may vary depending on the manufacturer and the type of metal roof system being installed. Some drip edges may have additional features, such as built-in drip channels or extended overhangs, to provide enhanced water protection. Therefore, it is recommended to consult the manufacturer’s guidelines or seek professional advice to ensure proper installation and compatibility with the specific metal roof system.
What are the 2 types of drip edge?
Drip Edge Profile Types
Type C: This is the classic “L”-shaped drip edge, sometimes called “L style.” This drip edge is bent to a 90-degree angle and has a lower flange at the bottom. Type D: This profile of drip edge is shaped like a “T,” with a lower flange at the bottom.
Drip edge is an essential component in roofing systems that helps protect the edges of the roof from water damage. It is a metal flashing that is installed along the edges of the roof, providing a barrier against water infiltration. There are two main types of drip edge commonly used in roofing: L-shaped drip edge and T-shaped drip edge.
L-shaped drip edge is the most commonly used type of drip edge. It is named after its shape, which resembles the letter “”L””. This type of drip edge is installed along the eaves of the roof, where the roof meets the fascia board. It extends over the edge of the roof and directs water away from the fascia, preventing water from seeping into the roof deck or the underlying structure. L-shaped drip edge also helps to protect the roof shingles from wind uplift and damage.
T-shaped drip edge is another type of drip edge that is used in certain roofing applications. It is named after its shape, which resembles the letter “”T””. T-shaped drip edge is typically installed along the gable ends of the roof, where the roof meets the sidewalls. It provides a protective barrier against water intrusion and helps to prevent water from seeping into the roof deck or the walls. T-shaped drip edge is particularly useful in areas with high wind or heavy rainfall, as it helps to channel water away from vulnerable areas.
Both L-shaped and T-shaped drip edge are typically made of metal, such as aluminum or galvanized steel, which provides durability and resistance to corrosion. They are available in various sizes and colors to match different roofing materials and aesthetics. Proper installation of drip edge is crucial to ensure its effectiveness in protecting the roof and the underlying structure from water damage. It should be securely fastened to the roof deck and properly overlapped to provide a continuous barrier against water infiltration.
Drip edge is an important component in roofing systems that helps protect the edges of the roof from water damage. L-shaped and T-shaped drip edge are the two main types commonly used, each serving a specific purpose in different areas of the roof. Proper installation and maintenance of drip edge are essential to ensure its effectiveness in preventing water infiltration and preserving the integrity of the roof.
What kind of drip edge do you use on a metal roof?
The idea is for the drip edge to direct water into a gutter pipe, so make sure you’ve also got a gutter running below your metal roof. This should ideally sit directly below the edge of the roof. Metal drip edges can come in several different materials including aluminum, galvanized steel and copper.
Introduction:
When it comes to installing a metal roof, one crucial component that should not be overlooked is the drip edge. A drip edge is a metal flashing that is installed along the edges of a roof to prevent water from seeping into the underlying structure. It plays a vital role in protecting the roof and ensuring its longevity. However, choosing the right type of drip edge for a metal roof is essential to ensure proper installation and optimal performance.
Types of Drip Edges for Metal Roofs:
There are several types of drip edges available for metal roofs, each designed to cater to specific needs and requirements. One commonly used type is the L-shaped drip edge, also known as the standard drip edge. This type of drip edge is typically made of galvanized steel or aluminum and is installed along the eaves of the roof. It helps to redirect water away from the fascia and prevents it from seeping into the roof deck.
Another type of drip edge commonly used for metal roofs is the T-shaped drip edge. This type of drip edge is installed along the gable ends of the roof and provides additional protection against water infiltration. It is particularly useful in areas prone to heavy rainfall or strong winds.
Considerations for Choosing a Drip Edge:
When selecting a drip edge for a metal roof, there are a few factors to consider. Firstly, the material of the drip edge should be compatible with the metal roofing material to prevent any potential corrosion or compatibility issues. Galvanized steel and aluminum are popular choices due to their durability and resistance to rust.
Additionally, the size and dimensions of the drip edge should be appropriate for the specific roof design. It should extend beyond the edge of the roof to ensure proper water runoff and prevent any water from seeping into the underlying structure. The angle and shape of the drip edge should also be considered to ensure a proper fit and effective water redirection.
Installation and Maintenance:
Proper installation of the drip edge is crucial to ensure its effectiveness. It should be securely fastened to the roof deck using appropriate fasteners, such as roofing nails or screws. The drip edge should be installed with a slight overhang to allow water to drip away from the roof and prevent any water from pooling or backing up.
Maintenance of the drip edge is relatively simple and involves regular inspections to ensure it remains securely in place and free from any debris or blockages. Any signs of damage or corrosion should be addressed promptly to prevent any potential water damage to the roof or underlying structure.
Choosing the right type of drip edge for a metal roof is essential for its proper installation and long-term performance. The L-shaped and T-shaped drip edges are commonly used for metal roofs, providing protection against water infiltration. Considerations such as material compatibility, size, and dimensions should be taken into account when selecting a drip edge. Proper installation and regular maintenance are crucial to ensure the effectiveness of the drip edge and the overall integrity of the metal roof.
Do you put drip edge on a metal roof?
If you are installing a metal roof, a drip edge is not required, especially if the roof is at a slant and installed to hang over an inch. Doing this will help direct the water away from the fascia. However, while it’s not necessary to have a drip edge, it is often highly recommended anyway.
Introduction:
When it comes to installing a metal roof, one important consideration is whether or not to use drip edge. Drip edge is a metal flashing that is installed along the edges of a roof to help protect it from water damage. It is commonly used with asphalt shingle roofs, but can it also be used with metal roofs? In this article, we will explore the benefits of using drip edge on a metal roof and discuss the reasons why it may or may not be necessary.
Benefits of using drip edge on a metal roof:
Using drip edge on a metal roof can provide several benefits. Firstly, it helps to prevent water from seeping into the roof deck and causing damage. The metal flashing directs water away from the edges of the roof, preventing it from infiltrating the underlying structure. This is particularly important in areas with heavy rainfall or snowfall, where water runoff can be significant.
Secondly, drip edge can help to protect the fascia and soffit of the roof. These are the areas that are most vulnerable to water damage, as they are located at the edges of the roof. By directing water away from these areas, drip edge can help to prolong the lifespan of the roof and prevent costly repairs.
Additionally, using drip edge on a metal roof can enhance the overall aesthetics of the roof. The metal flashing can provide a clean and finished look to the edges, giving the roof a more polished appearance. This can be particularly important for homeowners who value the visual appeal of their property.
While using drip edge on a metal roof can offer several benefits, it may not always be necessary. Metal roofs are designed to be highly durable and resistant to water damage. They are typically installed with overlapping panels that provide a watertight seal. In many cases, this can be sufficient to prevent water infiltration without the need for additional flashing.
However, there are certain situations where using drip edge on a metal roof is recommended. For example, if the roof has a low slope or if it is located in an area with high wind or heavy rainfall, using drip edge can provide an extra layer of protection against water penetration. Additionally, if the roof is being installed in a region where local building codes require the use of drip edge, it is important to comply with these regulations.
While using drip edge on a metal roof is not always necessary, it can provide several benefits in terms of water protection, preservation of the roof’s structural integrity, and aesthetic appeal. Ultimately, the decision to use drip edge should be based on factors such as the roof’s slope, local weather conditions, and compliance with building codes. Consulting with a professional roofing contractor can help determine whether or not drip edge is recommended for a specific metal roof installation.
The purpose of installing drip edge on a metal roof is to provide protection against water damage. Drip edge is a metal flashing that is installed along the edges of the roof, specifically at the eaves and rakes. It serves as a barrier between the roof decking and the fascia, preventing water from seeping into the underlying structure.
One of the main functions of drip edge is to redirect water away from the roof and into the gutters or off the roof entirely. It helps to prevent water from pooling or accumulating along the edges, which can lead to rotting of the roof deck, fascia, and soffit. By guiding water away, drip edge helps to maintain the integrity and longevity of the roof.
Additionally, drip edge also provides a neat and finished appearance to the roof. It helps to create a smooth transition between the roof and the fascia, enhancing the overall aesthetics of the building. Properly installed drip edge can also help to prevent pests, such as insects or small animals, from accessing the roof through the edges.
What are the necessary tools and materials needed to install drip edge on a metal roof?
When it comes to installing drip edge on a metal roof, having the right tools and materials is crucial for a successful installation. Here is a list of the necessary items you will need:
Drip Edge: The main material needed for this installation is the drip edge itself. It is typically made of galvanized steel or aluminum and comes in various sizes to fit different roof profiles. Make sure to choose the appropriate size and material for your specific metal roof.
Measuring Tape: Accurate measurements are essential for a proper installation. A measuring tape will help you determine the length of the drip edge needed for each section of the roof.
Tin Snips: Tin snips are necessary for cutting the drip edge to the correct size and shape. They allow you to make precise cuts on the metal material without causing any damage.
Hammer: A hammer is required for securing the drip edge to the roof. It is used to drive nails or roofing screws into the metal roof panels and hold the drip edge firmly in place.
Roofing Nails or Screws: Depending on the type of metal roof you have, you will need either roofing nails or screws to attach the drip edge. Make sure to choose the appropriate fasteners that are compatible with your roof material.
Safety Equipment: Safety should always be a top priority when working on a roof. Make sure to have safety goggles, gloves, and sturdy footwear to protect yourself from any potential hazards.
By having these necessary tools and materials on hand, you will be well-prepared to install the drip edge on your metal roof with ease and efficiency.
How do you properly measure and cut the drip edge for a metal roof installation?
When it comes to measuring and cutting the drip edge for a metal roof installation, precision and accuracy are crucial to ensure a proper fit and effective water drainage. To begin, gather the necessary tools and materials, including a tape measure, tin snips, and a pencil. Start by measuring the length of the roof edge where the drip edge will be installed. Take into account any corners or angles that may require additional measurements.
Once you have determined the length needed, transfer the measurement onto the drip edge material using a pencil. It is important to note that the drip edge should extend beyond the roof edge by at least 1 inch to allow for proper water runoff. Use tin snips to carefully cut along the marked line, ensuring clean and straight edges. Take your time during this step to avoid any mistakes or uneven cuts.
After cutting the drip edge to the appropriate length, it is essential to properly shape the corners to ensure a seamless fit. Measure and mark the desired angle on the drip edge, and use tin snips to carefully cut along the marked line. Remember to wear gloves and eye protection during this process to ensure safety. Once all the necessary cuts have been made, the drip edge is ready to be securely attached to the metal roof.
Are there any specific safety precautions to consider when installing drip edge on a metal roof?
When installing drip edge on a metal roof, it is crucial to prioritize safety to prevent any accidents or injuries. Here are some specific safety precautions to consider:
Personal Protective Equipment (PPE): Before starting the installation process, ensure that you are wearing the appropriate PPE. This includes safety glasses or goggles to protect your eyes from debris, gloves to protect your hands, and sturdy footwear with good traction to prevent slipping.
Secure Ladder Placement: If you need to access the roof, make sure to use a sturdy ladder and place it on a stable surface. Ensure that the ladder is securely positioned and that it is at the correct angle for safe climbing. It is also advisable to have someone hold the ladder for added stability.
Weather Conditions: Check the weather forecast before starting the installation. Avoid working on the roof during windy or rainy conditions, as this can increase the risk of accidents. Slippery surfaces can make it difficult to maintain balance, and strong winds can make it challenging to handle materials.
Proper Tool Handling: Use tools correctly and handle them with care. Ensure that all tools are in good working condition and that you are familiar with their proper usage. Avoid using damaged or faulty tools, as they can pose a safety hazard.
Fall Protection: If you are working at heights, it is essential to have appropriate fall protection measures in place. This may include using safety harnesses, guardrails, or safety nets. Familiarize yourself with the proper use of fall protection equipment and ensure it is correctly installed and secured.
By following these safety precautions, you can minimize the risk of accidents and ensure a safe installation process when working with drip edge on a metal roof.
Are there any specific safety precautions to consider when installing drip edge on a metal roof?
When installing drip edge on a metal roof, it is crucial to prioritize safety to prevent any accidents or injuries. Here are some specific safety precautions to consider:
Personal Protective Equipment (PPE): Before starting the installation process, ensure that you are wearing the appropriate PPE. This includes safety glasses or goggles to protect your eyes from debris, gloves to protect your hands, and sturdy footwear with good traction to prevent slipping.
Secure Ladder: If you need to access the roof, make sure to use a sturdy and properly secured ladder. Ensure that the ladder is placed on a stable surface and that it is extended to the appropriate height. Always maintain three points of contact while climbing up or down the ladder.
Weather Conditions: Check the weather forecast before starting the installation. Avoid working on the roof during windy or rainy conditions, as it can make the surface slippery and increase the risk of accidents. If the weather conditions become unfavorable during the installation, it is best to pause the work and resume when it is safe.
Proper Footing: When working on the roof, ensure that you have a secure footing at all times. Be cautious of any loose or unstable areas on the roof and avoid stepping on them. If necessary, use roof brackets or safety harnesses to provide additional stability and prevent falls.
Tool Safety: Handle all tools and materials with care to avoid injuries. Keep sharp tools properly stored when not in use and use them in a controlled manner. Follow the manufacturer’s instructions for safe tool operation and always use the appropriate tool for each task.
By following these safety precautions, you can minimize the risk of accidents and ensure a safe installation process when attaching drip edge to a metal roof.

Conclusion
Installing drip edge on a metal roof is a crucial step in ensuring the longevity and effectiveness of your roofing system. By following the proper instructions and techniques, you can successfully install drip edge and protect your roof from water damage. This conclusion will provide a comprehensive overview of the key steps involved in installing drip edge on a metal roof.
The first step in installing drip edge on a metal roof is to gather all the necessary tools and materials. These typically include a tape measure, tin snips, roofing nails, a hammer, and of course, the drip edge itself. It is important to ensure that you have the correct size and type of drip edge for your specific roof. Once you have all the materials ready, you can proceed with the installation process.
Next, you will need to measure and cut the drip edge to fit the dimensions of your roof. This can be done using a tape measure and tin snips. It is important to make precise measurements and cuts to ensure a proper fit. Once the drip edge is cut to size, you can begin attaching it to the roof.
To attach the drip edge, start at one corner of the roof and position the edge so that it extends over the edge of the roof. Secure it in place using roofing nails, making sure to leave a small gap between each nail. This gap allows for expansion and contraction of the metal roof. Continue this process along the entire perimeter of the roof, overlapping the drip edge sections as necessary.
Installing drip edge on a metal roof is a straightforward process that can greatly benefit the overall performance and durability of your roof. By following the proper instructions and techniques, you can successfully install drip edge and protect your roof from water damage. Remember to gather all the necessary tools and materials, measure and cut the drip edge to fit your roof, and securely attach it using roofing nails. With these steps completed, you can have peace of mind knowing that your metal roof is well-protected against water infiltration.