


How To Build A Wood Storage Rack
Introduction
How To Build A Wood Storage Rack: Building a wood storage rack is a practical and efficient way to organize and store your wood supplies. Whether you are a seasoned woodworker or a DIY enthusiast, having a dedicated storage rack can help you keep your workspace tidy and ensure that your wood is easily accessible when you need it. In this article, we will guide you through the process of building a wood storage rack, providing step-by-step instructions and helpful tips along the way.
Wood storage racks come in various shapes and sizes, but the basic principles remain the same. The rack should be sturdy enough to support the weight of the wood and should provide adequate space for different lengths and sizes of wood. Additionally, it should be designed in a way that allows for easy loading and unloading of wood, ensuring that you can quickly find the piece you need without any hassle.
Before you start building your wood safe storage rack, it is essential to consider the available space in your workshop or storage area. Measure the dimensions of the space and determine the ideal size and design for your rack. You can choose to build a freestanding rack or attach it to a wall, depending on your preferences and the layout of your workspace. Additionally, consider the amount of wood you typically work with and plan the rack’s capacity accordingly.
When it comes to materials, you have several options for building your wood storage rack. One popular choice is using sturdy lumber, such as 2x4s or 4x4s, for the frame and supports. These materials provide excellent strength and durability. Alternatively, you can opt for metal brackets or adjustable shelving systems, which offer flexibility and ease of assembly. Whichever materials you choose, ensure they are of high quality and suitable for the weight and size of the wood you will be storing.
As you embark on the construction process, it is crucial to have a detailed plan and gather all the necessary tools and equipment. Some common tools you may need include a saw, drill, measuring tape, level, and screws or nails. Additionally, ensure you have a safe and well-ventilated workspace to carry out the construction. Following the instructions carefully and taking necessary safety precautions will help you build a sturdy and functional wood storage rack that will serve you for years to come.
By following these instructions and considering the specific needs of your woodworking projects, you can create a wood storage rack that optimizes your workspace and enhances your overall woodworking experience.
How to build a log storage rack?
Cut 45-degree angles on the ends of four 2x4s approximately 16 inches long and screw them to the inside edge of each upright. Make sure the uprights are plumb before attaching them to the base. At this point, your firewood rack will keep the logs stacked and off the ground.
How to build a log storage rack?
Building a log storage rack is a practical and efficient way to keep your firewood organized and easily accessible. Whether you have a fireplace, wood-burning stove, or simply enjoy the cozy ambiance of a fire pit, having a well-built log storage rack is essential. In this guide, we will provide step-by-step instructions on how to build your own log storage rack.
Materials needed:
Before you begin, gather the necessary materials. You will need:
- Pressure-treated lumber
- 2×4 boards
- Wood screws
- Measuring tape
- Saw
- Drill
- Level
Step 1: Measure and cut the lumber
Start by measuring and cutting the pressure-treated lumber to the desired length for your log storage rack. The length will depend on the amount of firewood you plan to store and the available space. Cut four pieces for the vertical supports and four pieces for the horizontal beams.
Step 2: Assemble the frame
Using wood screws, assemble the frame by attaching the horizontal beams to the vertical supports. Make sure the frame is square and level before securing the screws.
Step 3: Add the slats
Next, cut the 2×4 boards to the desired length for the slats. Attach the slats to the frame, evenly spacing them apart. This will create the platform for stacking the firewood.
Step 4: Finishing touches
Finally, sand any rough edges and apply a weather-resistant finish to protect the wood from the elements. You can also add wheels to the bottom of the rack for easy mobility.
By following these instructions, you can build a sturdy and functional log storage rack to keep your firewood neatly organized and readily available. Remember to always exercise caution when using power tools and follow proper safety guidelines. Happy building!
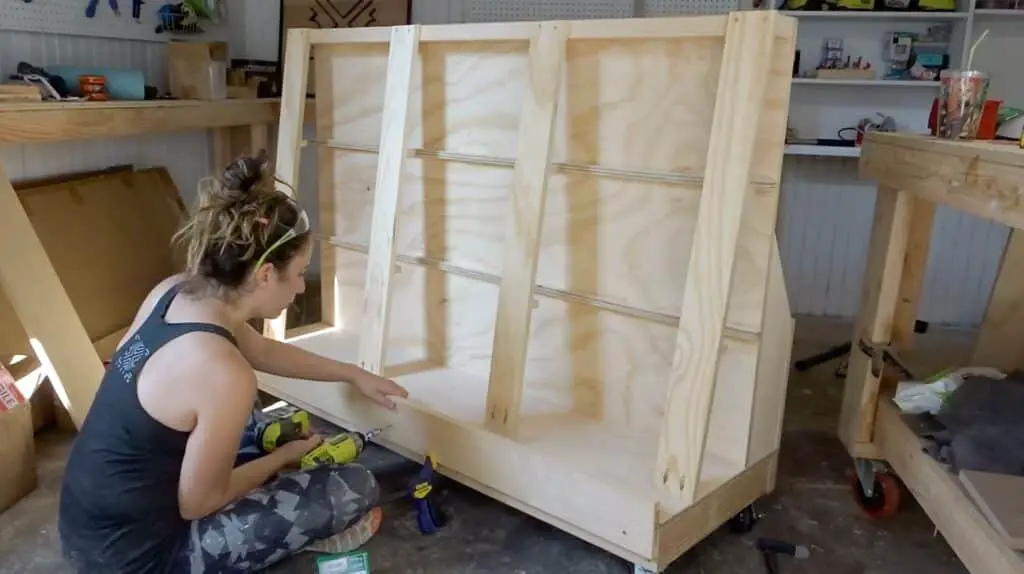
How do you make scrap wood storage?
Steps for Building DIY Scrap Wood Storag
Step 1: Drill Pocket Holes. To get started first drill pocket holes along the front and back edges of the base. …
Step 2: Apply Wood Glue.
Step 3: Secure the Sides.
Step 4: Stand it Upright.
Step 5: Drive in the Screws.
Step 6: Install the Dividers (Optional)
Introduction:
Scrap wood storage is an essential component for any woodworking enthusiast or professional. It provides a convenient and organized way to store leftover wood pieces, ensuring they are easily accessible for future projects. Whether you have a small workshop or a large garage, creating an efficient scrap wood storage system can help maximize your workspace and keep your materials in order.
Benefits of Scrap Wood Storage:
Having a dedicated area for scrap wood storage offers several advantages. Firstly, it helps you maintain a clutter-free workspace, allowing you to focus on your projects without any distractions. By keeping your wood pieces organized, you can quickly locate the materials you need, saving time and effort. Additionally, proper storage prevents damage to the wood, ensuring it remains in good condition for future use.
Types of Scrap Wood Storage:
There are various options available for creating a scrap wood storage system. One popular choice is to build a storage rack or shelving unit. This allows you to store wood pieces vertically, utilizing the height of your workshop or garage. Another option is to use bins or containers, which can be labeled and stacked to maximize space. Additionally, wall-mounted storage solutions such as pegboards or hooks can be used to hang smaller pieces of scrap wood.
Tips for Creating an Efficient Scrap Wood Storage System:
When designing your scrap wood storage system, consider the following tips to ensure efficiency and functionality:
1. Sort and categorize: Before storing your scrap wood, sort it into different categories based on size, type, or project relevance. This will make it easier to locate specific pieces when needed.
2. Utilize vertical space: If you have limited floor space, consider building storage racks or shelves that can accommodate wood pieces of various lengths. This will help maximize your storage capacity.
3. Label containers: If you opt for bins or containers, label them clearly to identify the contents. This will save you time when searching for specific wood pieces.
4. Keep safety in mind: Ensure that your scrap wood storage system is sturdy and secure to prevent accidents. Avoid overloading shelves or racks, and make sure they are properly anchored to the wall or floor.
By following these instructions and implementing an efficient scrap wood storage system, you can keep your workspace organized, save time, and make the most of your leftover wood pieces for future projects.
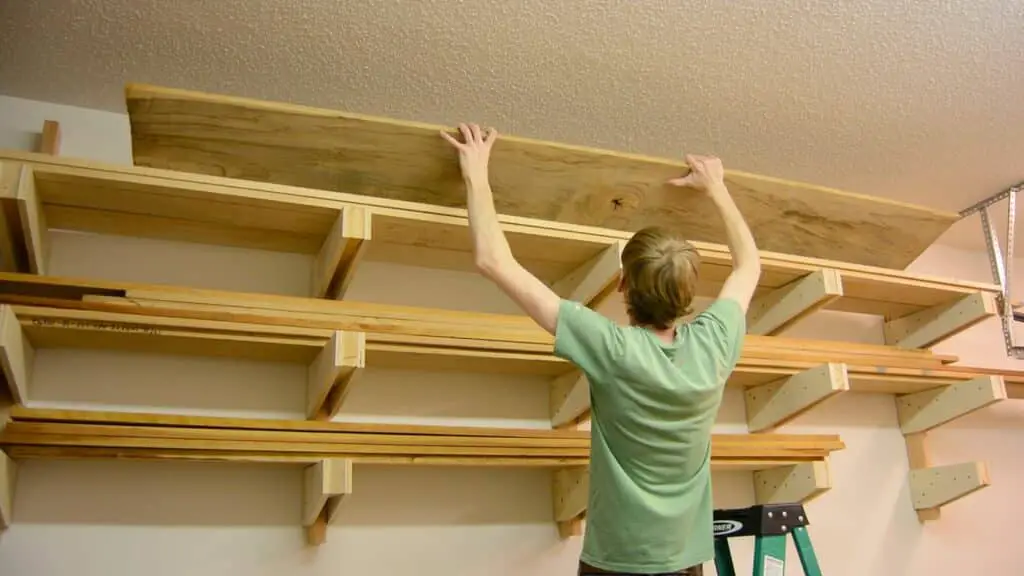
What is the best way to store a lot of wood?
Keep them flat: Keeping them flat when possible will prevent uneven pressure and warping. Keep them away from sunlight: Sunlight can fade the color of wood and cause it to dry out and crack. To prevent these issues, store your wood boards in a place that is not exposed to direct sunlight.
Introduction:
When it comes to storing a large quantity of wood, it is essential to consider the best way to preserve its quality and ensure its longevity. Proper storage methods not only protect the wood from damage but also maintain its structural integrity and prevent any potential hazards. In this article, we will explore some effective ways to store a lot of wood, ensuring its usability and durability over time.
Storing wood indoors:
One of the most common and convenient ways to store a large amount of wood is by keeping it indoors. This method provides protection against external elements such as rain, snow, and extreme temperatures. To store wood indoors, it is crucial to choose a well-ventilated area that is away from any potential sources of moisture. This helps in preventing the growth of mold or mildew, which can deteriorate the quality of the wood.
Using a woodshed:
If you have ample outdoor space, constructing a woodshed can be an excellent option for storing a lot of wood. A woodshed provides a dedicated space for storing wood, keeping it organized and easily accessible. When building a woodshed, it is important to ensure proper ventilation to prevent the accumulation of moisture. Additionally, using a raised floor or pallets can help in keeping the wood off the ground, reducing the risk of rot or insect infestation.
Covering the woodpile:
Regardless of whether you store wood indoors or in a woodshed, it is crucial to cover the woodpile to protect it from rain or snow. Using a waterproof tarp or a specially designed woodpile cover can effectively shield the wood from moisture. This prevents the wood from absorbing excess water, which can lead to decay and make it difficult to ignite when used as fuel.
Stacking and organizing:
Proper stacking and organizing of the woodpile are essential for efficient storage. It is recommended to stack the wood in a crisscross pattern, allowing for better airflow and reducing the chances of the pile collapsing. Additionally, separating the woodpile into different sections based on the type or size of wood can make it easier to locate and access specific pieces when needed.
Storing a large quantity of wood requires careful consideration and proper techniques to ensure its longevity and usability. Whether you choose to store it indoors or in a woodshed, covering the woodpile and organizing it effectively are crucial steps to protect the wood from moisture and maintain its quality. By following these guidelines, you can store a lot of wood efficiently and have a readily available supply for various purposes.
How do you store wood cheaply?
No matter which method you choose make sure to stack your split logs off the ground to get good air circulation. Use a pallet or rack to elevate the wood to allow airflow that helps keep the logs dry. Keep it covered. Do that and rest assured in just a few months, your cord of wood is ready to enjoy!
Introduction:
Storing wood in a cost-effective manner is essential for individuals who rely on it for various purposes, such as heating, construction, or crafting. By implementing smart strategies and utilizing available resources, it is possible to store wood cheaply without compromising its quality. In this article, we will explore several effective methods to store wood inexpensively.
Proper Shelter:
One of the key factors in storing wood cheaply is providing it with proper shelter. Wood should be protected from moisture, rain, and extreme weather conditions, as exposure to these elements can lead to decay and reduce its usability. A simple yet effective solution is to construct a woodshed or use an existing structure like a garage or barn. Ensure that the shelter has a solid roof and walls to prevent water from seeping in. Additionally, consider elevating the wood off the ground using pallets or a raised platform to avoid contact with damp soil.
Stacking and Air Circulation:
When storing wood, it is crucial to stack it properly to maximize space and promote air circulation. Arrange the wood in neat rows, leaving gaps between each piece to allow air to flow through. This helps in drying the wood and preventing the growth of mold or fungi. It is advisable to stack the wood in a crisscross pattern, as this provides stability to the stack. Furthermore, consider covering the top of the stack with a tarp or plastic sheet to protect it from rain while still allowing air to circulate.
Seasoning the Wood:
Seasoning the wood is an important step in storing it cheaply. Freshly cut wood contains a high moisture content, which makes it difficult to burn efficiently. By allowing the wood to dry or “”season”” for a certain period, its moisture content decreases, making it more suitable for use. To season wood, stack it in a well-ventilated area, preferably under a shelter, and let it sit for at least six months to a year. This process not only improves the wood’s burning efficiency but also reduces its weight, making it easier to handle and transport.
By following these methods, individuals can store wood cheaply while ensuring its quality and usability. Proper shelter, stacking techniques, and seasoning are key factors in maintaining the wood’s integrity and preventing unnecessary expenses. Implementing these strategies will not only save money but also contribute to a more sustainable and efficient use of this valuable resource.
Should wood be stored vertically or horizontally
Is it better to store wood vertically or horizontally? Storing wood vertically is space-saving, but it’s only recommended if the wood is completely dry. Otherwise, store it horizontally until the moisture content of the wood is at its ideal percentage.
Introduction:
When it comes to storing wood, one of the most common questions that arises is whether it should be stored vertically or horizontally. This is an important consideration as it can impact the quality and longevity of the wood. Both methods have their advantages and disadvantages, and the choice ultimately depends on various factors such as the type of wood, available space, and personal preference.
Advantages of Vertical Storage:
Storing wood vertically has several benefits. Firstly, it allows for better air circulation around the wood, which helps in drying and preventing moisture buildup. This is particularly important for freshly cut or green wood, as improper drying can lead to warping, cracking, and decay. Additionally, vertical storage takes up less floor space compared to horizontal storage, making it a suitable option for those with limited storage areas. It also allows for easier access and organization, as individual pieces can be easily identified and retrieved.
Advantages of Horizontal Storage:
On the other hand, horizontal storage also has its advantages. One of the main benefits is that it provides better stability for longer and heavier pieces of wood. By laying the wood flat, it reduces the risk of it falling or rolling over, which can be a safety hazard. Moreover, horizontal storage is more suitable for seasoned or kiln-dried wood, as it is less prone to moisture absorption. This method also allows for stacking multiple pieces on top of each other, maximizing storage capacity.
Considerations and Conclusion:
When deciding between vertical and horizontal storage, it is important to consider the specific characteristics of the wood being stored, as well as the available space and personal preferences. Some woodworkers may prefer a combination of both methods, depending on the type and quantity of wood they have. Ultimately, the goal is to ensure proper air circulation, minimize moisture exposure, and maintain the structural integrity of the wood. By carefully considering these factors, one can make an informed decision on whether to store wood vertically or horizontally.
To build a wood storage rack, you will need several materials to ensure its stability and durability. The primary material required is, of course, wood. Opt for sturdy and strong lumber, such as pine or oak, which can withstand the weight of the stored items. Additionally, you will need screws or nails to secure the wooden pieces together. It is recommended to use galvanized or stainless steel hardware to prevent rusting.
In addition to wood and fasteners, you may also need some additional materials depending on the design and features of the storage rack. For example, if you plan to include adjustable shelves, you will need shelf brackets or supports. If you want to add a backing to the rack, you will require plywood or hardboard. Lastly, consider using wood glue to reinforce the joints and enhance the overall strength of the rack.
Overall, the materials needed for building a wood storage rack include wood, screws or nails, galvanized or stainless steel hardware, shelf brackets or supports (if necessary), plywood or hardboard (if desired), and wood glue for added strength.
What are the steps involved in constructing a wood storage rack?
Constructing a wood storage rack involves several steps that ensure a sturdy and functional end result. The first step is to gather all the necessary materials and tools, which typically include lumber, screws, a saw, a drill, a measuring tape, and a level. Once you have everything you need, you can begin the construction process.
The second step is to measure and cut the lumber according to the desired dimensions of the storage rack. It is important to ensure accurate measurements and straight cuts to ensure stability and proper fit. Next, assemble the frame of the rack by attaching the cut pieces of lumber using screws and a drill. Make sure to use a level to ensure that the frame is straight and level.
After the frame is assembled, the next step is to add the shelves. Measure and cut the lumber for the shelves, and then attach them to the frame using screws. It is important to evenly space the shelves to maximize storage capacity. Finally, sand down any rough edges and apply a finish or paint to protect the wood and enhance its appearance.
How can the wood storage rack be designed to maximize storage capacity?
When designing a wood storage rack to maximize storage capacity, there are several key factors to consider. Firstly, it is important to optimize the dimensions of the rack to make the most efficient use of available space. This can be achieved by carefully measuring the area where the rack will be placed and customizing the dimensions accordingly. Additionally, utilizing vertical space is crucial in maximizing storage capacity. Incorporating multiple levels or tiers within the rack design allows for stacking and storing items vertically, making efficient use of the available height.
Another important aspect to consider is the arrangement of shelves or compartments within the wood storage rack. By incorporating adjustable shelves or modular compartments, the rack can be customized to accommodate items of various sizes and shapes. This flexibility ensures that the available space is utilized effectively and efficiently. Additionally, incorporating features such as hooks, pegs, or hanging bars can further optimize storage capacity by providing additional options for hanging or storing items.
Furthermore, it is essential to consider the accessibility and ease of retrieval when designing a wood storage rack. Incorporating features such as sliding or pull-out shelves, rotating mechanisms, or labeling systems can greatly enhance the usability of the rack and make it easier to locate and retrieve stored items. By carefully considering these design elements, a wood storage rack can be optimized to maximize storage capacity while also ensuring convenience and functionality.
Are there any specific tools or equipment required for building a wood storage rack?
When it comes to building a wood storage rack, there are several specific tools and equipment that are essential for the construction process. These tools not only make the task easier but also ensure safety and accuracy in the final result. One of the most important tools you will need is a power drill with various drill bits. This will be used to create pilot holes and secure screws or bolts in place. Additionally, a saw is crucial for cutting the wooden boards to the desired lengths and angles.
Another essential tool is a measuring tape or ruler, which will help you accurately measure and mark the dimensions of the wood pieces. A level is also necessary to ensure that the storage rack is straight and balanced. Additionally, a hammer or rubber mallet will come in handy for gently tapping the wooden pieces together or adjusting their positions.
Furthermore, you will need a set of screwdrivers or a power screwdriver to tighten screws securely. A stud finder is recommended to locate wall studs for added stability if you plan to attach the storage rack to a wall. Lastly, don’t forget to have a safety gear such as goggles, gloves, and a dust mask to protect yourself from any potential hazards during the construction process.
Are there any safety precautions or considerations to keep in mind while building a wood storage rack?
When building a wood storage rack, it is crucial to prioritize safety to prevent accidents and ensure a successful construction process. There are several important safety precautions and considerations to keep in mind:
1. Wear appropriate protective gear: Before starting any construction work, make sure to wear the necessary protective gear such as safety goggles, gloves, and a dust mask. These items will protect you from potential hazards like flying wood chips, splinters, and dust particles.
2. Use proper lifting techniques: Wood can be heavy, especially when working with larger pieces. To avoid strain or injury, always use proper lifting techniques. Bend your knees, keep your back straight, and lift with your legs rather than your back. If a piece of wood is too heavy to lift on your own, ask for assistance.
3. Secure the work area: Before starting construction, ensure that the work area is clean, well-lit, and free from any potential hazards. Remove any obstacles or clutter that may cause tripping or falling. Additionally, make sure the floor is stable and level to provide a safe working environment.
4. Use appropriate tools and equipment: It is essential to use the right tools and equipment for the job. Ensure that your tools are in good working condition and appropriate for the specific tasks involved in building a wood storage rack. Follow the manufacturer’s instructions and safety guidelines for each tool.
5. Follow proper electrical safety: If your construction process involves the use of power tools, be cautious with electrical safety. Inspect cords for any damage before use, and never operate tools with frayed or exposed wires. Use grounded outlets and avoid overloading circuits to prevent electrical hazards.
By following these safety precautions and considerations, you can minimize the risk of accidents and injuries while building a wood storage rack. Remember, safety should always be a top priority in any construction project.
Conclusion
Building a wood storage rack is a practical and efficient solution for organizing and storing wood materials. By following the instructions provided, individuals can easily construct a sturdy and reliable rack that will not only keep their wood neatly organized but also protect it from damage. Whether you are a professional woodworker or a DIY enthusiast, having a dedicated storage rack can greatly enhance your woodworking experience.
One of the key advantages of building a wood storage rack is the ability to maximize space utilization. With a well-designed rack, you can effectively utilize vertical space, allowing you to store a larger quantity of wood in a smaller area. This is particularly beneficial for those with limited workshop or storage space. By keeping your wood off the ground and neatly stacked on a rack, you also minimize the risk of moisture damage, pests, and other potential hazards that can compromise the quality of your wood.
Furthermore, constructing your own wood storage rack allows for customization to suit your specific needs. You can adjust the dimensions, materials, and design of the rack to accommodate the size and weight of your wood materials. This level of customization ensures that your rack is not only functional but also tailored to your preferences and requirements. Additionally, building your own rack can be a rewarding and fulfilling project, allowing you to showcase your woodworking skills and creativity.
In summary, building a wood storage rack is a practical and customizable solution for efficiently organizing and storing wood materials. By following the provided instructions, individuals can create a space-saving and durable rack that protects their wood from damage. Whether you are a professional or a hobbyist, having a dedicated storage rack will enhance your woodworking experience and ensure that your wood is readily accessible and well-maintained. So, roll up your sleeves, gather your tools, and embark on the journey of building your own wood storage rack!