How To Apply Poly To Wood Floors
Introduction
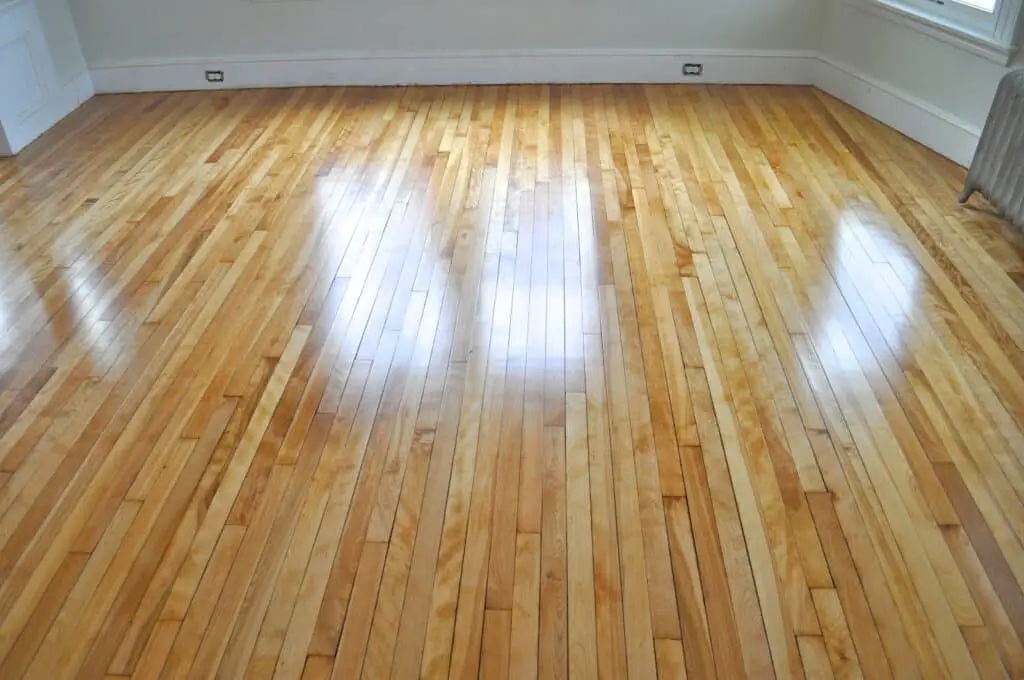
How To Apply Poly To Wood Floors: Applying polyurethane (poly) to wood floors is a common and effective method for protecting and enhancing the beauty of the wood. Polyurethane creates a durable, protective layer that shields the wood from scratches, stains, and moisture. It also adds a glossy or satin finish, depending on the desired look. Applying poly to wood floors requires careful preparation, proper technique, and attention to detail to achieve a smooth and flawless finish. By following the recommended steps and using the right tools and materials, you can successfully apply polyurethane to your wood floors and enjoy long-lasting protection and a stunning appearance.
Before applying polyurethane to wood floors, it is essential to prepare the surface properly. Start by thoroughly cleaning the floors to remove any dust, dirt, or debris. Use a broom or vacuum cleaner to ensure a clean surface. If needed, mop the floors with a mild cleaner and allow them to dry completely before proceeding. Inspect the floors for any cracks, dents, or imperfections, and make necessary repairs or sanding to achieve a smooth and even surface.
Once the wood floors are properly cleaned and repaired, the next step is to choose the right type of polyurethane for your specific needs. Polyurethane is available in oil-based and water-based formulas. Oil-based polyurethane typically provides a more durable and amber-toned finish, while water-based polyurethane dries faster and has less odor. Consider factors such as the level of foot traffic, desired sheen, and personal preferences when selecting the type of polyurethane.
How many coats of polyurethane on wood floors?
We recommend a minimum of 3 coats of water based polyurethane as it coats in thinner, but harder layers, than an oil based poly. Water based polyurethane dries very quickly and up to 4 coats can be applied in one day. Jobs 1,500 – 5,000 sq ft, 2-4 days for completion.
The number of coats of polyurethane required for wood floors depends on several factors, including the type of wood, the condition of the floor, and personal preferences. In general, it is recommended to apply two to three coats of polyurethane to achieve a durable and protective finish.
The first coat of polyurethane serves as a sealer, penetrating the wood to provide a strong foundation for subsequent coats. It helps to enhance the wood’s natural beauty while protecting it from moisture, scratches, and wear. After the initial coat, it is common to lightly sand the surface to ensure smoothness before applying subsequent layers.
The second and potentially third coats build upon the first, creating a thicker protective layer that further enhances the floor’s longevity and appearance. Additional coats offer increased resistance to daily wear and tear, making the finish more resilient over time.
How do you apply water based polyurethane to wood floors?
Put your applicator on the floor, and cut into the finish. Then, use it to brush the finish up and down the floor, covering a couple of feet of the room. Apply a moderate, consistent amount of pressure when you push the finish, but don’t push down on the applicator while pulling it towards you.
Applying water-based polyurethane to wood floors is a straightforward process that requires careful preparation and attention to detail. Here’s a step-by-step guide to help you achieve a beautiful, durable finish:
Prepare the Surface
Ensure the wood floor is clean, dry, and free of any dust or debris. Sand the floor lightly with a fine-grit sandpaper to create a smooth surface and promote adhesion.
Choose the Right Finish
Select a high-quality water-based polyurethane finish suitable for wood floors. Consider the sheen level (e.g., matte, satin, semi-gloss, or high-gloss) based on your preference and the room’s lighting conditions.
Ventilate the Area
Proper ventilation is essential during the application process. Open windows and doors, and use fans to ensure good air circulation.
Stir the Polyurethane
Thoroughly stir the polyurethane to ensure an even consistency. Avoid shaking the can to prevent air bubbles.
Apply the First Coat
Using a high-quality synthetic bristle brush or a foam applicator, apply an even coat of polyurethane along the grain of the wood. Work in small sections to avoid lap marks. Allow the first coat to dry completely as per the manufacturer’s instructions.
Lightly Sand
After the first coat is dry, lightly sand the surface with a fine-grit sandpaper to smoothen any imperfections. Wipe away the dust with a tack cloth.
Apply Additional Coats
Repeat the application process with additional coats of polyurethane (typically 2-3 coats total). Ensure each coat is dry before applying the next one.
Cure Time
Allow the final coat to cure for the recommended time before subjecting the floor to regular foot traffic or placing furniture.
Maintain the Finish
Regularly clean the floor with a gentle cleaner and avoid using harsh chemicals or abrasives that could damage the finish.
By following these steps, you can achieve a professional-looking, water-based polyurethane finish on your wood floors that will protect and enhance their natural beauty for years to come.
How long does polyurethane last on wood floors?
Between three to six years
Depending on many factors, like your lifestyle and type of finish, polyurethane can last between three to six years. However, if you see damage on your floors, it may be time to reapply a fresh finish to your hardwood.
The longevity of polyurethane on wood floors depends on several factors, including the quality of the polyurethane used, the level of foot traffic the floor receives, and how well the floor is maintained over time. Generally, polyurethane is a durable and protective finish for wood floors, renowned for its ability to resist scratches, stains, and wear.
Under normal conditions and with proper care, a well-applied polyurethane finish can last anywhere from 3 to 5 years before showing signs of wear. However, in high-traffic areas or in homes with pets and children, the finish may wear down more quickly. Additionally, factors like exposure to direct sunlight and moisture can also impact its longevity.
To extend the life of a polyurethane finish on wood floors, regular maintenance is crucial. This includes routine cleaning with gentle products, avoiding harsh chemicals, and using protective pads on furniture legs. If signs of wear do appear, it’s possible to revitalize the finish by lightly sanding and applying a fresh coat of polyurethane.
What to do after applying polyurethane?
Apply only one thin coat. Then, remove any dust nibs with 1,500-grit sandpaper or a piece of brown paper bag. Finally, using a soft cotton rag or polishing pad, buff the finish to a high shine using automotive paste wax, photo below, which has fine abrasives that polish the finish even further.
After applying polyurethane, there are several essential steps to ensure a successful and long-lasting finish on your project. Polyurethane is a popular protective coating for wood surfaces, providing a durable and glossy sheen. Here’s what to do after applying polyurethane:
Allow sufficient drying time
Give the polyurethane ample time to dry and cure. Check the manufacturer’s instructions for the recommended drying time, but generally, it may take 24 to 48 hours for the surface to be ready for the next step.
Sand the surface
Once the polyurethane has dried completely, lightly sand the surface with fine-grit sandpaper. This helps to smooth out any imperfections or raised wood fibers, ensuring a smooth and even finish.
Clean the surface
After sanding, clean the surface to remove any dust or debris. Use a tack cloth or a soft, lint-free cloth slightly dampened with mineral spirits to wipe away the dust.
Apply additional coats
Depending on the desired level of protection and sheen, you may need to apply multiple coats of polyurethane. Sand lightly between each coat to promote adhesion.
Final cure
After applying all the coats, allow the final layer of polyurethane to cure for the recommended time before subjecting the surface to regular use.
By following these steps, you’ll achieve a professional-looking and durable finish with polyurethane, enhancing the beauty and longevity of your woodwork or furniture.
What is the best applicator for polyurethane on floors?
Many manufacturers recommend applying polyurethane to floors with lambswool applicators because it offers a smooth finish. Synthetic lambswool works with water-based poly but not with oil-based poly.
When it comes to applying polyurethane on floors, choosing the right applicator is crucial for achieving a smooth, even, and professional finish. The best applicator for polyurethane on floors typically depends on the type of polyurethane being used and personal preference. Here are some commonly used applicators and their benefits:
Brushes
Natural bristle brushes are often preferred for oil-based polyurethane, while synthetic brushes work well with water-based variants. Brushes allow for precise application, especially in tricky areas and along edges, providing a smooth finish and even coverage.
Rollers
High-density foam rollers are ideal for both water-based and oil-based polyurethane. They cover large areas quickly and efficiently, reducing application time. Rollers also produce minimal bubbles, ensuring a smoother surface.
Lambswool Applicators
Lambswool applicators are excellent for oil-based polyurethane. They provide a smooth, lint-free finish and are easy to control, making them suitable for DIY projects.
T-Bar Applicators
Commonly used by professionals, T-bar applicators work well with water-based polyurethane. They enable quick and consistent application, resulting in a uniform appearance.
Ultimately, the best applicator choice depends on factors such as the polyurethane type, project size, and the skill level of the applicator. Whatever the choice, remember to follow the manufacturer’s guidelines for proper application techniques and ensure the floor is clean and prepared before starting the polyurethane application process.
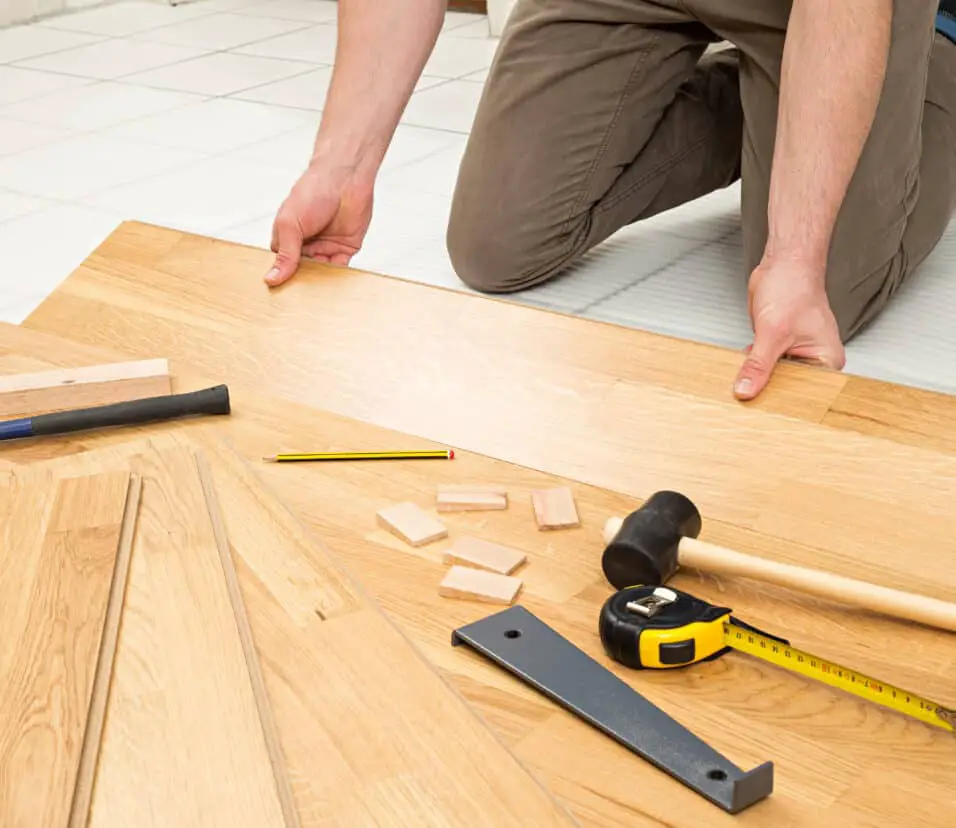
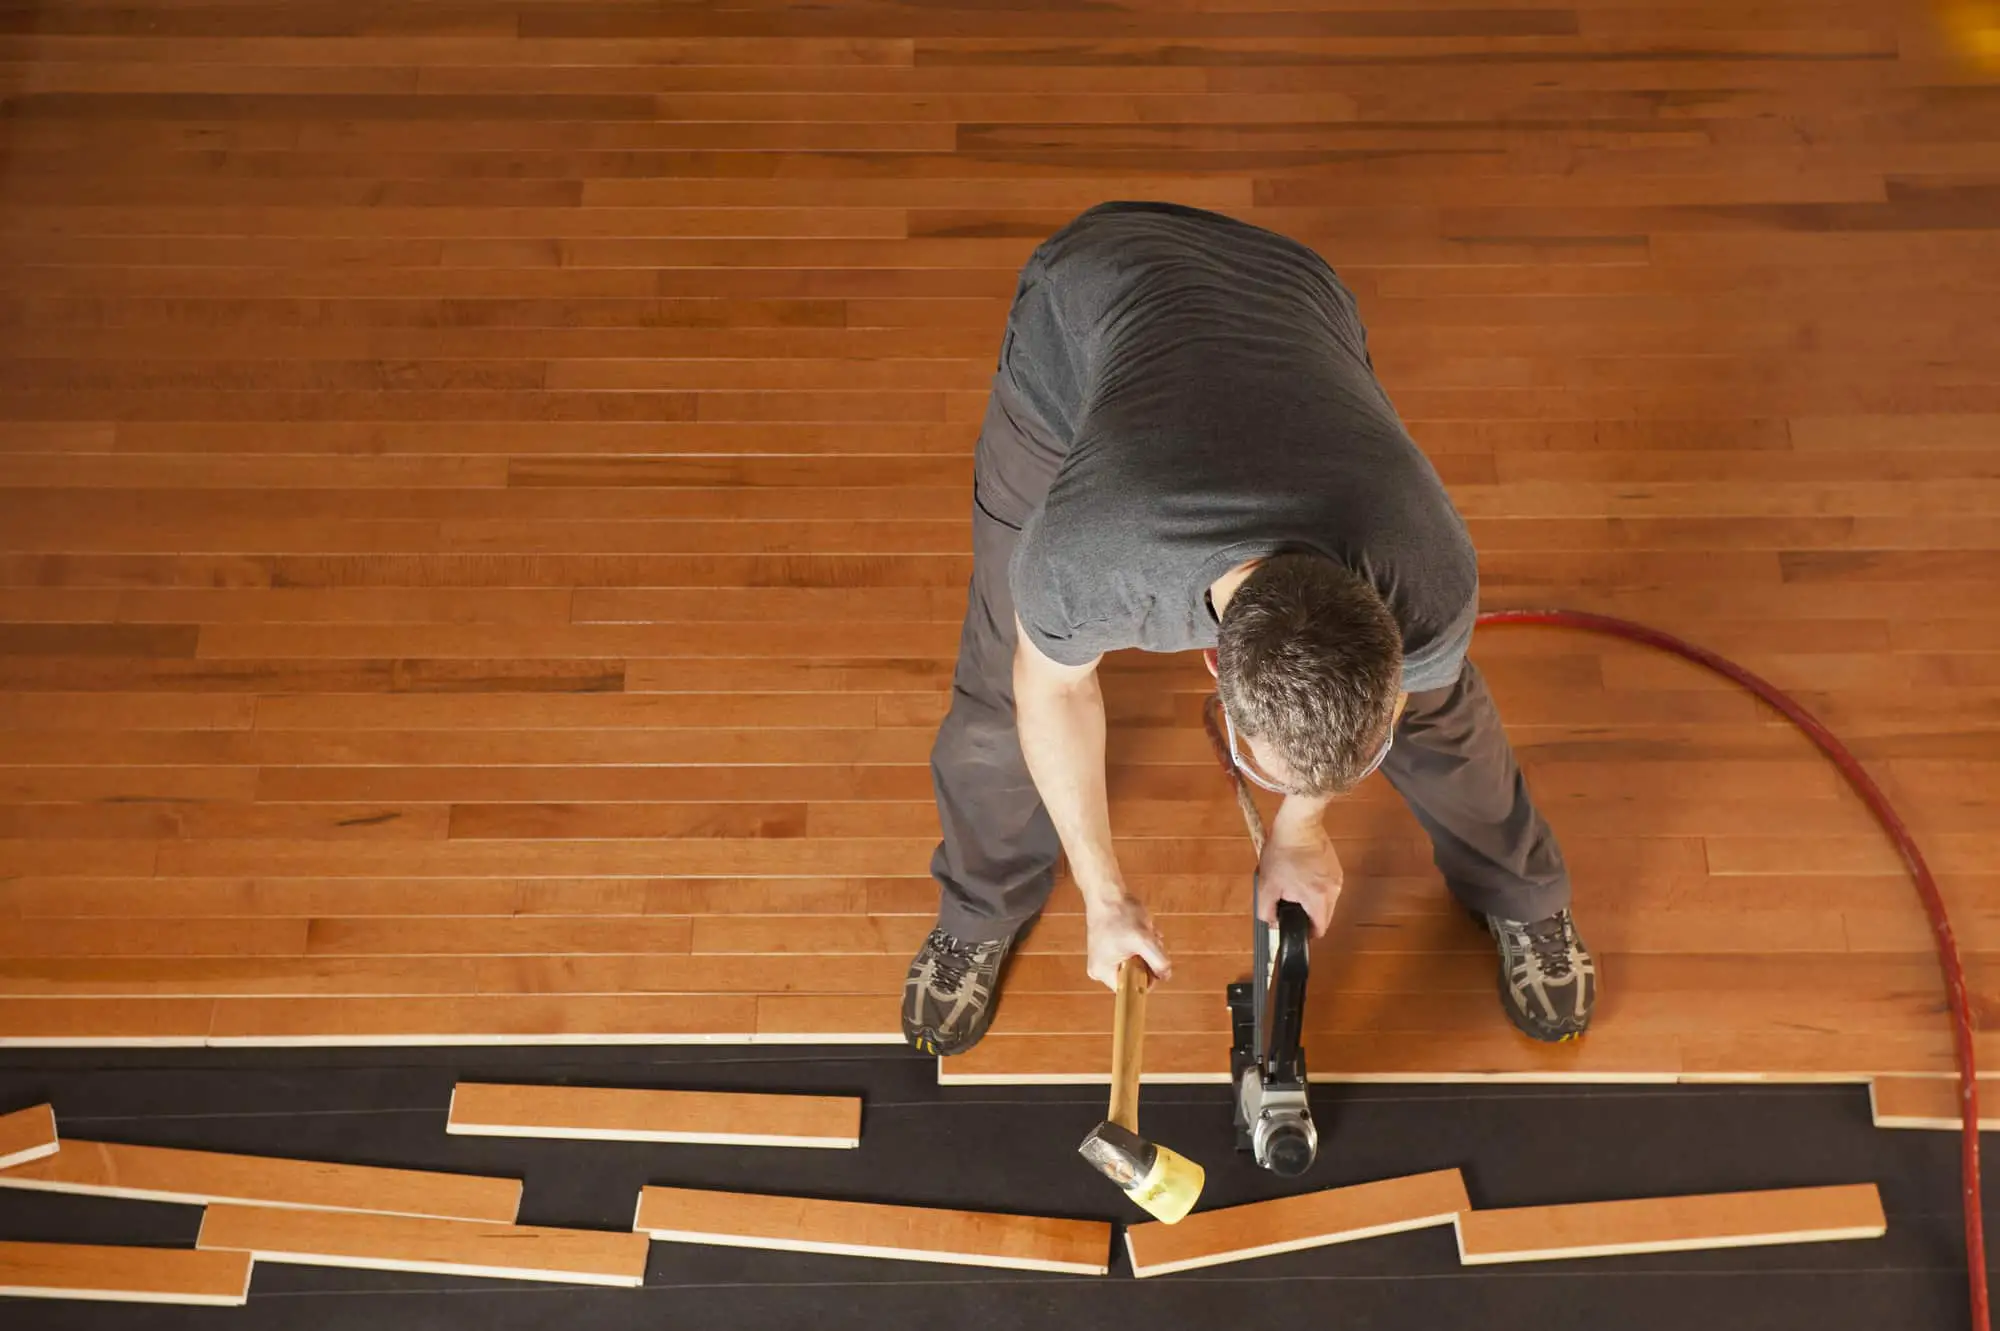
How do I prepare the wood floor before applying polyurethane?
Before applying polyurethane, it is crucial to prepare the wood floor properly. Start by sanding the floor to remove any existing finish, stains, or imperfections. Ensure the surface is clean and dust-free by thoroughly vacuuming and wiping it with a damp cloth.
Preparing the wood floor before applying polyurethane is crucial to ensure a smooth and long-lasting finish. Here’s a step-by-step guide to help you through the process:
Clean the surface
Start by thoroughly cleaning the wood floor to remove any dust, dirt, or debris. Sweep or vacuum the floor to get rid of loose particles, and use a damp mop or cloth to wipe away any remaining residue.
Sanding
Sanding the wood floor is essential to create a smooth and even surface for the polyurethane to adhere to. Use a floor sander or a handheld sanding block with progressively finer grits (starting with rough grit and gradually moving to finer ones) to remove any imperfections, scratches, or previous finishes. Sand in the direction of the wood grain to prevent damage.
Remove sanding dust
After sanding, clean the floor again to eliminate the fine sanding dust. Use a vacuum cleaner or tack cloth to ensure there’s no dust left on the surface.
Fill gaps and cracks
If there are any gaps or cracks in the wood, use wood filler to patch them up. Allow the filler to dry completely before sanding the filled areas gently.
Test the stain (optional)
If you intend to apply a stain to the wood floor before polyurethane, perform a test in an inconspicuous area to ensure you achieve the desired color.
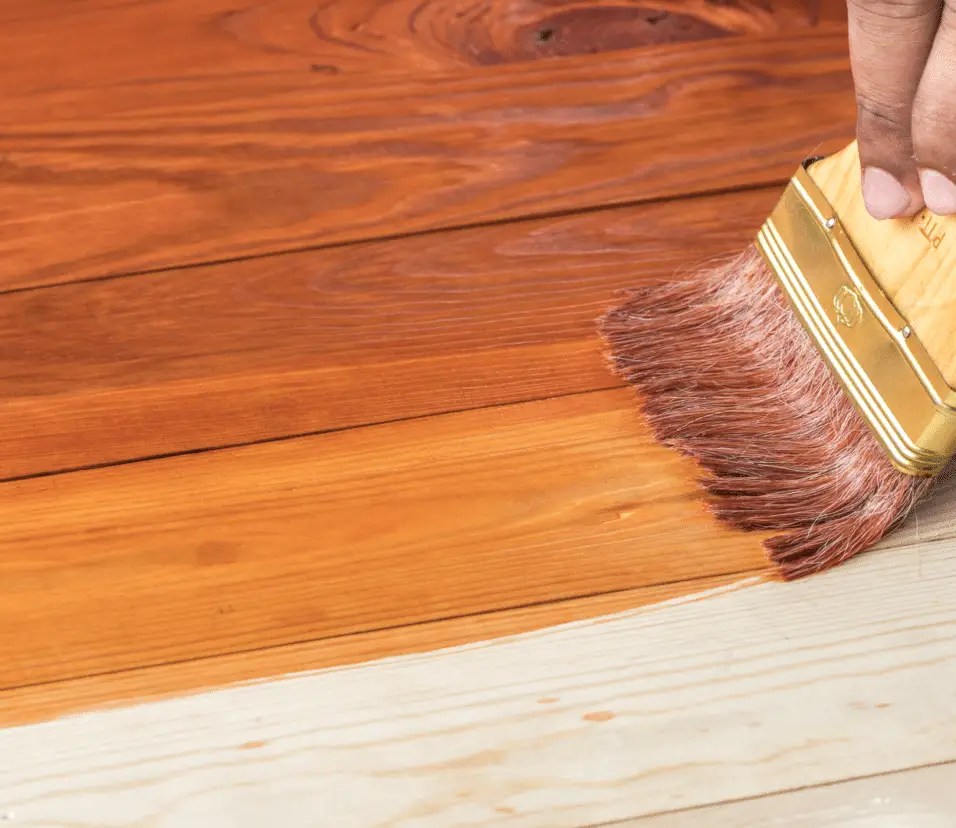
Apply the polyurethane
Once the surface is clean, smooth, and dry, you can apply the polyurethane. Use a high-quality brush or a foam applicator, and follow the manufacturer’s instructions regarding drying times and the number of coats to apply.
By properly preparing the wood floor before applying polyurethane, you’ll enhance the final appearance and extend the life of your beautiful wooden floor.
What type of polyurethane should I use for wood floors?
There are two main types of polyurethane: oil-based and water-based. Oil-based polyurethane provides a more traditional, amber-colored finish and requires more time to dry. Water-based polyurethane dries faster, has low odor, and maintains the wood’s natural color better. Both types offer excellent protection, so choose based on your preference and project requirements.
When choosing polyurethane for wood floors, it’s essential to consider factors like durability, finish appearance, and ease of application. There are two primary types of polyurethane: oil-based and water-based.
Oil-based polyurethane
This type offers excellent durability and enhances the natural beauty of the wood. It creates a warm amber tone, which can deepen over time. Oil-based polyurethane is known for its resistance to scratches and chemicals, making it ideal for high-traffic areas. However, it has a longer drying time and emits strong fumes during application, necessitating proper ventilation.
Water-based polyurethane
This type has gained popularity due to its low odor and quick drying time. It dries clear, maintaining the wood’s original color and appearance. Water-based polyurethane is less prone to yellowing compared to oil-based versions, making it suitable for light-colored woods or areas with minimal sunlight exposure. It is also eco-friendly and easy to clean up with water.
Ultimately, the choice between oil-based and water-based polyurethane depends on your preferences and specific project requirements. For professionals or those seeking ultimate durability, oil-based polyurethane may be preferred. On the other hand, DIY enthusiasts or those looking for a more eco-friendly option might opt for water-based polyurethane. Remember to follow the manufacturer’s instructions for proper application and maintenance to ensure long-lasting and beautiful wood floors.
How do I apply polyurethane to wood floors?
Start by stirring the polyurethane gently to avoid bubbles. Use a synthetic bristle brush or lambswool applicator to apply the polyurethane in smooth, even strokes, following the wood grain. Allow the first coat to dry completely, usually within 4-6 hours, before applying subsequent coats. Sand lightly between coats for better adhesion. Apply at least two to three coats for optimal protection and durability.
Applying polyurethane to wood floors is a great way to protect and enhance their beauty. Here’s a step-by-step guide to help you achieve a professional finish:
Preparation
Start by preparing the wood floor. Ensure it is clean, dry, and free of any dust, debris, or previous finishes. Sand the floor gently to create a smooth surface.
Choose the right polyurethane
There are two main types: oil-based and water-based polyurethane. Water-based options dry faster, have less odor, and are more eco-friendly, while oil-based versions are more durable. Select the one that suits your preferences.
Ventilation
Before you begin, ensure the room is well-ventilated. Open windows and doors, use fans, or wear a mask to protect yourself from fumes.
Stir and strain
Stir the polyurethane thoroughly but gently before use to mix any settled solids. Strain the product through a mesh strainer to remove any impurities.
Application
Use a high-quality synthetic bristle brush or a lamb’s wool applicator to apply the polyurethane. Start from the farthest corner of the room and work your way towards the exit to avoid stepping on the wet finish.
Even coats
Apply thin, even coats, following the wood grain. Avoid over-applying, as it can lead to drips and an uneven finish. Allow each coat to dry completely as per the manufacturer’s instructions before applying the next.
Sanding between coats
For a smoother finish, lightly sand the floor with fine-grit sandpaper between coats. Wipe away the dust before applying the next coat.
Final coat and curing
After the last coat, allow the polyurethane to cure for the recommended time before placing furniture or rugs on the floor.
By following these steps, you can achieve a beautiful, durable, and long-lasting finish that protects and enhances the natural beauty of your wood floors.
Conclusion
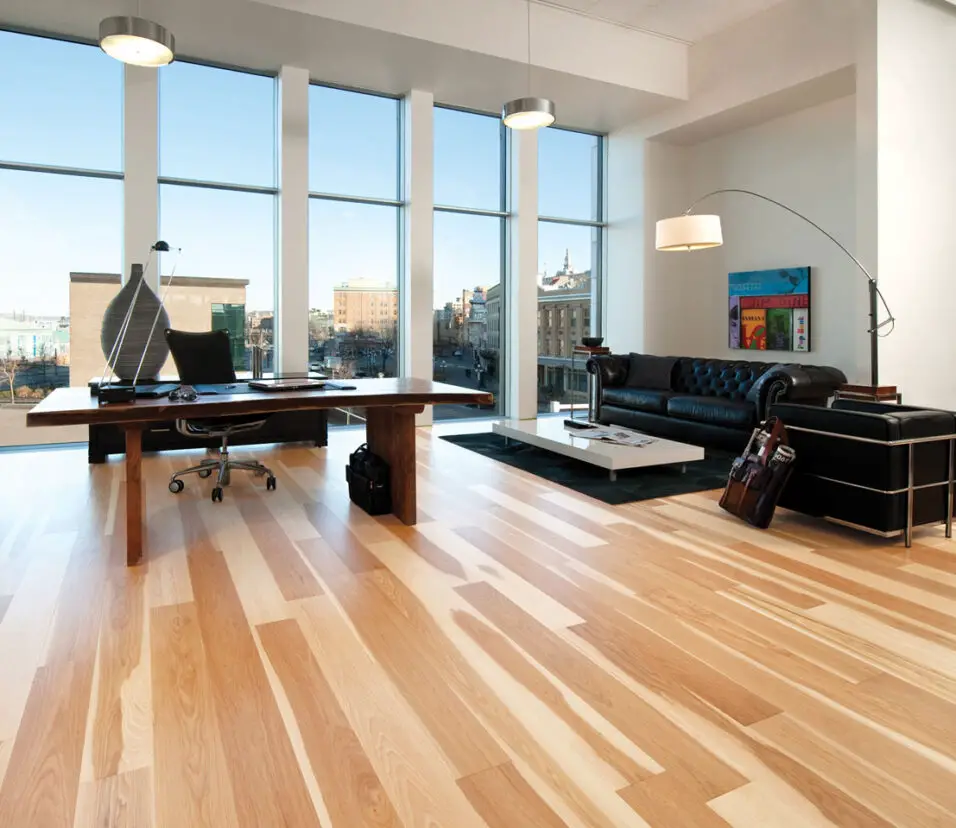
Applying polyurethane to wood floors is a rewarding process that enhances the durability and aesthetic appeal of the wood. By following the proper steps and utilizing the right techniques, you can achieve a beautiful and long-lasting finish. It is important to remember that patience and attention to detail are key to obtaining a flawless result.
In conclusion, proper surface preparation is crucial before applying polyurethane to wood floors. This includes thoroughly cleaning the floors, repairing any imperfections, and ensuring a smooth surface. Choosing the right type of polyurethane, whether oil-based or water-based, is also important, as it affects the appearance and durability of the finish.
When applying polyurethane, using the correct tools, such as synthetic bristle brushes or lambswool applicators, ensures even coverage and a professional-looking result. Applying thin and even coats, allowing sufficient drying time between coats, and lightly sanding between applications contributes to a smooth and flawless finish. Remember to follow the manufacturer’s instructions regarding drying and curing times to allow the polyurethane to fully set and provide optimal protection for your wood floors.