Building Interior Walls with Doors: Crafting Functional Spaces
Introduction
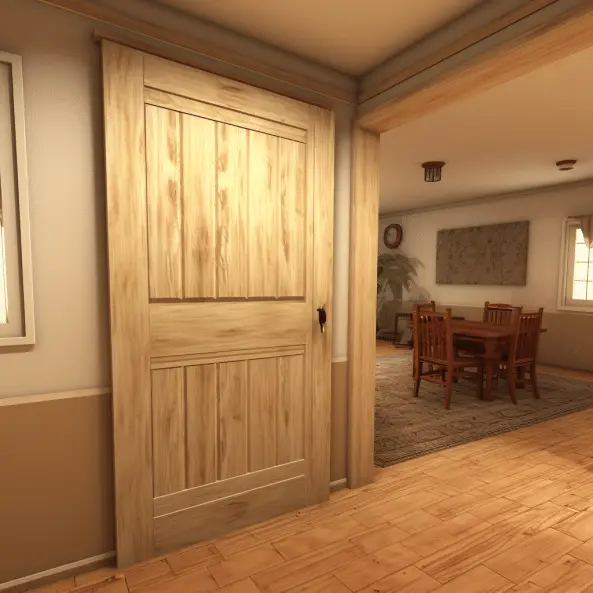
Building an interior wall with a door: Creating an interior wall with a door is a fundamental aspect of home improvement and renovation projects, offering both functional division and aesthetic enhancement to living spaces. Whether you’re looking to separate rooms for privacy or add character to your interior design, this process requires careful planning, precise measurements, and the right tools. By following a systematic approach, you can successfully construct an interior wall with a door that seamlessly integrates into your existing space.
Internal wall building requires planning. Look for electrical, plumbing, and load-bearing walls near wall installation. After picking a layout, gather studs, drywall, screws, door frame kit, door slab, level, tape measure, saw, and safety gear.
After equipping, building involves numerous steps. Mark wall floor and ceiling for leveling and measuring. Install header and studs evenly and frame level. Drywall sides.
Be careful with doors. Follow manufacturer’s directions to properly install the door frame kit in the wall frame. Smooth operation requires door slab adjustment in the frame. Tape, mud, and paint drywall inside for a beautiful finish.
Doored internal walls augment property value. Proper planning, execution, and equipment may divide and calm your house.
How much does it cost to build an interior wall with a door?
Walls with openings such as windows, doors, or pass-throughs can cost an additional $120 to $200 per opening. An opening needs studs and beams to carry the weight of the wall. In addition, you’ll pay $300 to $1,000 for the trim, frame, sill, doors, windows, and other materials.
The cost of building an interior wall with a door can vary significantly based on factors such as the size of the wall, the type of materials used, labor expenses, and geographic location. On average, the cost can range from $800 to $2,500 or more.
Materials make up a substantial portion of the cost, including studs, drywall, door frame kit, door slab, screws, and finishing supplies like paint and trim. Labor costs can vary based on whether you hire a professional contractor or DIY the project. Contractors typically charge for their time and expertise, which can increase the overall expense.
Geographic location also plays a role, as labor rates and material costs differ from one region to another. Additional expenses may arise if you encounter unexpected issues like electrical or plumbing adjustments during construction.
To accurately estimate costs, it’s advisable to obtain quotes from local contractors or suppliers based on your project specifications. Remember that while costs are a consideration, investing in quality materials and skilled labor can result in a well-built interior wall with a door that enhances your living space and adds value to your home.
How do you cut a door into an interior wall?
Steps:
- Outline the new doorway’s rough opening onto the wall with blue painters tape.
- Use reciprocating saw to cut through drywall or plaster.
- Cut the baseboard using the reciprocating saw.
- Pull the drywall or plaster, and baseboard from the doorway opening.
- Nail short 2×4 blocks under subfloor.
Cutting a door into an interior wall requires careful planning and precise execution to ensure a clean and functional result. Here’s a general overview of the process:
Planning: Determine the desired location for the door. Consider factors like traffic flow, room layout, and any potential obstructions behind the wall.
Marking: Use a tape measure to mark the door’s height and width on the wall. Ensure the markings are level and centered within the wall frame.
Frame Removal: Remove the drywall within the marked area using a utility knife and a drywall saw. Carefully cut along the marked lines to expose the wall’s studs.
Header Installation: Install a header, a horizontal beam above the door, to support the weight of the wall above the opening. Ensure it’s level and securely fastened to the studs.
Side Studs: Install vertical studs on each side of the door opening, attaching them to the top and bottom plates and the header.
Door Frame: Attach the door frame kit according to the manufacturer’s instructions. Ensure it’s level and securely anchored to the studs.
Finishing: Apply drywall over the new framing and smooth out joints. Finish with tape, mud, and sanding. Paint or finish the wall as desired.
Door Installation: Hang the door slab onto the hinges installed in the door frame. Adjust as needed for proper operation and alignment.
By meticulously following these steps, you can successfully cut a door into an interior wall, creating a functional and aesthetically pleasing doorway that seamlessly integrates into your space.
Can you put a door in a wall?
If the door is going into a bearing wall, the rough opening may need to be even taller to allow for a header. Often it is best to remove the wall covering from floor to ceiling between the two bordering studs that will remain in place.
Yes, it is entirely possible to put a door in a wall, but it requires a systematic approach and the proper tools. Adding a door to a wall involves creating an opening, installing a door frame, and then hanging the door itself.
Start by carefully planning the door’s location within the wall. Consider factors like room layout, traffic flow, and structural considerations. Once you’ve chosen the location, mark the dimensions of the door opening on the wall’s surface.
Next, remove the drywall or plaster within the marked area to expose the wall’s framing. Install a header above the opening to support the structure above the door. Attach vertical studs on either side of the opening and a horizontal stud at the bottom to form the door frame.
Securely attach the door frame kit within the framed opening, ensuring it’s level and plumb. Hang the door slab within the frame, attaching it to the hinges. Adjust the door for proper fit, alignment, and smooth operation.
Adding a door to a wall involves careful planning, precise measurements, and skilled installation. By following the correct steps, you can successfully integrate a door into an interior wall, enhancing both functionality and aesthetics.
What are doors in the wall called?
A pocket door is the name used to describe a type of sliding door that recedes into the wall frame when it’s fully open. These doors are great for smaller spaces and tight areas when there isn’t enough room for a standard hinged door that swings open.
Doors that are seamlessly integrated into a wall are commonly referred to as “concealed doors,” “hidden doors,” or “wall doors.” These types of doors are designed to blend seamlessly with the surrounding wall, often appearing as part of the wall itself when closed.
Concealed doors are frequently used to maintain a clean and uncluttered aesthetic in interior spaces. They can be designed to swing open or slide within the wall, providing access to hidden rooms, secret compartments, or functional spaces while preserving the overall design and flow of a room.
In addition to their aesthetic appeal, concealed doors offer practical benefits such as optimizing space utilization, adding an element of surprise, and enhancing privacy. These doors are often popular in homes, offices, and commercial spaces seeking a combination of functional utility and interior design finesse.
Manufacturers offer various mechanisms and designs for concealed doors, including pivot hinges, sliding systems, and bookcase-style entrances. These options enable customization to match the specific requirements of a space while providing a seamless, elegant solution for integrating doors within walls.
What tools and materials are required for constructing an interior wall with a door, and why are they necessary?
Constructing an interior wall with a door necessitates a carefully curated assortment of tools and materials to ensure a successful and structurally sound outcome. These elements collectively contribute to the precision, stability, and aesthetic appeal of the final result.
Tools such as a tape measure and level are indispensable for accurate measurements and proper alignment, ensuring the wall’s verticality and the door’s functionality. A saw enables cutting of studs and drywall to the desired dimensions, while screws hold the components together securely. Safety equipment like goggles and gloves safeguard against potential hazards during construction.
Materials, including studs, form the framework of the wall, providing stability and support. Drywall serves as the surface layer, imparting a polished appearance to the wall. A door frame kit contains components essential for door installation, ensuring proper fitting and functionality. The door slab itself, accompanied by hinges and a doorknob, allows access between spaces. Additionally, paint and finishing materials contribute to the wall’s aesthetics and protection.
In essence, these tools and materials are the building blocks of a successful interior wall with a door. Each element has a designated role, collectively ensuring structural integrity, precision, and a visually pleasing outcome.
How do you ensure accurate measurements and proper leveling when marking the placement of the interior wall on the floor and ceiling?
Achieving accurate measurements and precise leveling is paramount when marking the placement of an interior wall with a door. To ensure these critical aspects, a systematic approach and the use of essential tools are imperative.
Start by measuring the dimensions of the area where the wall will be installed, verifying the space’s length, width, and height. Utilize a tape measure for precise readings. Once measured, transfer these dimensions onto the floor and ceiling, marking them clearly using a pencil or chalk line.
To maintain proper leveling, use a high-quality level. Position the level horizontally against the marked lines on both the floor and ceiling. Adjust the lines as necessary to align with the level’s bubble indicator, ensuring that the wall will be perfectly vertical. This step guarantees that the wall won’t appear slanted or uneven once constructed.
In instances where the floor or ceiling is uneven, take the average measurement to achieve balance. Additionally, double-check measurements and leveling before proceeding to frame assembly, as any discrepancies at this stage can lead to complications later on.
By meticulously measuring and leveling, you set the foundation for a structurally sound interior wall with a door. These efforts result in a professional finish that seamlessly integrates into your space while ensuring the functionality and aesthetic appeal of your project.
Can you explain the process of assembling the frame for the interior wall? What factors should be considered while spacing the studs and header?
The process of assembling the frame for an interior wall is a crucial step in creating a stable and well-constructed structure. This frame provides the framework onto which the wall’s surface materials will be attached.
To begin, lay out the bottom plate, which runs along the floor, and the top plate, which is placed against the ceiling. Connect these plates using vertical studs. The spacing of these studs is essential for maintaining the wall’s structural integrity. The standard practice is to place studs every 16 inches on center, although specific building codes or project requirements may influence spacing.
The header, a horizontal beam positioned above the door opening, bears the load from the ceiling and distributes it to the adjacent studs. The header size should be determined by the width of the door and any applicable building codes.
Consider factors such as load-bearing walls, electrical wiring, and plumbing when spacing the studs and header. Avoid obstructing or damaging existing structures while ensuring proper support for the new wall. Additionally, precision is vital during assembly to guarantee that the studs and header are level and securely fastened.
By carefully spacing and positioning the studs and header, you ensure the interior wall’s stability and capacity to bear its intended load. This thoughtful construction approach lays the foundation for a reliable structure that aligns with both safety standards and your design objectives.
What are the key considerations when installing the door frame kit within the wall frame? Are there any specific guidelines you should follow?
When installing a door frame kit within the wall frame of an interior wall, several key considerations should guide your approach to ensure a seamless and functional result.
Firstly, carefully follow the manufacturer’s guidelines provided with the door frame kit. These instructions are tailored to the specific product and will guide you through the installation process step by step.
Pay close attention to the dimensions of the door frame kit in relation to the wall opening. Ensure that the frame is centered and level within the wall frame. Precise measurements and proper alignment prevent issues such as uneven gaps or difficulty in closing the door.
Securely anchor the frame to the wall studs using appropriate screws or fasteners. The door frame’s stability is crucial for the door’s functionality and longevity.
Consider the swing direction of the door, whether it should open to the left or right, to ensure it suits the layout of the room and adjacent spaces.
Lastly, verify the door frame’s plumb and level status before finalizing the installation. Adjust as needed to avoid potential problems with the door’s operation.
In essence, meticulous adherence to the manufacturer’s guidelines, accurate measurements, proper anchoring, and attention to detail will yield a flawlessly integrated door frame that enhances the overall appearance and functionality of your interior wall.

Conclusion
Mastering the art of constructing an interior wall with a door opens the door, not just to physical division, but to a world of creative possibilities within your living spaces. By diligently following each step of the process, from meticulous planning to precise execution, you’re not merely building a barrier, but crafting a gateway that enhances both the functionality and visual appeal of your home.
Remember, the success of this endeavor rests on your attention to detail. The fusion of accurate measurements, sturdy framing, and expert drywall application ensures a structure that not only stands firm but seamlessly integrates into your existing architecture. Incorporating a door into the equation brings an extra layer of complexity, yet it’s this challenge that adds character and depth to your project.
As you apply the finishing touches, from the door’s smooth operation to the flawless drywall finish, the interior wall you’ve built becomes more than just a physical boundary. It symbolizes your dedication to the art of craftsmanship and your ability to transform ideas into tangible, functional spaces. Whether you’re dividing rooms for privacy, optimizing the use of your space, or elevating your interior design, this undertaking showcases your commitment to enhancing your living environment.
Building an interior wall with a door is not only about constructing physical elements; it’s about reshaping your home, one meticulous step at a time. With patience, precision, and a touch of creativity, you’ve unlocked the potential to redefine your living space according to your vision, and in doing so, you’ve empowered yourself to shape the very ambiance and narrative of your home.